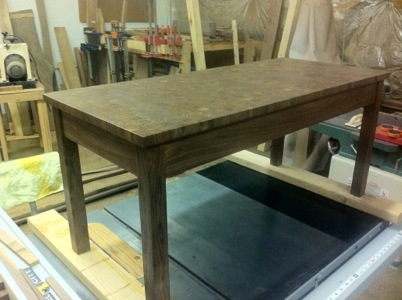
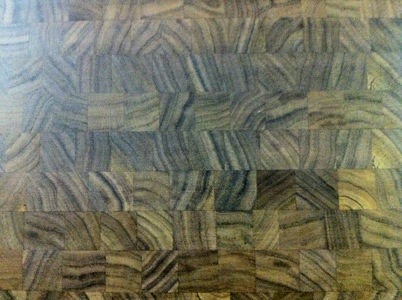
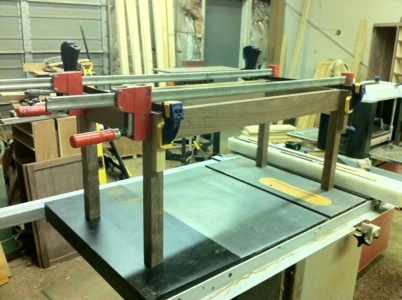
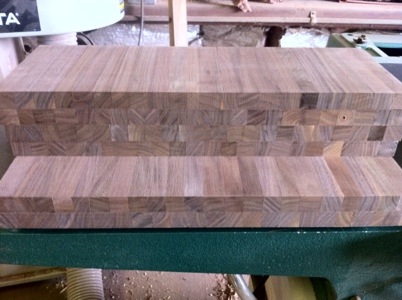
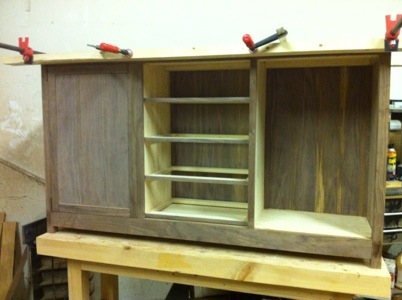
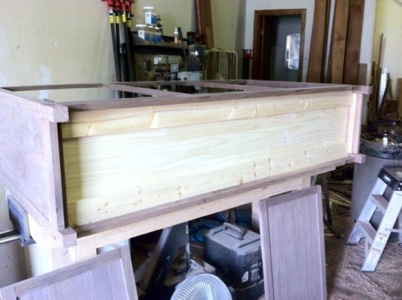
This piece is ready for one final coat of finish. Unfortunately my table saw has become my finishing table… I need to finish some of these other half finished pieces. They have all been occupying my work tables for far too long now. The shop was a little warm today (100+ degrees but only about 55% humidity), so today saw little work other than the final coats of finish being applied. This one should be heading back up to DC tomorrow.
Tag Archives: WIP
End Grain – Take 1
Finally almost time to call the butcher block coffee table done. Finished all sanding and got a first coat of finish on the table. The picture is a close up of the end grain after the first coat of finish. Please note that this is actually end grain butcher block as opposed to all of those companies advertising their tops as butcher block (but they don’t bother to expose the end grain). It can still look good that way, but it looks more like a bowling alley lane than a butcher’s block. The proper way should have the end grain exposed as it is easier on the butcher’s knives.
Butcher Base Dry Fit
A long business trip to Indonesia has resulted in this project taking a few weeks longer than anticipated to finish. In the picture below is the dry fit of the coffee table base. When working solo it is great to practice with the clamps before adding glue to the mix. This one was fairly straightforward thankfully. It should be dry by the morning. Then it’s only sanding and finishing left.
Final Butcher Assembly
It took a while (about 3 trips to the shop), but it’s finally time to put the top together. In the picture below are the 4 sub assemblies I made on the prior trip to the shop. At this point they have made numerous trips through the planer to get them flat and equal thickness. Normally I would have done this mostly with my wide belt drum sander, but it was almost 100 degrees outside and my shop doesn’t have AC (so speed was of the essence). After this point in the process I jointed one edge of each piece and cut a parallel side with the table saw. To do the final assembly, I used biscuits to help keep the tops of the pieces flush. On my next visit to the shop we’ll see how well that worked…
Clean, Rotate, Cut, Glue
Started the day by taking yesterday’s glued up sections and cleaning them up. Basically that was a combination of jointer and sander work to get the panels to look like the photo below.
The process from there is to basically run these blanks through the table saw to cut the final end grain strips. The 7 blanks I made yesterday yielded 51 strips of end grain. The first photo shows them lined up. The problem is that to get the best look you need to randomize the pattern. This is basically a process of putting them in random order and rotating some strips 180 degrees. Ultimately that leaves you with a more pleasing panel like in the bottom photo. Currently the top is in 4 big pieces. After then next shop visit the top should be finished.
Butcher’s Layout
There is an inordinate amount of gluing required to put together an end grain butcher block. I’m about half way through today’s gluing exercise. In the picture are about 15% of the pieces in the top. They are all rotated 90 degrees so that it is easier to grab, glue, rotate, glue, put in place, and then repeat on the next piece. You’ve got to move quickly so that the glue doesn’t dry too much before you reach the last piece in the line. Hopefully they dry pretty straight so that I don’t have to do as much cleanup work in the morning.
Start of Butcher Block Top
Below is the messy beginnings of the butcher block top to a coffee table. The first picture shows the scrap lumber that I’m using for the top. It’s great to see it find another home other than more iPad styluses (although I’m sure there will be a few pieces leftover for me to throw on the lathe). The work on the top starts by getting the pieces all to a common thickness and length (I don’t care about the other dimensions at this point). The first pass of this work is shown in the second picture where the pieces are laid out prior to glue up. Hopefully I can get the initial glue up completed before calling it a day today.
Proper Fitting
I feel like I’ve been writing about a proper fitting on this piece forever… At least I’ve knocked out a bunch of other projects while working on this one. This time I really mean that I’m onto fitting. Currently in clamps are the final structural elements of the cabinet. The studs from yesterday stiffened up the piece enough that I can avoid the hidden 5th leg. I could probably finish up all of the fitting today, but with temperatures near 90 degrees and no ac or moving air in the shop, that activity will have to wait until next weekend.
Stiffening Up
The span from one end to the other of this cabinet is pretty long. As a result the center section supporting all of the drawers was sagging about 3/8 of an inch. To stiffen it up a bit, I’ve installed some studs attached to the bottom rails to support the bottom. Hopefully that will fix things up. If not I’ll have to add a small center leg to support the bottom. You would never notice it unless you were on your hands and knees, but I still hope to avoid adding it.
On a positive note, two new brushes were able to revive the planer. And while I was in maintenance mode, I finally replaced the busted plug on the table saw…
Mother’s Day Work
Spent Mother’s Day in the shop. None of these pieces are for her though (sorry Mom). Most of the day was spent between assembly, sanding and fit work. The tall cherry piece in the photo below was the dry fit of the back part of the new cabinet I’m working on. The four corners of the piece feature through dovetails. The back is a panel about 1/16th of an inch thick. The wood for the panel is from the same pieces used to make the sides of the cabinet. My cherry stock was pretty thick, so I resawed it to get the backs and the sides out of the same piece of lumber. The walnut piece below is in the middle of being fit for the 4 drawers in the center section of the piece. Little more fit work on the drawers and doors next week and then this one will be ready for finishing…


