One of the first posts I ever made here was related to a sideboard that I was building. That was a little over a year ago. It’s still not done… It’s not complete for 2 reasons. First I have been busy with other projects and paying customers. Second, there are just a number of extremely frustrating components to this build. Many, many months ago I worked to stiffen up the cabinet. It was a minor fix, but frustrating to have to do. I’ve also spent countless hours perfecting the fit of the drawers. I’ve finally dialed all of that in and now the only thing left is the doors. The doors haven’t been easy. Slightly out of square openings (related to the earlier need to stiffen up the cabinet) led to a very difficult fit for the door. The challenge with doors is to get the proper gap all of the way around the door (this is even harder when the opening isn’t perfectly square).
After lots of hand planing and sanding, I had an even gap around the door. Unfortunately the gap was too large. Originally I considered rebuilding the door, but ultimately I decided to work with what I had (this piece is more of a prototype and learning experience than something I’m selling to a customer). To build up the width and height of the door, I have glued thin strips of walnut to the outside of the perimeter of the doors. To create the strips I took thin pieces of resawn walnut and passed them through my wide belt drum sander until each strip was less than 1/8″ thick.
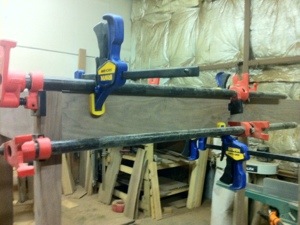
The final pieces were glued on today. The picture below shows the final step in the glue up. The challenge with the doors, is that I like to cut the sides at a 5 degree angle (it helps in opening and closing the door). Cutting the angle isn’t hard, but clamping it up and keeping the glued on strip from slipping while maintaining enough clamping pressure and keeping the center panel from buckling was not easy. I’ll be curious to see how this dries up. Hopefully it comes out well; otherwise I will be building 2 new doors on the next trip to the shop.