Claremont Designs


Leave a comment

The Shop Has Moved (and a Shift to Lamps in Inventory)

It wasn’t quick and it wasn’t easy, but the Claremont Designs shop has made a 9 mile move. It seemed like it would be easy to move a 600 square foot shop… but 10 years of work (and sawdust), several pieces of equipment over 300 pounds, and a few projects that are perpetually WIP added to the complexity.

During the (extended) move time, the Etsy Shop has been on vacation mode. I’m sure Etsy has a better description, but it basically means my Etsy shop existed with nothing listed. It also means that all of my search rankings plummeted… After years of having several of pieces show up in the top 5 positions when people search for Edison Lamps, Claremont Designs is now not even in the top 50 (it’s probably worse than that, but I gave up on counting other listings before I found any of my lamps). Hopefully that will be fixed by the holiday season.

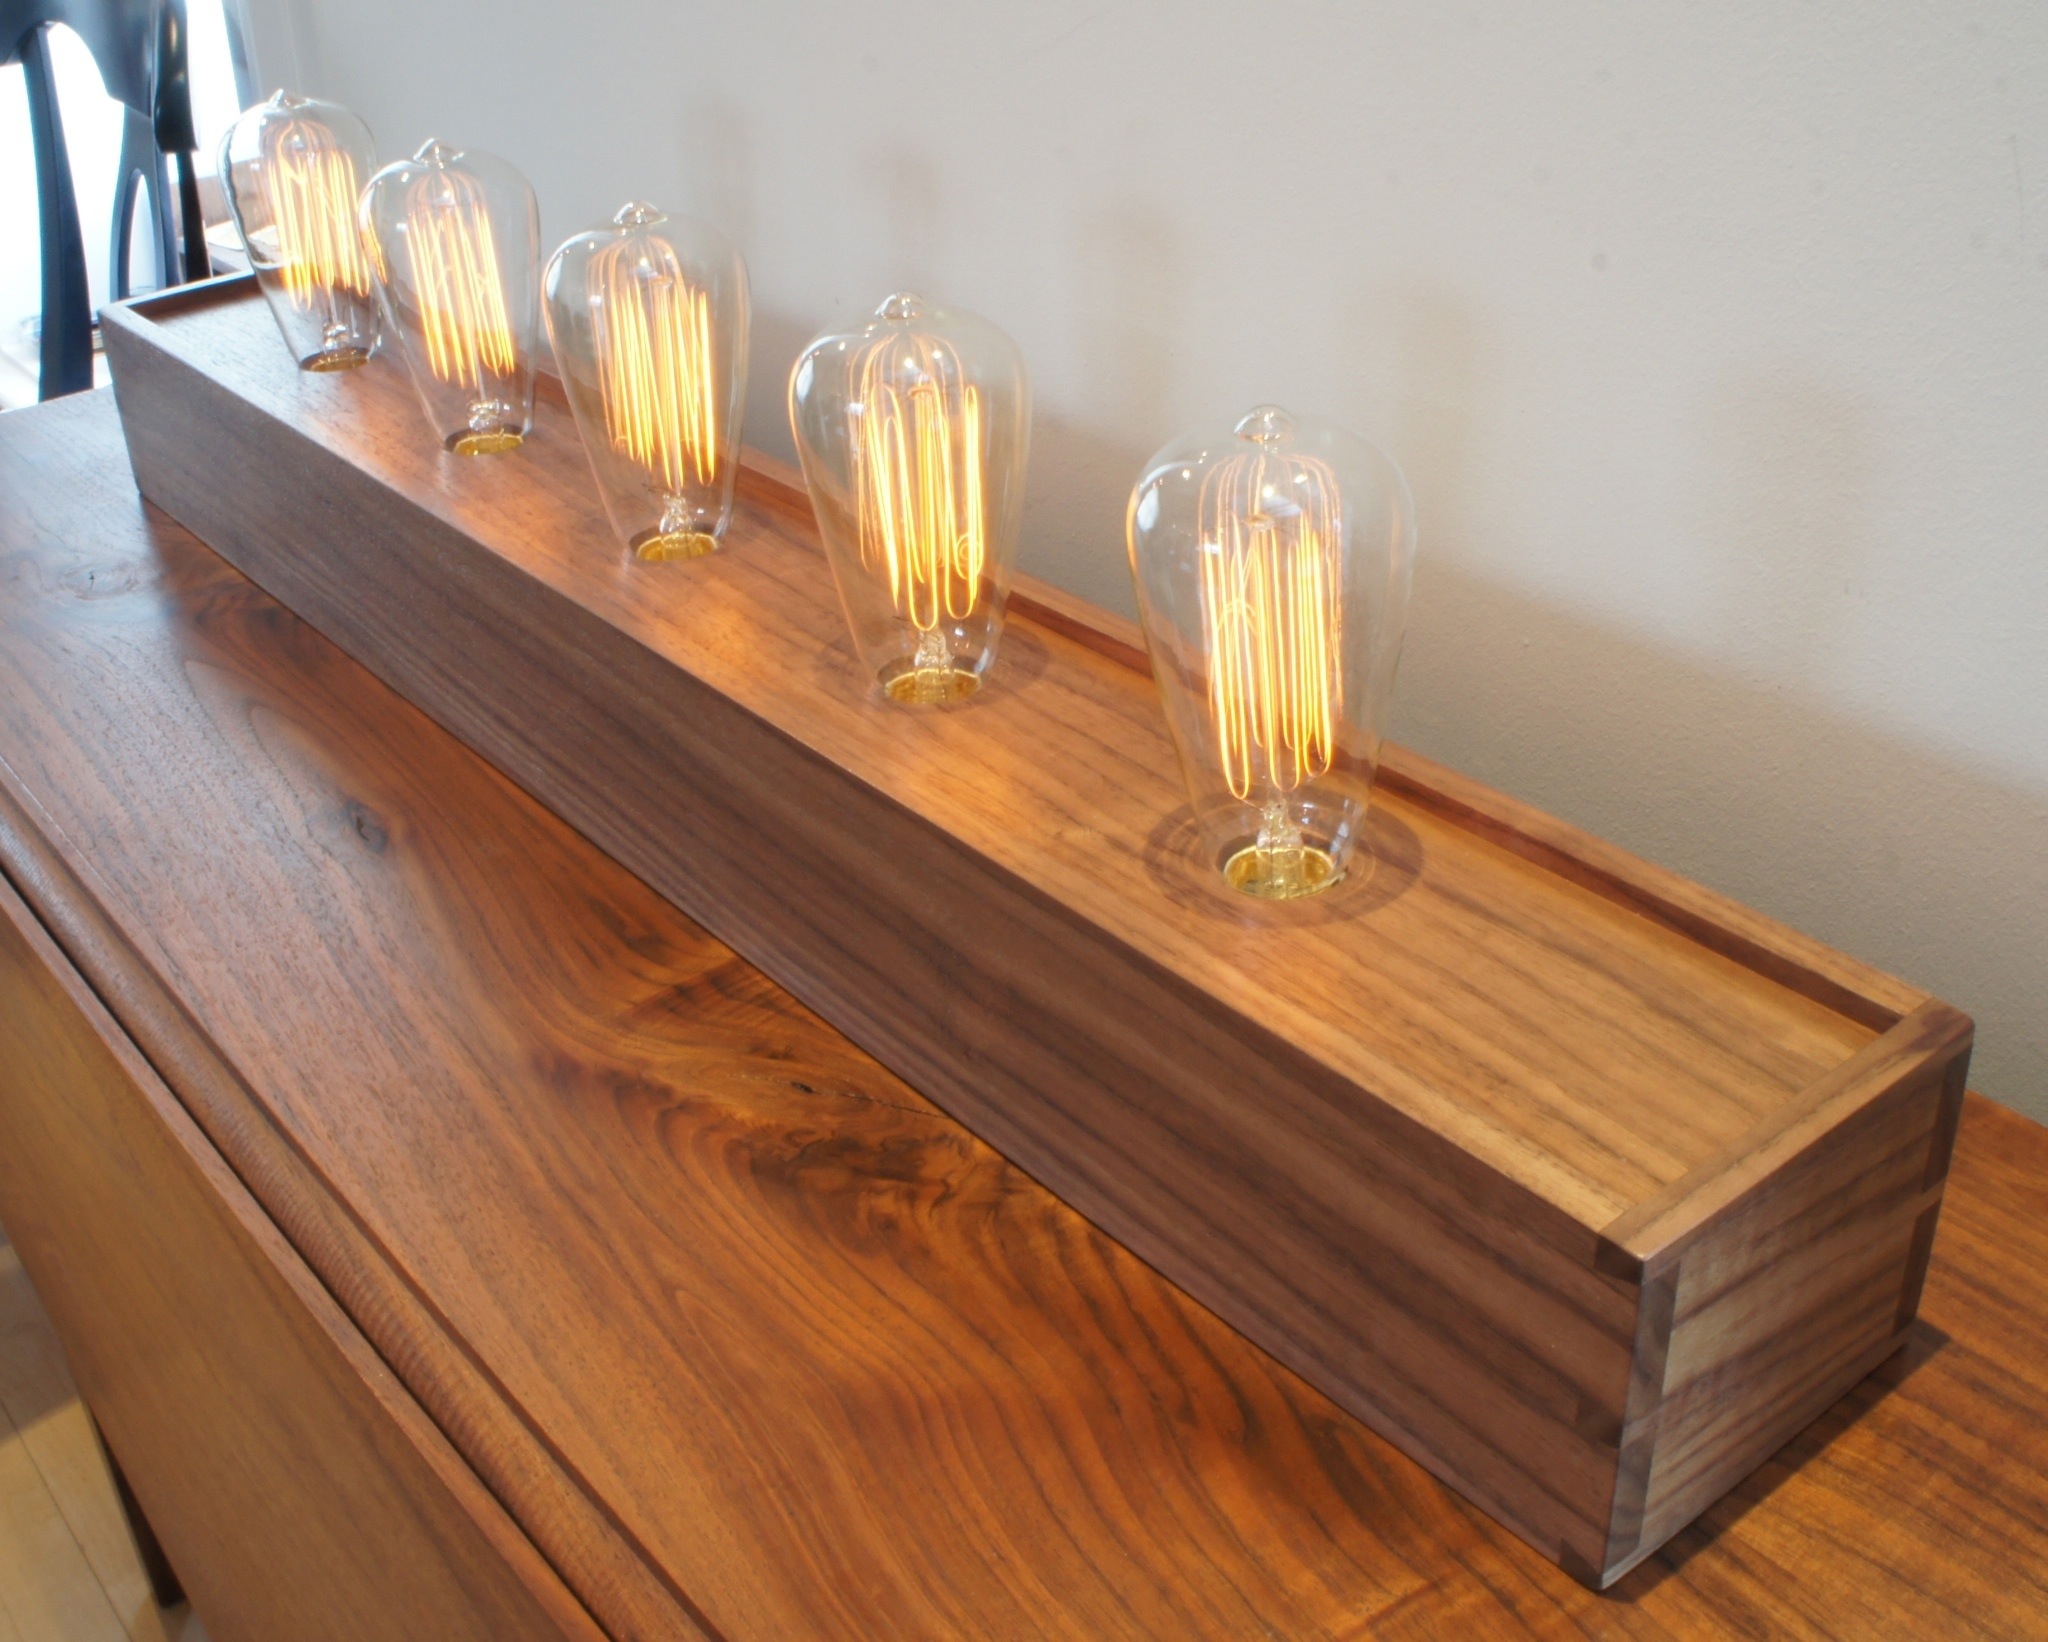
I haven’t made too much of a mess in the shop yet, so it’s still pretty clean. I’ve made 3 new lamps since the shop was setup, and I’m still happy with the level of cleanliness. Beyond being new and clean, the biggest improvement in the new shop is actually having some natural daylight and overhead lights that actually work. I hope that means that quality of furniture coming out of the shop will improve, but time will tell.

The other big change with the shop is that I’m going to transition away from only selling made to order lamps. I think that will improve options for both me and customers.

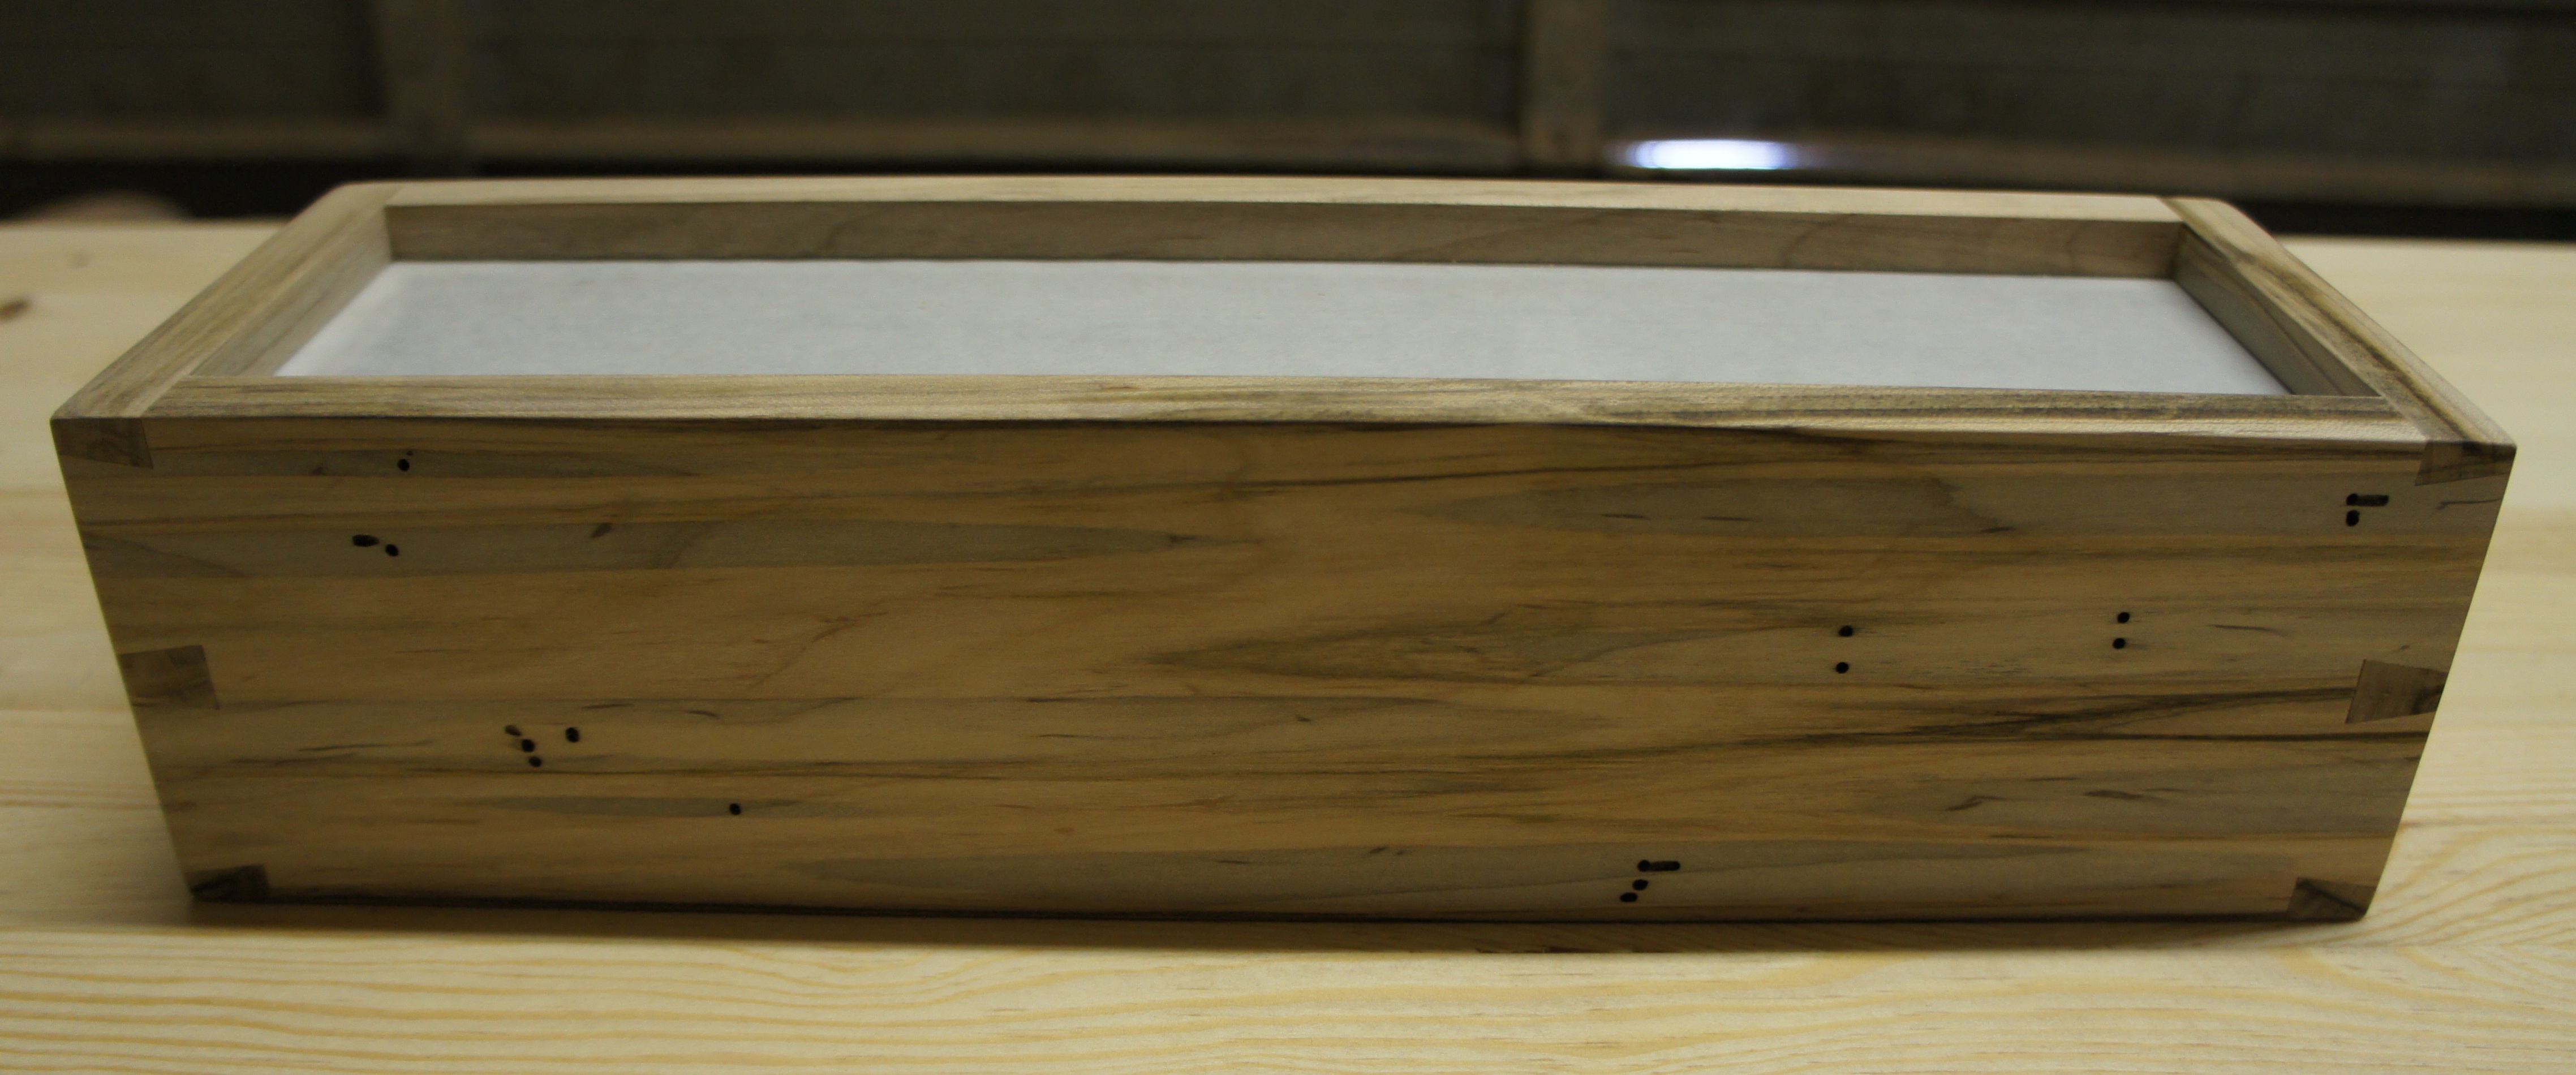
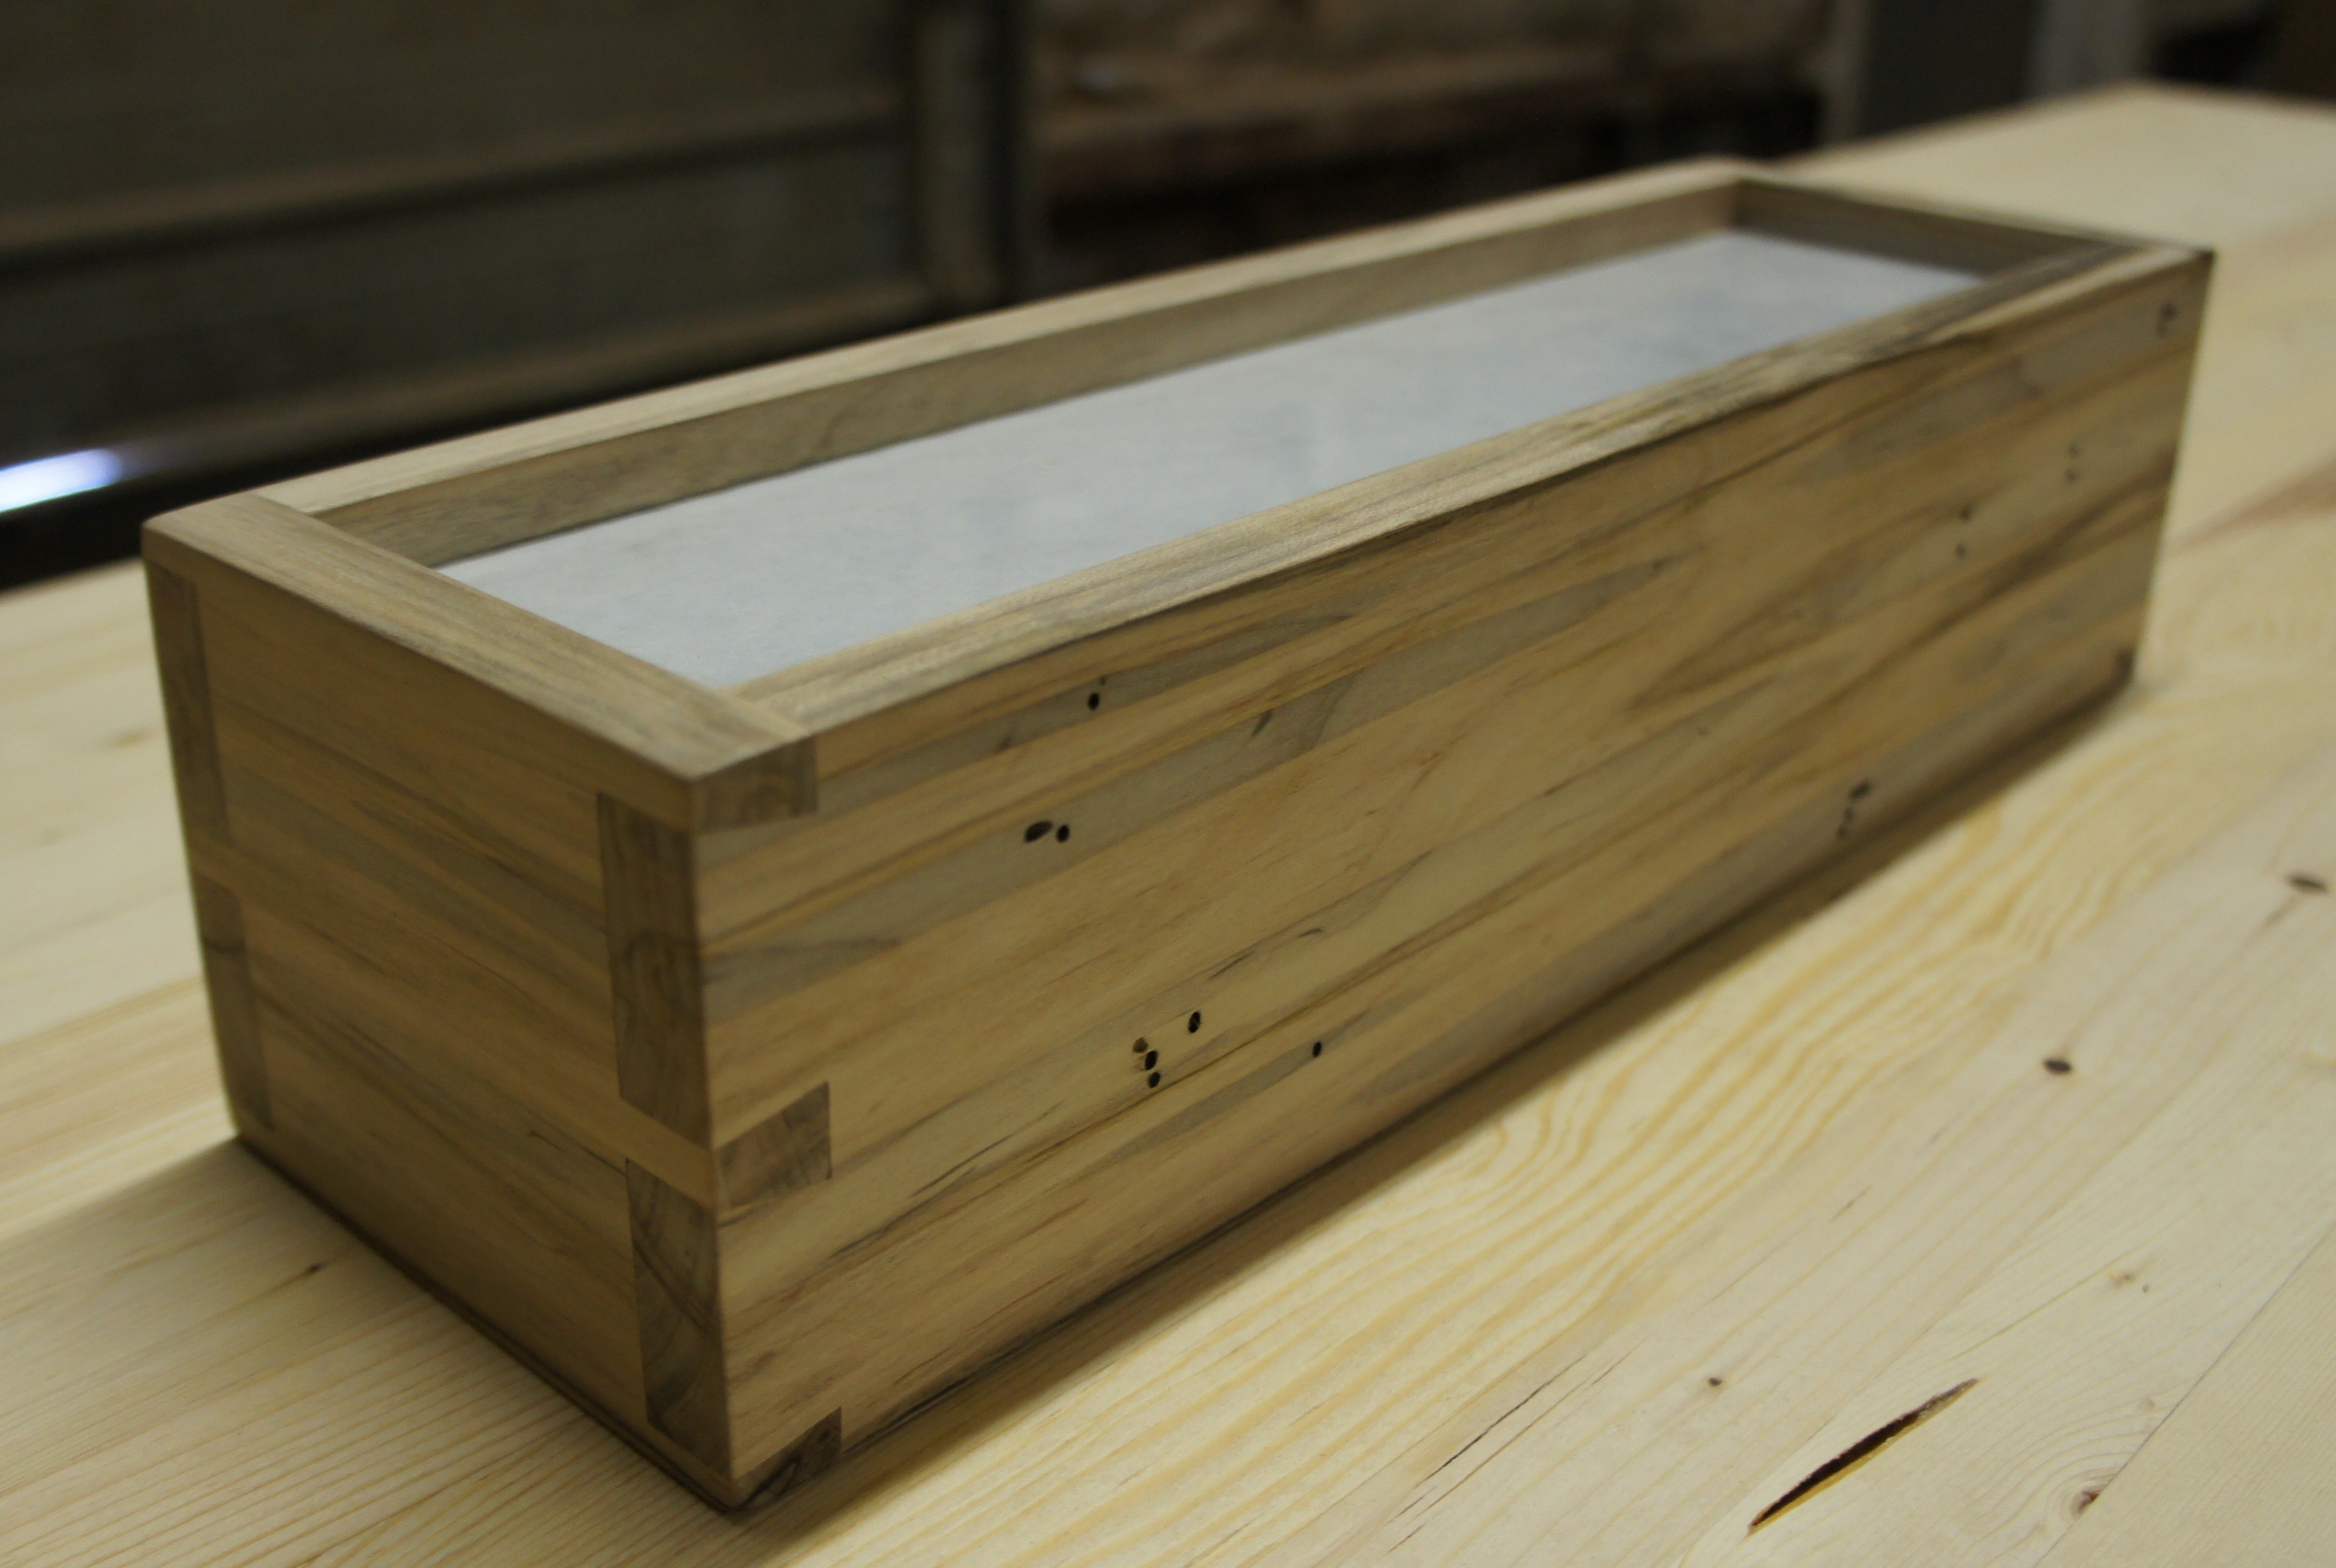
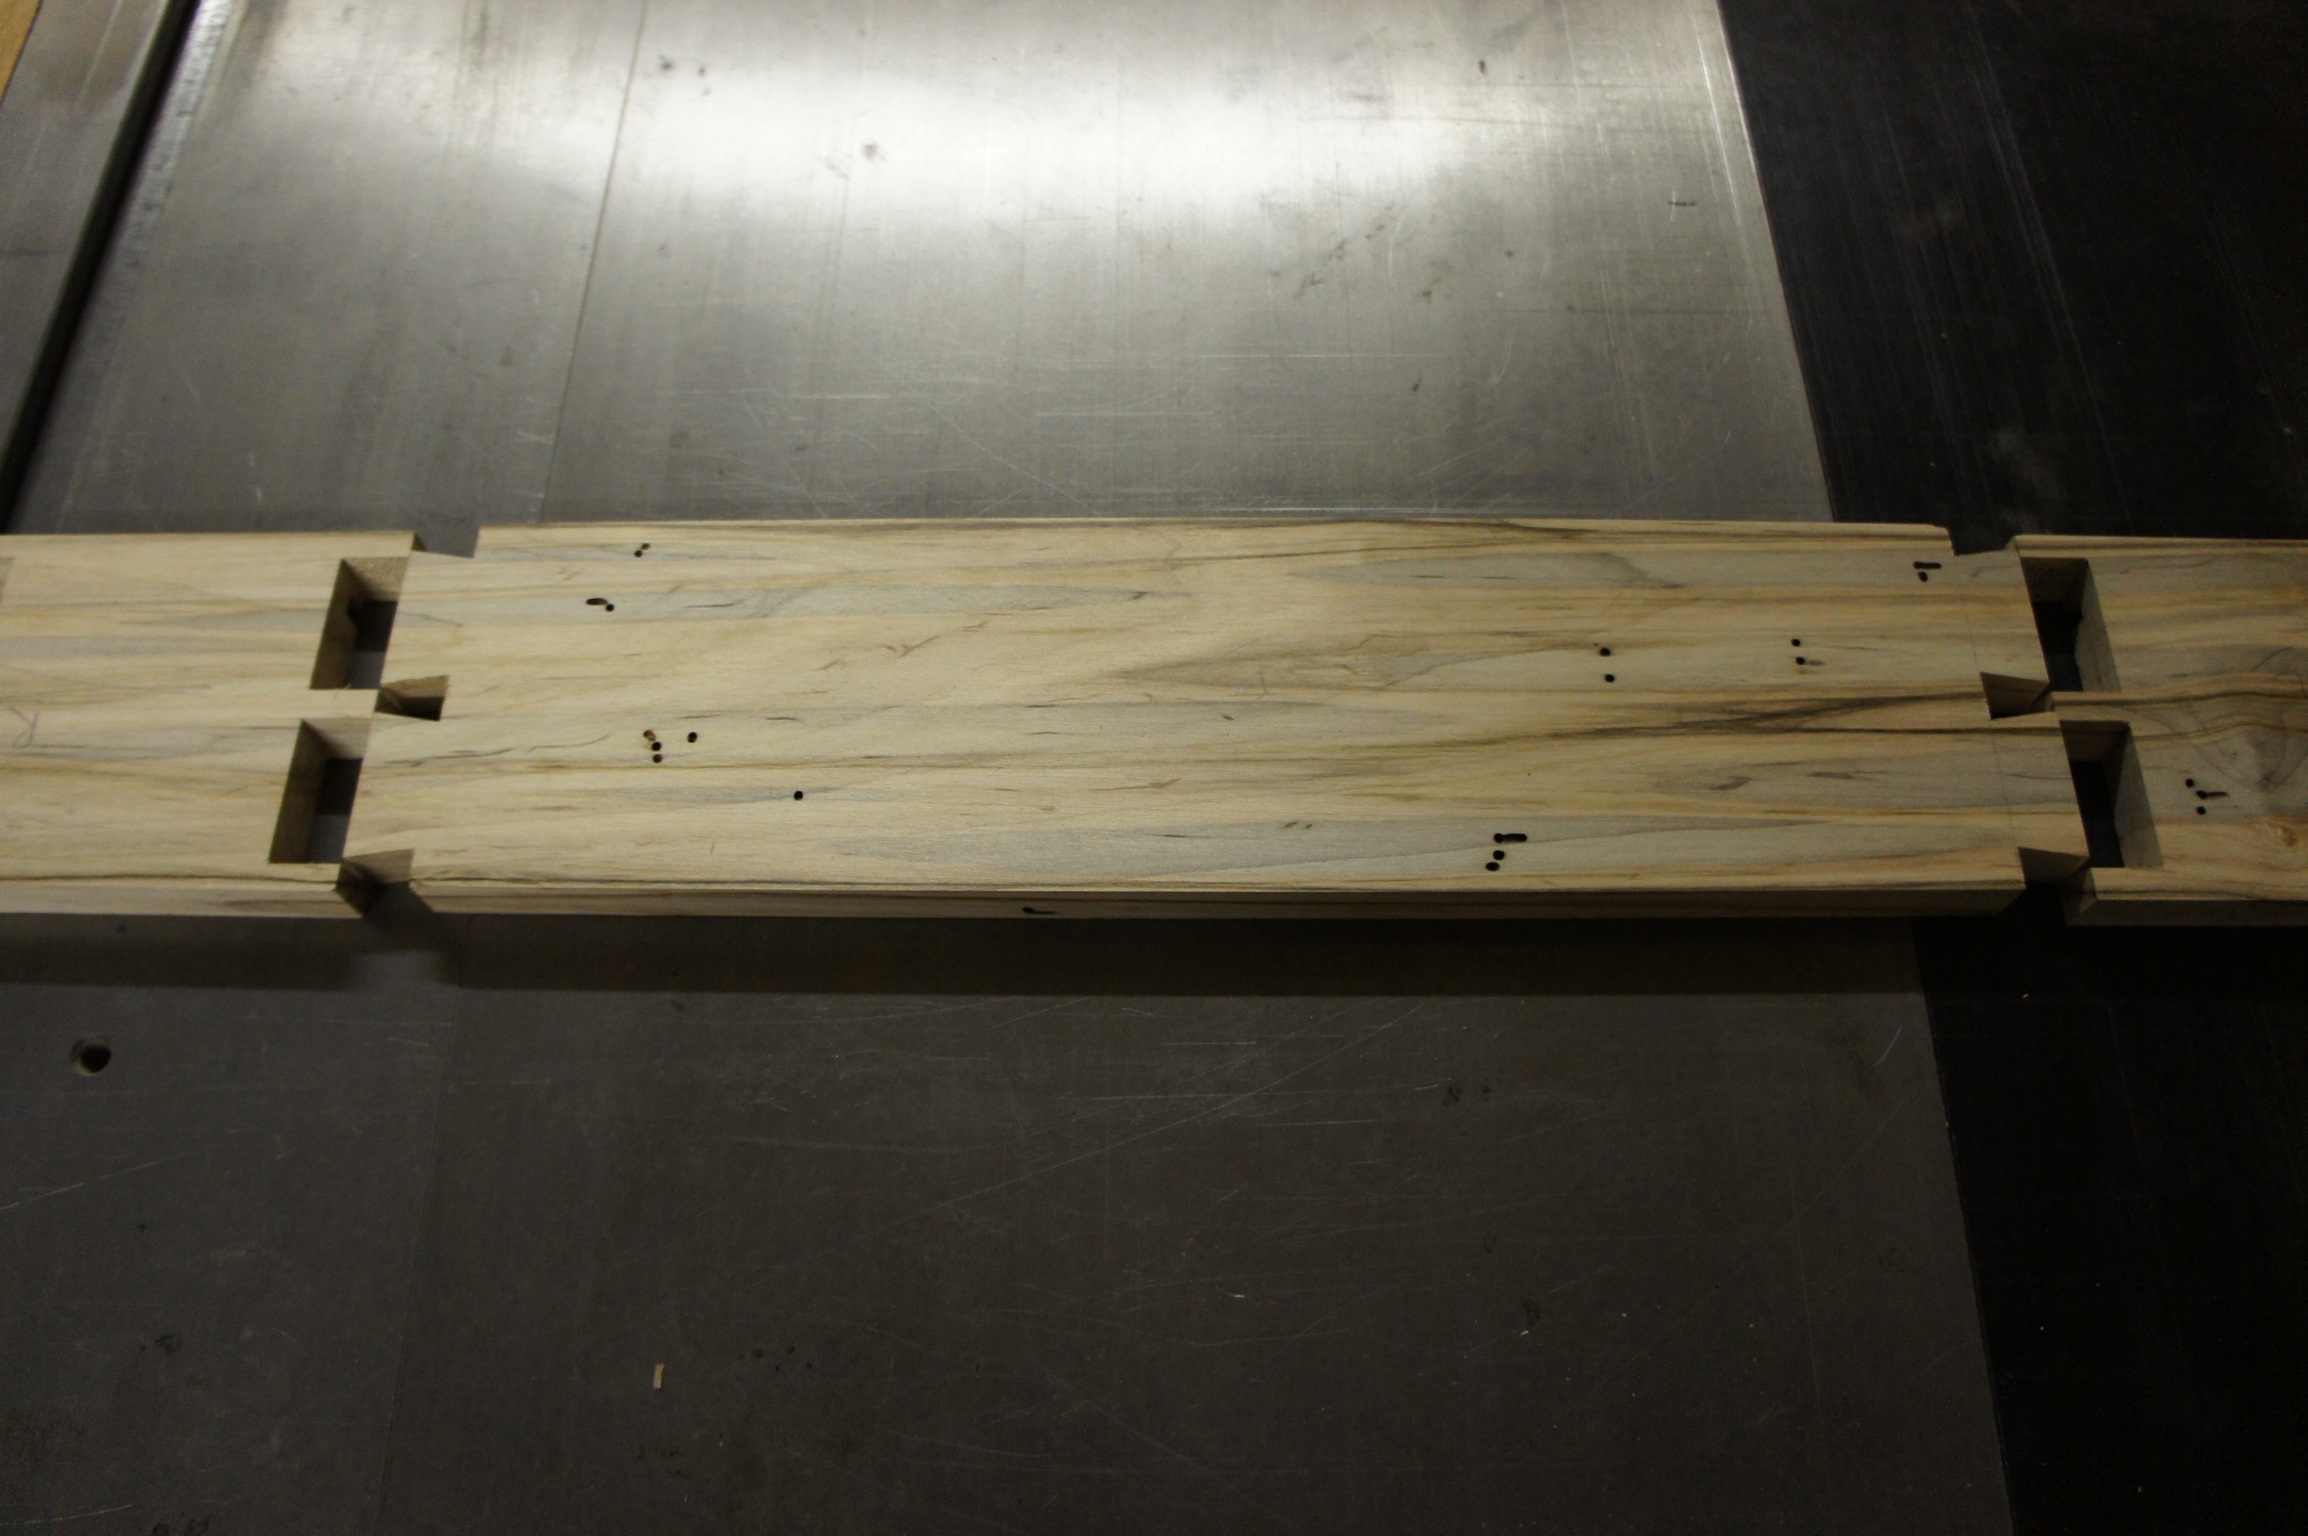
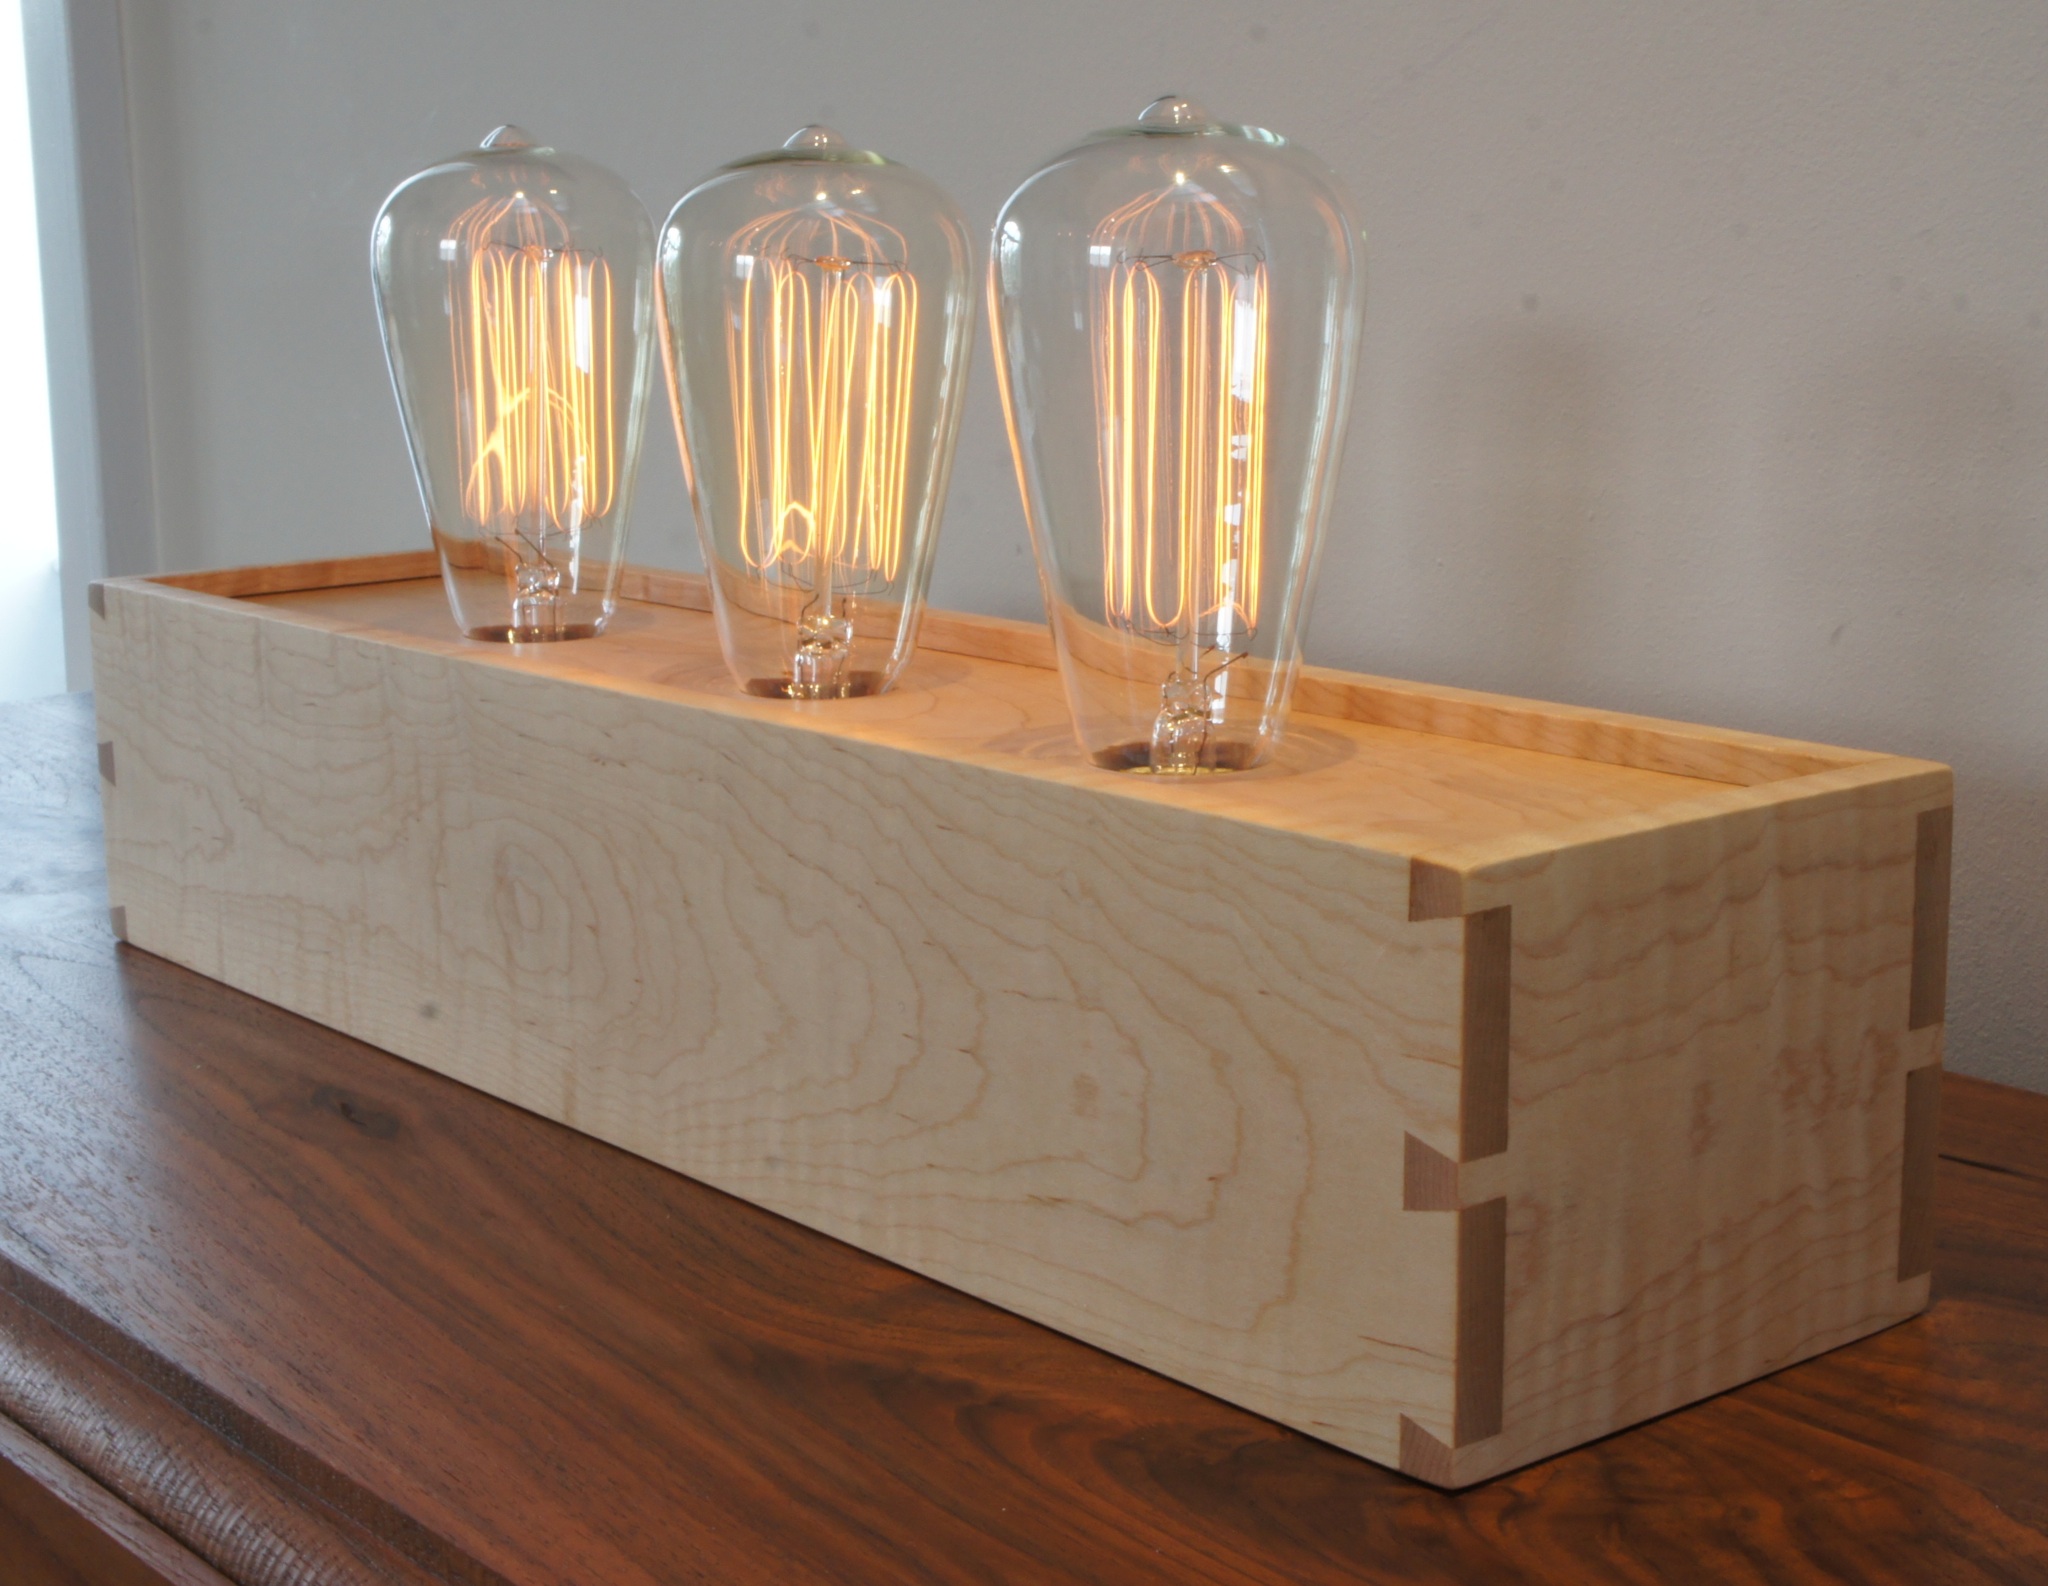
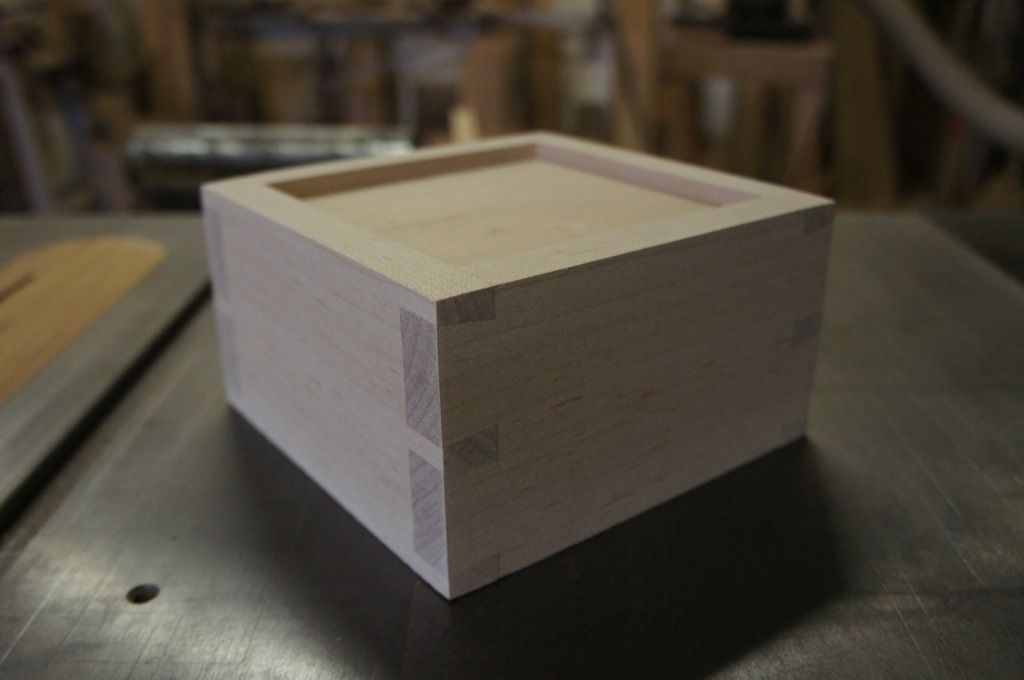
For me, I’m going to enjoy building furniture (and lamps) on my schedule rather than the (largely) unpredictable timing of lamp orders. I’m also going to start building lamps from wood that I think is interesting, as opposed to wood which is fairly generic. It might sound counterintuitive, but when building custom pieces it is not generally the best idea to use interesting wood. Interesting can refer to the color, the grain, the lack of uniformity, etc. The challenge when building custom pieces (when only interacting over Etsy and building to an aggressive timeline) is that it is usually safest to use lumber with consistent color and straight grain. Going forward, I’ll try to build more lamps that use “interesting” wood. We’ll see if customers want that… An example of one of the new lamps is the 3-bulb Ambrosia lamp below.

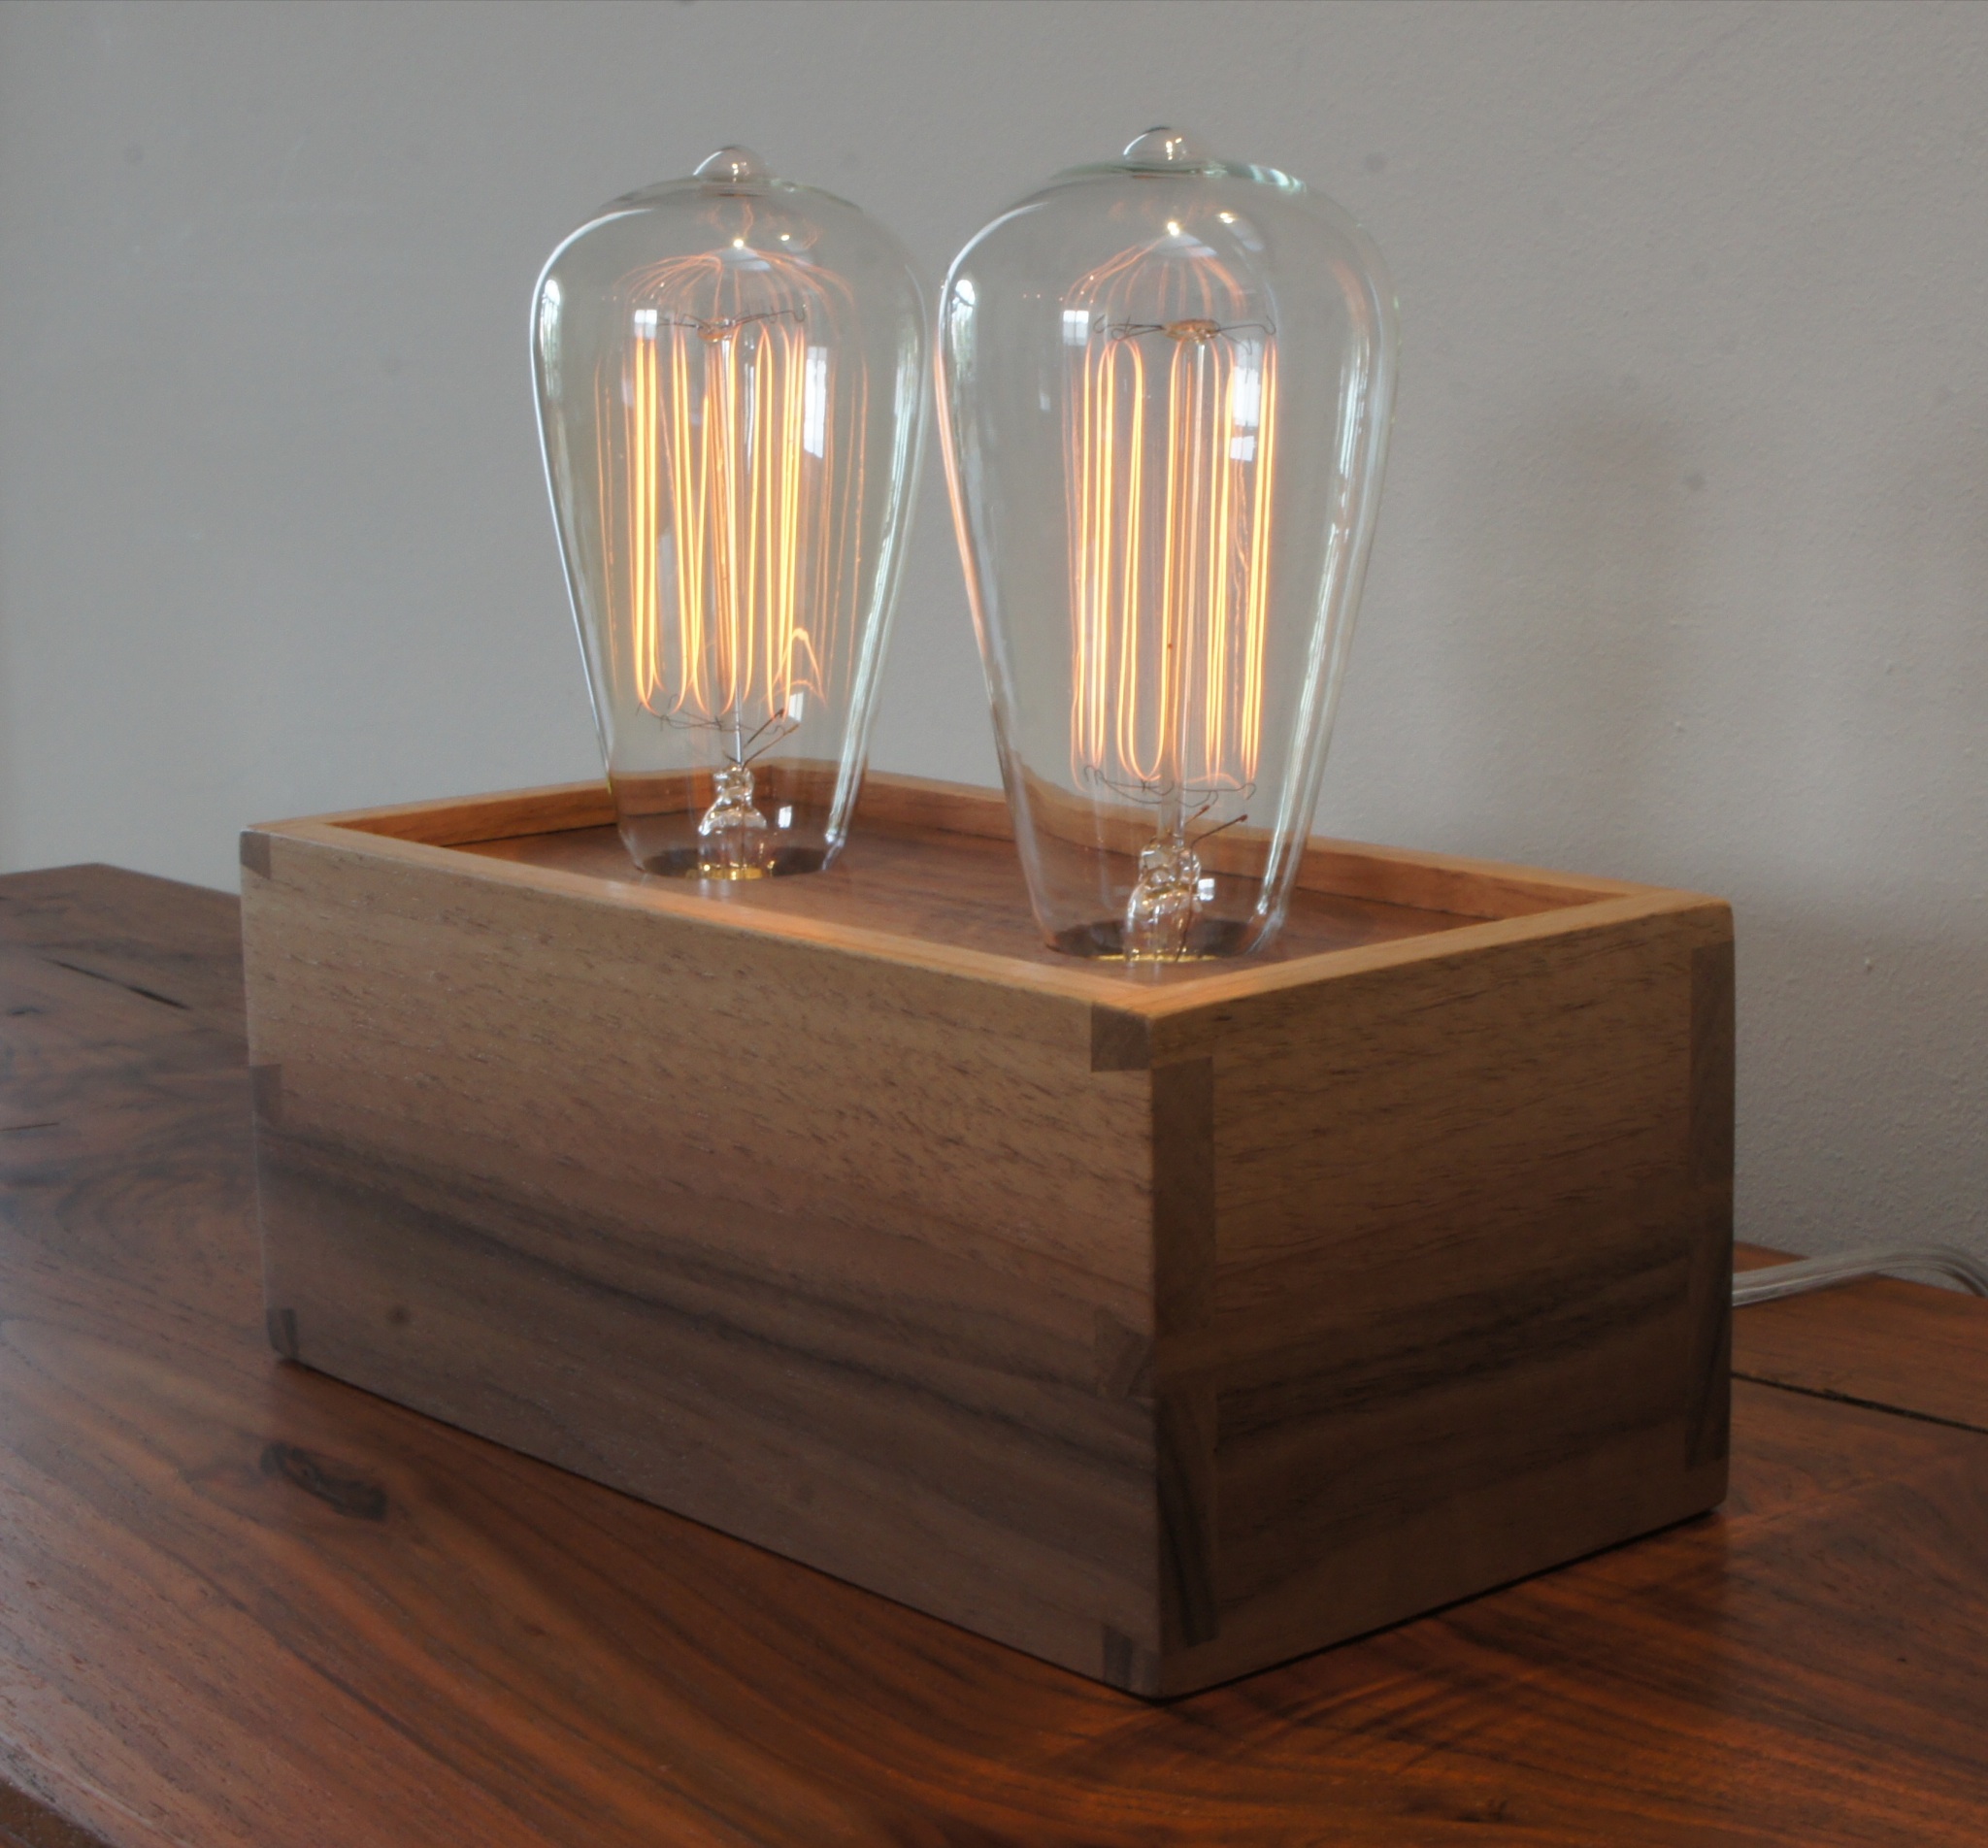
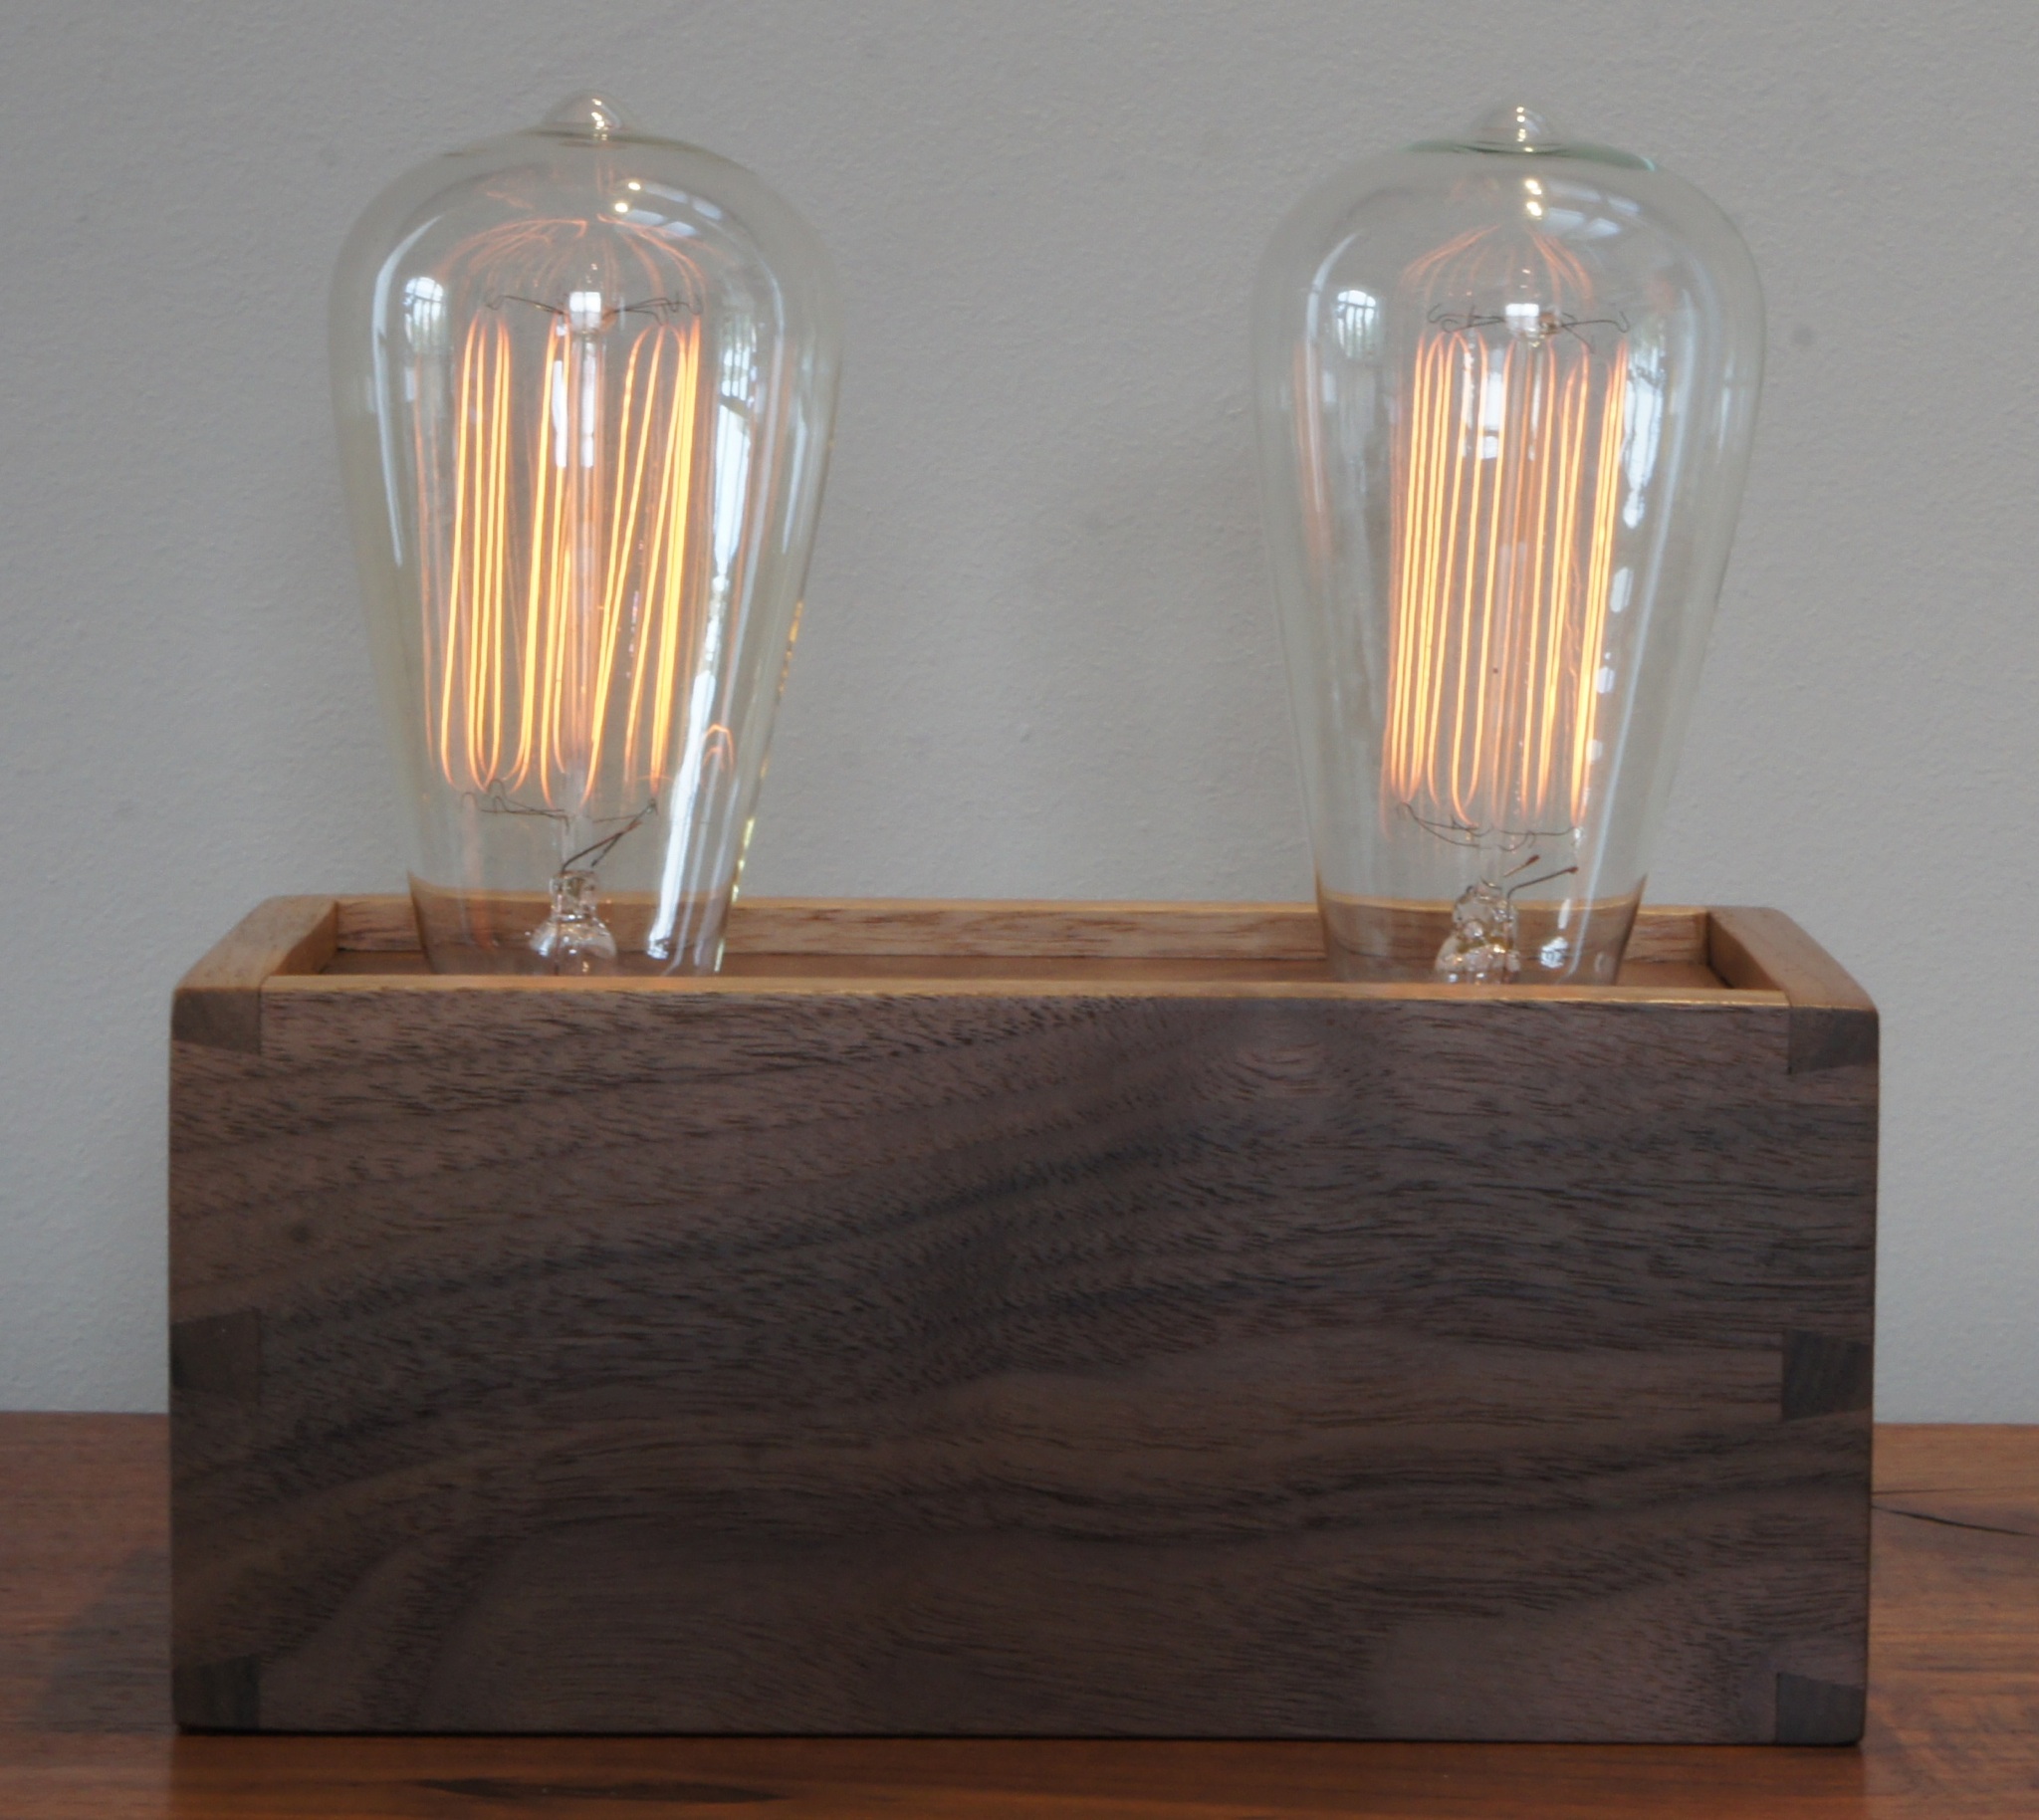
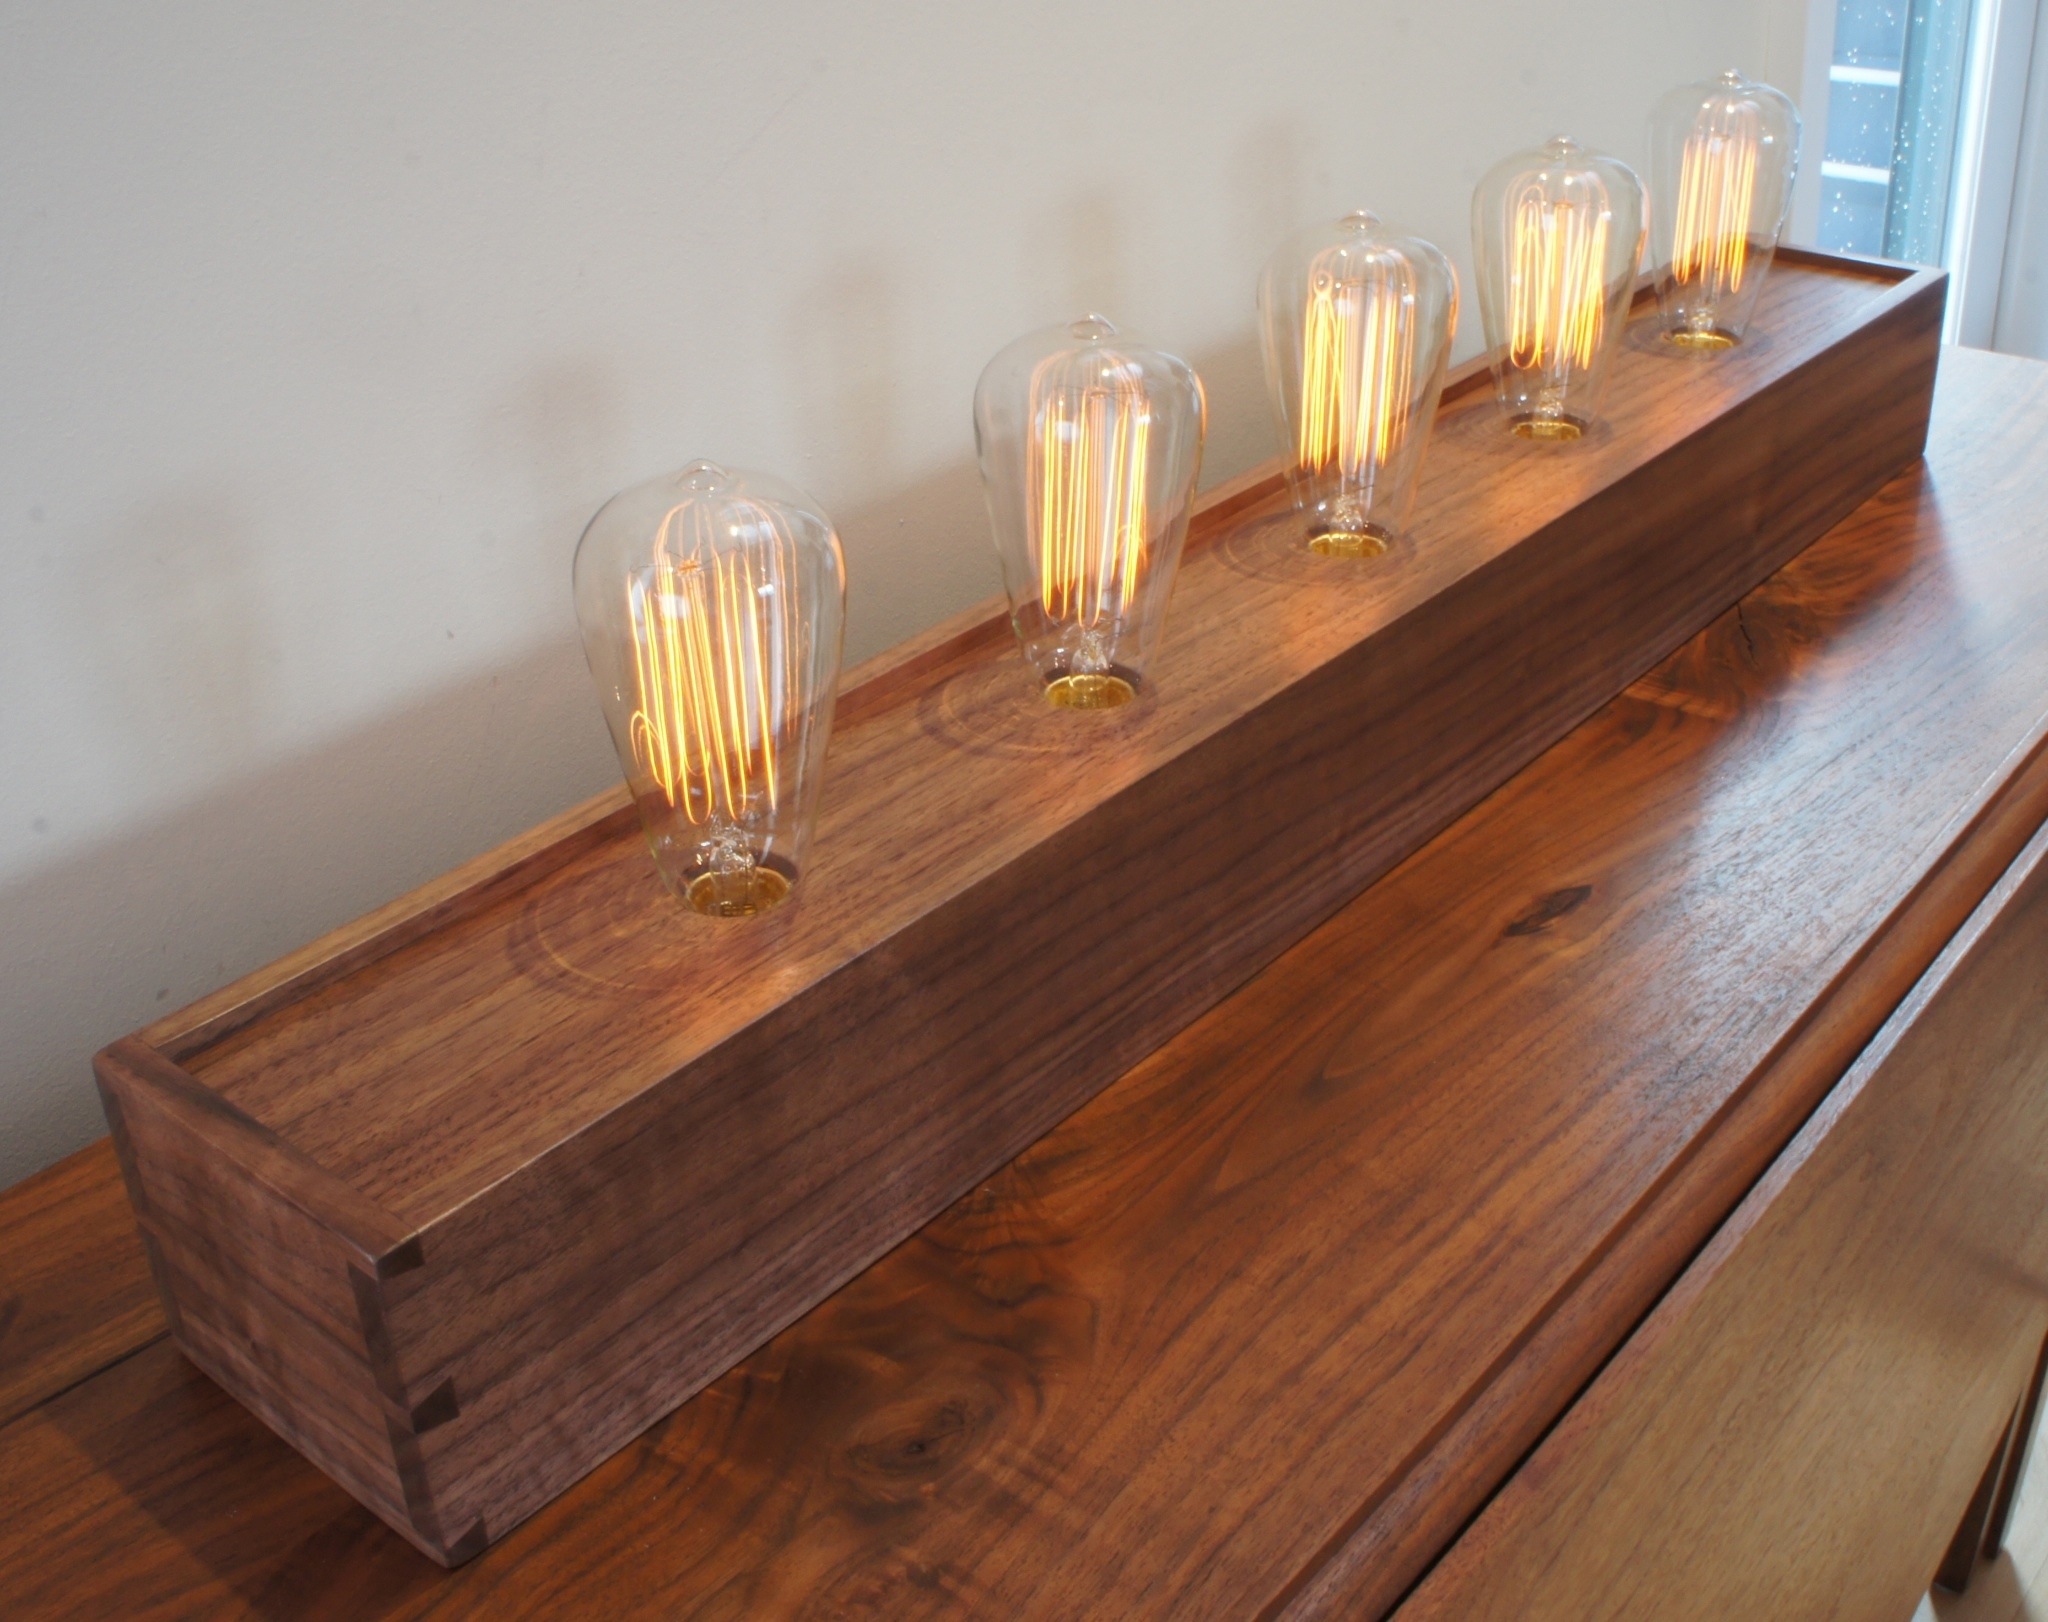
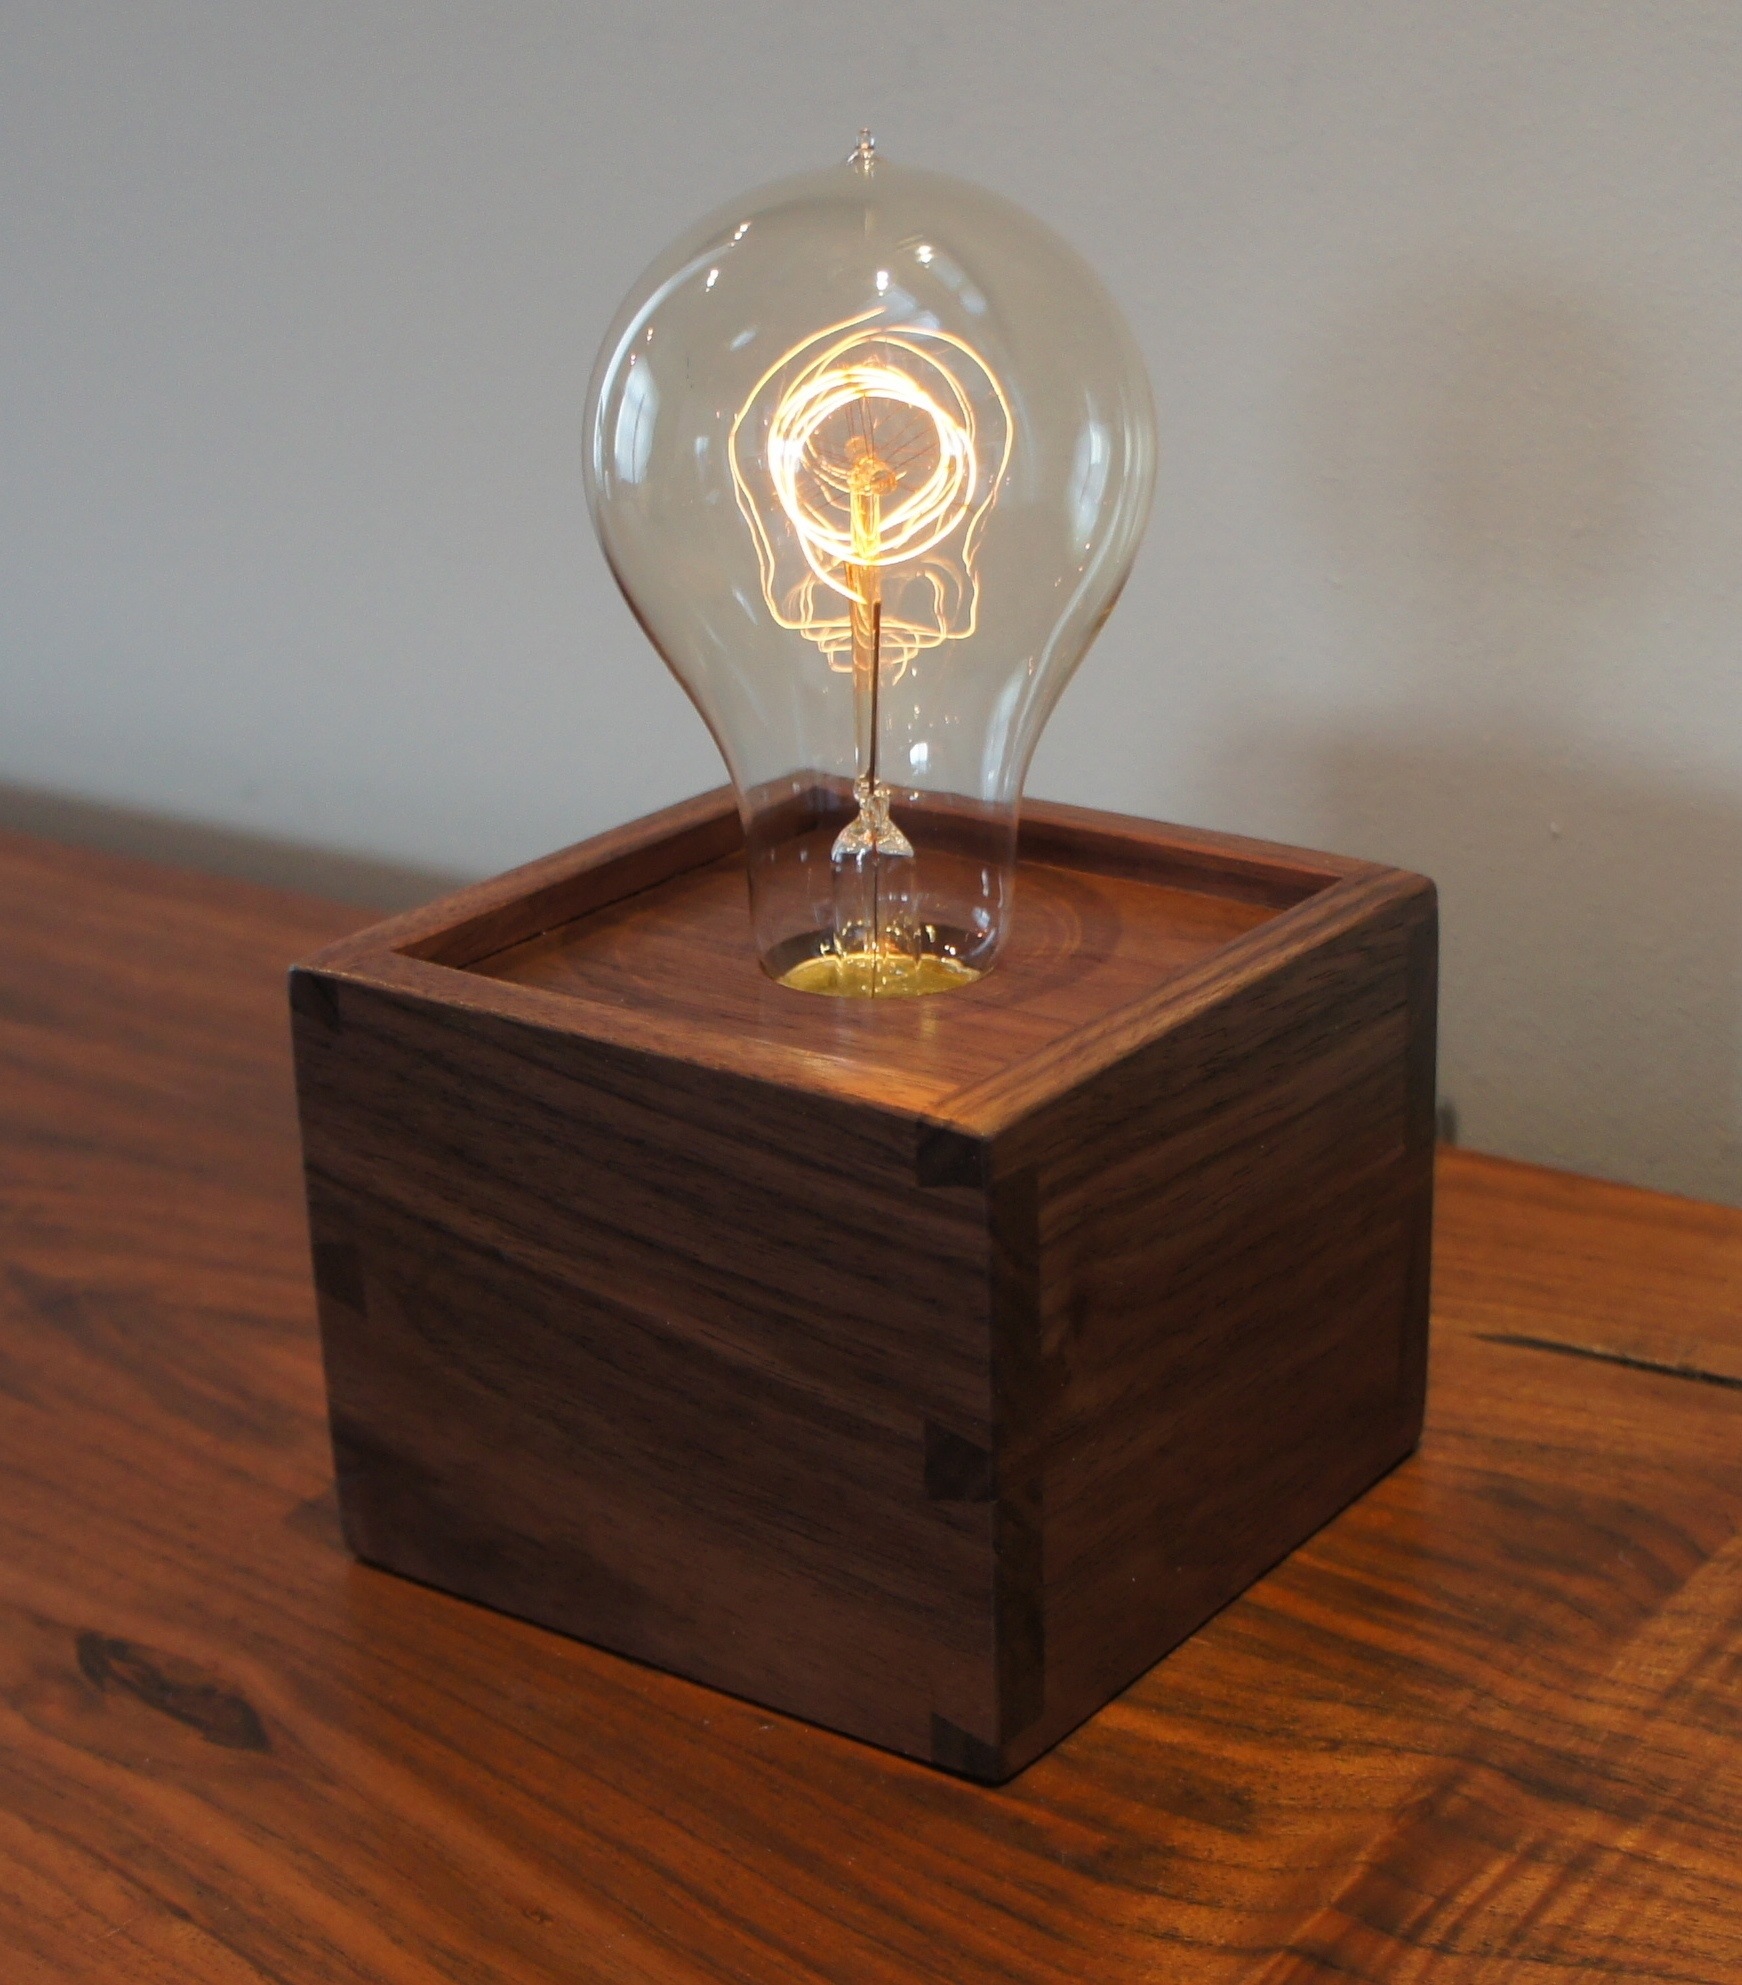
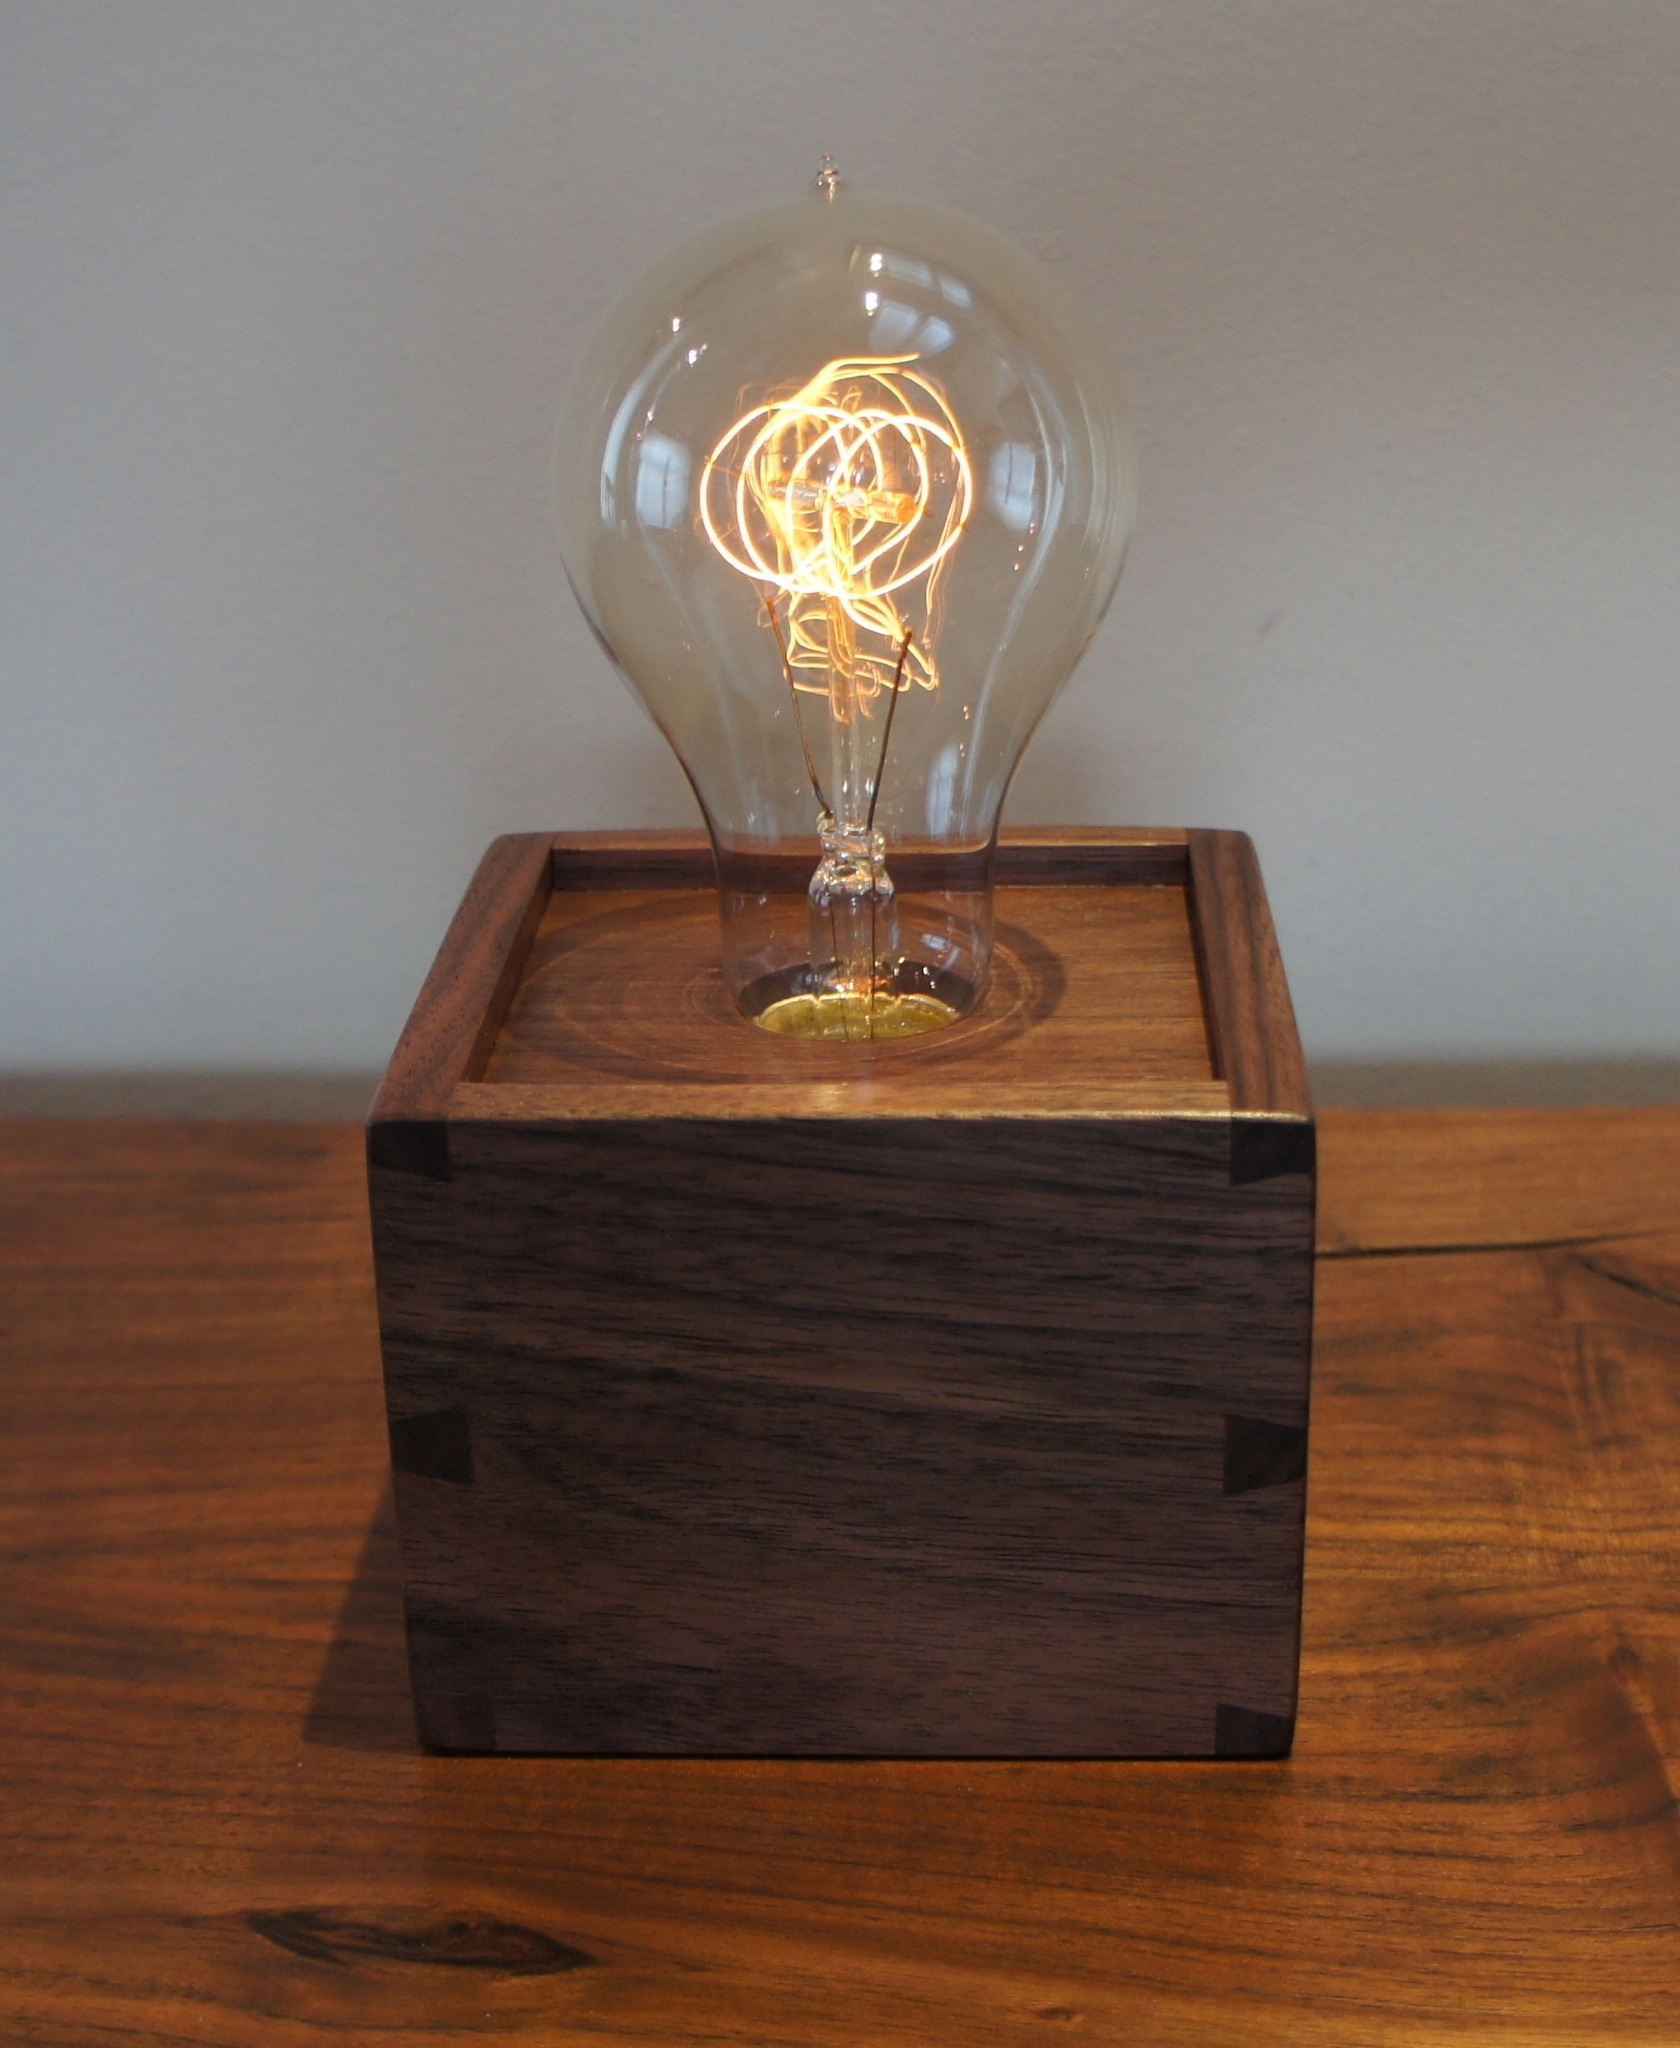
While I’m trying to do some more interesting wood choices, I also want to make sure that I build the lamps that customers have been expecting (and purchasing for the past few years). To start building up the inventory, I’ve built 2 single bulb lamps. One is in cherry and one in walnut. Over the years, walnut has by far been the most popular wood choice, but I like the cherry the best.

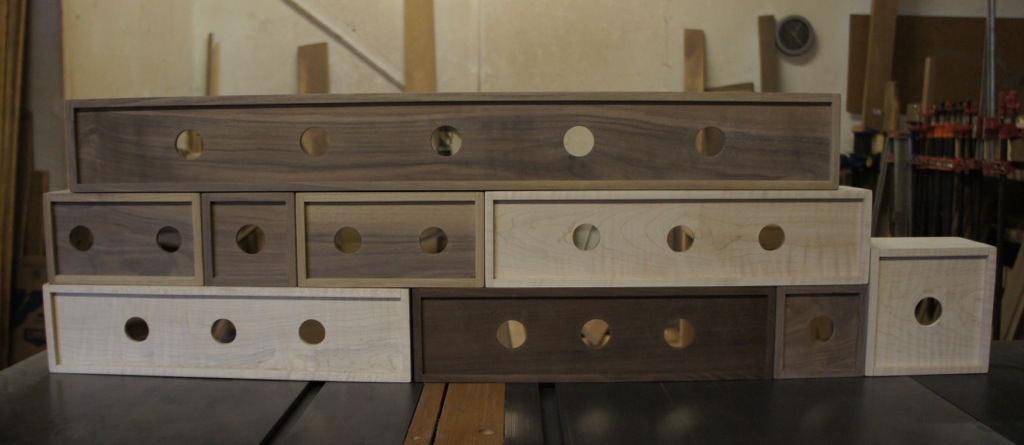
For customers they will get 2 big benefits. First, they will know exactly what they are buying. The pictures on the Etsy listings will now show them exactly what they are going to get. For customers that like the surprise, they can still order a “made to order” version of the lamp. But my primary reason for the made to order option is for customers that want to make some small changes to the lamps (e.g., different size, different finish, custom cords, etc.). The second big benefit for customers is that I can ship the lamps much quicker. I’ve listed the shipping times online at 3-5 days, but I’m hoping I can ship faster than that.

We’ll see how this all goes, but hopefully these changes will make the process better overall.


Leave a comment

Finishing the Ambrosia Maple Box

In a recent post, I was showing how to flatten an ambrosia maple board with a strategic cut before employing the jointer and planer.  Since then I have finished assembling the box.  As with the Edison Lamps that I make, the box features through dovetails.  The ambrosia maple has such dramatic coloring that it is crucial that the box is cut all from the same continuous piece of lumber.  I made passing reference to wrapping the grain around the corner in that previous post.  The photos below show why that is so important.

From a woodworking perspective this box is nearly identical to the Edison Lamps that I’ve been making, but there are a few differences.  The minor differences are the lack of holes for a lamp cord or a dimmer switch (this piece will be illuminated from the inside by a string of battery powered LED lights).  The major difference is the top of the piece.  On an Edison Lamp, I take a 1/4″ thick piece of lumber for the top of the piece.  In this case, I replaced the wood top with a sheet of rice paper (same concept that is used in shoji lamps).  Because I could anticipate this being used as a modern table centerpiece, I didn’t want the rice paper exposed.  I wanted to be able to clean this piece without worrying about ruining the paper.  As a result, I sandwiched the paper through two pieces of glass that I had cut at the local hardware store.

I still really like the concept, but I’m not positive I like my approach to the rice paper.  As of right now, everything looks like it will work just fine, but I’m not sure I love the quality or coloring of the rice paper I used.  And by sandwiching it between sheets of glass, it can’t ever be replaced.  This one will be permanent as-is.  For future versions, I think I’ll keep the glass on the top to protect it / keep it easy to clean, but I’ll find a new way to install the paper.

The photos below were taken in my shop before a first coat of finish was applied.  Usually, I do WIP photos at lower resolution, but I do like the ambrosia maple, so I kept this full resolution.

SONY DSC SONY DSC SONY DSC SONY DSC


Leave a comment

Overcoming a Bowed Ambrosia Maple Board

Building unique pieces is fun. The “unique” part of that statement can be defined in many ways. Sometimes it’s the design. Sometimes it’s the raw material. Sometimes it’s the finish. In this case it was definitely the raw material. I’ve always really liked the look of ambrosia maple; actually I’ve always called it spalted maple, but it seems like everyone has been more specific recently with the term ambrosia. Plenty of other places on the internet describe the ambrosia aspect, so I won’t bore you with stories of beetles…

On the last trip to the lumber store there was a really nice looking piece of ambrosia maple that everyone seemed to be ignoring. It wasn’t priced outrageously. It wasn’t abnormally short or narrow. But it was badly bowed. The board was ~40″ long but about 1/3 of the way down the board, it was bowed about 1-2″ (I’m probably exaggerating for purposes of the story). No one wanted it because it would be difficult to use in most applications. The photo below shows how large the bow was.
SONY DSC

I don’t mean to imply that I have some magical fix for the board, but I was able to use the board with a strategic cut around the bowed section. I was building a box and was able to locate the primary cut just to the side of the worst part of the bowed section. After cutting the boards they weren’t instantly flat. They still required more work (couple of passes over the jointer and through the planer), but the waste from this one board was minimized. The photo below shows the 2 boards now “flat”.
SONY DSC

I decided to make a variation on the Edison lamps I’ve been making so many of. Actually, this “lamp” will be the opposite of an “Edison” lamp. Rather than featuring the light bulbs that give those lamps their unique look, this lamp will just have a sheet of rice paper sandwiched between 2 pieces of glass. The interior of the lamp be wired with strings of LED lights powered by a battery – great news for me (no light sockets, wiring, switches, etc.) – all of the time consuming steps of the Edison build are avoided. This will be my modern take on a shoji lamp.

When doing the dovetailed boxes, I insist on getting at least the front and sides of the box out of one continuous piece of lumber. The primary reason I do this is that I want the grain to wrap around the piece. In the case of highly figured lumber (e.g., this piece of maple) it is even more important than ever. You can see in some of the photos below how the grain and coloring will wrap around this piece (side note: I’m not sure why, but I decided to keep my new cherry napkin holder in the photo). If all goes according to plan, I should be getting this piece into the finishing phases next weekend. Hopefully, all of the effort associated with this bowed board will be worth it.
SONY DSC

SONY DSC


Leave a comment

4 New Edison Lamps Have Landed at Etsy

I don’t usually do posts that are straight up advertisements that say “please buy me” but I figured adding one of that type isn’t that big of a deal… I’ve enjoyed building the dovetailed boxes that are used in the Edison Lamps that I make, but I wanted to start making some that are “ready to ship” rather than “made to order”.

I just finished an additional 4 lamps that have been posted to Etsy. 2 are made from curly maple. The other 2 are from walnut. Both of the walnut lamps are a new design. These are the first that have featured just 2 light bulbs. They are slightly different widths as I’m trying to figure out the best spacing for a 2 bulb design. I like both of these, but I’m not positive I’ve nailed the ideal proportions yet.

The other reason I wanted to make these “ready to ship” is that it gives me a chance to use lumber I like, but might not appeal to people generally. The best example of this is the wider 2 bulb walnut lamp. The lamp base has a significant change in the color of the walnut – shifting from a dark brown to a much lighter brown (almost yellow) color at the top. I could never sell that to a customer without them seeing it first. I love the look, but I know that it’s not for everyone.

Bunch of pictures below. You can find the lamps listed here.

SONY DSC

SONY DSC

SONY DSC

SONY DSC

SONY DSC

SONY DSC

SONY DSC

SONY DSC

SONY DSC

SONY DSC

SONY DSC

SONY DSC


Leave a comment

Stacks of Edisons

Super quick post tonight. In the photo are the 9 Edison lamps built this weekend. 9 lamps required about 4 total hours of sanding today (combination of random orbital and hand sanding). Thankfully, the next meaningful post should include some photos of finished lamps. Even better, I’ve got enough inventory now that hopefully I don’t have to spend all of next weekend building lamps.

20130421-220749.jpg


Leave a comment

From Rough Sawn to Edison Boxes and Coasters

I thought that last weekend might be the first in a few months not dedicated to building lamps, but that plan quickly changed. I tried to get a little ahead of the game and decided to build 2 lamps instead of the one on order. I wish that was a true statement, but I wasn’t happy with an extremely small detail of the first lamp. Consequently a second lamp happened.

Although not intended this did give me a chance to show in one photo the changes that the lumber goes through. The piece on the far left is what my favorite walnut boards look like before any work is done to them. The middle board shows the lumber after one face has been completely flattened. Finally the board on the right shows the inside of the front of the lamp right before it is ready for assembly.

20130409-221508.jpg

The photo below shows how the top is bookmatched to the front of the lamp. The top and front are cut out of the same piece of lumber. They are then opened up like a book. The two pieces are essentially a mirror image of each other. The line on the two boards is to provide me with a reference mark, so that I can keep the boards aligned when assembling the lamp.

20130409-221633.jpg

The final photo is the output off a long weekend in the shop. The two boxes are awaiting 5 holes each for light bulbs. The lamp on the front right really highlights matching the top and front grain patterns. The scattered 44 coasters are from excess lumber from the past 5 or 6 lamps.

20130409-221820.jpg


2 Comments

Four New Edison Lamps

Finally finished up a couple orders of Edison lamps. Except for one of the single bulb lamps, all of these are in the care of the USPS. The 5 bulb lamp is a pretty traditional rendition but the length has been shortened ever so slightly. The maple version is a significantly larger version of the single bulb lamp I’ve been making. I wasn’t too sure about it’s size at first. But with the right bulb it looks great. One of the small Edisons just left DC. The other will become my second lamp on etsy that is ready to ship when ordered.

Only one lamp on the books for the weekend, so hopefully I can get back to some of the other neglected projects in the shop.

20130405-135016.jpg

20130405-135043.jpg

20130405-135118.jpg

20130405-135142.jpg

20130405-135207.jpg

20130405-135226.jpg


Leave a comment

Edison Lamps in the Raw

Just a quick update post tonight. In the photos below are 4 lamps ready for a first coat of finish. The long walnut piece is a few inches shorter than my standard build, whereas the maple box is a few inches larger than the standard. I love the way that walnut looks before any finish is applied. One day I might build one of these pieces and never apply a finish… These lamps should be ready to ship soon.

20130402-214226.jpg

20130402-214247.jpg

20130402-214305.jpg


Leave a comment

Expanding the Size of a Single Bulb Edison Lamp

Started today to build a new single bulb Edison lamp. This one will be a little unique. It’s still going to be square still, but this one will approach 6.5″ square. In theory this isn’t a big deal, but the challenge is related to my bandsaw. I have a pretty nice bandsaw, but it’s resaw capacity is just shy of 6″. In order to make the top of the lamp, I need to resaw a board to get the 1/4″ thick top board. Technically I could just plane a board all of the way down the the right thickness, but that just seems like a complete waste of lumber. Fortunately, I was able to make this work by keeping the sides of the lamp a little thicker than normal. The thinking is that the outside dimension of the lamp is 6.5″ square. If you use lumber that is 3/4″ thick, then the interior dimension of the lamp is only 5″ (6.5″ – .75″ -.75″). From there you need to add back about 5/16″, so that it will be able to rest inside the groove for the top.

After a lot of math and woodworking, I was able to get the lamp into the clamps. The first photo shows the sides of the lamp before it’s pieces are cut to length. My goal is to always get the lamp out of a single board. By using a single board, you can have the grain wrap around the piece. Unfortunately, I had to use a different section of the board for the thin top piece. The lumber just wasn’t thick enough to get it out of the same section of lumber. When I get it out of the same board, I at least attempt to match the top to the front of the lamp. When it works properly, you get a top that is bookmatched to the front. The second photo shows the lamp after the dovetails have been cut. It’s been a long time since I’ve used the 7 degree dovetail bit, but with my jig it’s necessary for stock this thick. Hopefully, soon I’ll have a post on this site that isn’t just WIP…

20130330-235748.jpg

20130330-235801.jpg


2 Comments

Lots of Sanding for 2 Edison Lamps and Almost 40 Coasters

Just a quick interim post here to update on the status of current projects. In the photo are two Edison lamps that are ready for final finish. The walnut lamp is being built for a customer. It is a pretty standard build. The only distinction is that this is the first chance I’ve had to build a 5 bulb version out of walnut. I’m sad to say that this lamp used up the last real amount of walnut that I’ve been working from. The other lamp pictured is made from sapele. It’s the first time I’ve worked with sapele and so far I’m happy with the results. There was a distinctive pattern on the board that I featured on the front of the lamp. Taking it one step further, the 1/4 inch top board is book matched to the front to further highlight the pattern. Finally in the front left you can see the stack of coasters ready for finishing. The coasters are great but trust me that it’s a lot of work to sand all 6 sides, break the edges and steel wool between 2 coats of finish. It’s a great use of my scrap lumber, but it sure is a lot of work to get a product that I’m happy with.

20130303-143645.jpg