Claremont Designs


Leave a comment

Another Mother’s Day Weekend In the Shop

I promise that I love my Mom, but I have spent yet another Mother’s Day weekend in my shop.  All of the good sons and daughters spending time with their mothers means that the traffic on 95 is pretty light and the shop is that much easier to get to.  For this weekend, I focused on finishing up my second workbench and finally starting the finishing of a project that isn’t a lamp.

The workbench is a pretty straightforward project.  I already had the base of the bench from a prior piece of furniture.  Building the top takes a few weekends; not super difficult, but time consuming.  It’s not the best piece I’ve ever built, but it has already made my shop much more efficient.  That project was finished on day 1 of the weekend.

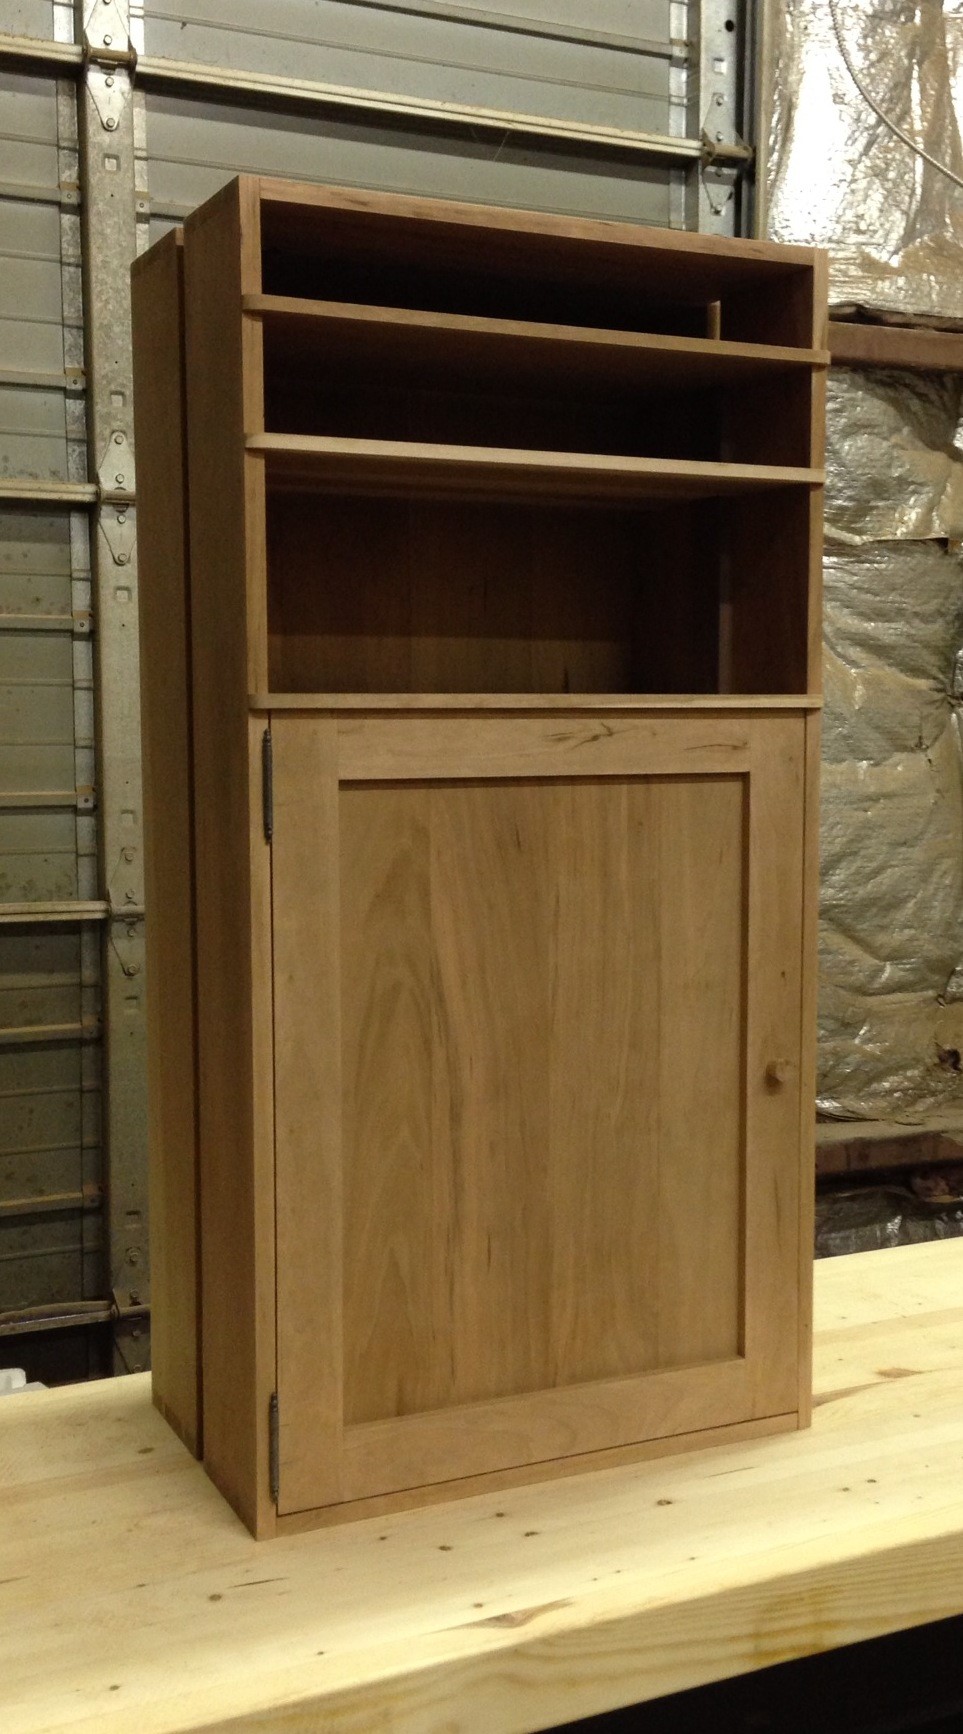
Day 2 was spent finally getting a new cabinet ready for finishing.  I’ve had the majority of the cabinet completed for weeks months.  I’ll miss having it as something to rest my sanders on, but it’s time to get this one out of the shop.  In the photo below it is sitting on the new workbench after being sanded to 120.  I eventually sanded it down to 220, but before the final sanding I wanted to fit the door to the cabinet.  The only challenge that I came across was the length of the screws for the hinges.  Ultimately, I had to snip off the tip of each screw, so that it wouldn’t protrude from the side of the cabinet.  The proportions may look a little off to people, but this is a purpose-built piece of furniture.  The cabinet will sit in an opening between a wall and a desk.  The door is design to swing open beneath the apron of the desk.  The large opening above the door is going to be completely concealed by the desk, so it will store items that I don’t need to access.  The top 2 shelves are for computer equipment, and will sit at or above the top of the desk.

Before leaving the shop, I finished the sanding and applied a first coat of boiled linseed oil.  One more weekend and this one should be done…

case


Leave a comment

Designing a New Lamp

Stuck in jury duty today, so I figured I would take the opportunity to update this site on something other than just Edison lamps. I feel like site has become an onslaught of WIP and final photos posts associated with those lamps. I do enjoy building them, but I feel like that is all that makes it to this site. I have a backlog of WIP projects that have taken a back seat to customer projects. Not complaining; just noting.

For a while I’ve been wanting to try some new concepts in the shop. Staying within the lamp theme, I decided to try a new design. The sketch below shows my initial thoughts on the profile of the lamp. The base of the lamp is loosely inspired by the base of the kinesis chair by Thos. Moser. I was lucky enough to spend a week in the shop with David Moser and many of their craftsman up in Maine. While I certainly picked up a new skill or two, what I most realized was that I don’t spend much time in the prototype phase refining the design. I think for this lamp I will try to truly prototype it. I both want to refine the shape and proportions, and I want to do it out of some cheaper stock.

For the return at the top of the lamp I was again inspired by a Thos. Moser design. This time it was the vita chair. In particular, the intersection point where the back sweeps into the front leg and then comes back to form the back support.

The shade itself will try to blend in the concepts of the kinesis base and the look of old victrola phonograph horns. I have been wanting an antique phonograph for years, and this might just have to help hold me over a little longer.

The sketch isn’t perfect, but it’s enough to get me started. Hopefully I’ll be able to spend a little more time on the design this weekend.

20130501-093839.jpg


Leave a comment

Couple of New 5 Bulb Walnut Edisons

Way too busy this weekend with the big boy job to put a complete write up in here. This post is basically just some photos of the last 2 lamps completed. Both walnut, but pretty different grain patterns.

20130428-164418.jpg

20130428-164440.jpg

20130428-164452.jpg

20130428-164502.jpg


Leave a comment

Stacks of Edisons

Super quick post tonight. In the photo are the 9 Edison lamps built this weekend. 9 lamps required about 4 total hours of sanding today (combination of random orbital and hand sanding). Thankfully, the next meaningful post should include some photos of finished lamps. Even better, I’ve got enough inventory now that hopefully I don’t have to spend all of next weekend building lamps.

20130421-220749.jpg


Leave a comment

New Approach to Aligning Sockets

I finally changed up my light socket solution to the Edison lamp build. I first started building with the basic black phenolic sockets that you can get at the local hardware store. These were more than adequate, but they had one primary shortcoming. The base of the socket would screw down on a rod (known as a brass or steel nipple). The challenge I was having was that the hole in the base was not centered on the bottom of the socket. I’m sure this must have been for a reason, but I can’t fathom what that reason would be. As a result, regardless of how much effort I put into aligning the nipple with the dead center of the hole for the lightbulb, there was a better than not chance that the socket wouldn’t be aligned. I found all sorts of ways to fix that, but no fix was great.

After the phenolic sockets, I moved up to porcelain sockets. These are slightly nicer sockets but more importantly the hole in the bottom was better centered. Alignment was less of an issue, but it still wasn’t perfect. Actually I could make it perfect, but screwing the nipple into a piece of wood and then screwing the socket down onto it was still more difficult than it should be.

I finally shifted to the trusty internet. Not for advice, but for better product selection. I’ve finally found a socket that I think I like. I don’t mean to write about this like it is a new product innovation, but it is a case where no local store stocks the product that I need; but I can find it on the internet. This one gets rid of the need for the nipple all together. In this case, you use screws to attach the socket directly to the support board. The challenge now is to find out where to locate the socket.

The series of photos bellows shows how I did this. First I went through a lot of effort to identify the center of a scrap piece of wood (that would become my template). From there I drilled a hole (the same size that I use in the final build) directly through that center position. I then cut that template to the same size as the base of the socket. In the second photo, I was double checking that everything was centered on the socket opening. What’s not shown are the boards that I used to ensure that everything was aligned. From there it was on to a live test… In the final photo, I’ve traced the hole openings on to the board that will support the five light sockets. This is done by first placing the support board inside the lamp base and pushing it against the underside of the top of the base. I then take the new wood template and align its hole with the circle traced to the support board. From there you trace the outside of the template. The socket will be located right inside this final traced square.

20130419-140912.jpg

20130419-140931.jpg

20130419-140942.jpg


Leave a comment

The Cost Accounting Approach to Building Edison Boxes

I’ve started to work on yet another batch of Edison lamps… I decided to use the principles of my education a bit this time. I’ve been talking about cost allocation approaches and ways to optimize output over the past couple of weeks in my big boy job. The basic idea is that there are certain factors that drive cost or dictate yield. It actually means much more than that, but as applied to my one man shop, that’s the basic idea. For the lamp builds, the concept is that in addition to raw material costs, I bear a cost (in terms of time) to build each lamp; and there should be some optimal number to build that minimizes my average cost per lamp while producing the most high quality lamps.

The way to optimize my time is to understand what are the drivers of my cost. For example, every lamp build has common steps including the first steps of dimensioning the lumber. In order to do this I must joint a face and edge of each board. I then resaw one board for the top. Finally I plane all boards to final thickness. There isn’t much time to save here though, because the time to setup each piece of equipment is minimal. There is zero effort on the jointer, because there isn’t any “setup” that is required. As a result, the time varies directly with the amount of lumber I’m jointing. This discussion isn’t all that interesting, but the point is that if I’m building 1 or 30 lamps, I can’t save any time by building more than 1 lamp at a time. Once this step is completed, I ended up with the stack of lumber seen in the photo below.

20130415-213309.jpg

Once all of the lumber is jointed and planed, the next step is to get the boards to final length and width. In this case, measuring is required. As a result, there is effort to position the table saw fence to get the boards to the right width. Similarly, all lamps are 4 1/2 inches deep. This is another case where I can setup the equipment once and just cut as many side pieces as quickly as possible (while being safe of course). Technically, I could cut the sides for 1000 lamps at once and save significant time. But if I took that approach it might take months before I finished a lamp. That’s both bad for customers waiting on lamps, and I would be carrying far too much inventory cost. A little time is saved here, but it isn’t super significant. Once that step is finished, I ended up with the stack of lumber below.

20130415-213404.jpg

Similar to the last step, cutting the dovetails can generate some real cost savings. There are a lot of setup steps (setting the depth of the router bits, changing the router bits, and setting up the jig). Each of these steps takes considerable time. This is one of the major areas where I can save time. Once all of the routing is finished, I ended up with the pieces in the photo below.

20130415-213445.jpg

Ultimately, I could treat this as a big equation. I could optimize the build quantity for the time and effort to build, controlling for inventory costs, changing raw material costs, travel time to the shop, etc. But ultimately, I’m building these lamps because I like spending time in the shop working with wood. The reality is that I decided to build a few lamps this time, because I want to have some in inventory to sell (as opposed to building them all to order).


Leave a comment

From Rough Sawn to Edison Boxes and Coasters

I thought that last weekend might be the first in a few months not dedicated to building lamps, but that plan quickly changed. I tried to get a little ahead of the game and decided to build 2 lamps instead of the one on order. I wish that was a true statement, but I wasn’t happy with an extremely small detail of the first lamp. Consequently a second lamp happened.

Although not intended this did give me a chance to show in one photo the changes that the lumber goes through. The piece on the far left is what my favorite walnut boards look like before any work is done to them. The middle board shows the lumber after one face has been completely flattened. Finally the board on the right shows the inside of the front of the lamp right before it is ready for assembly.

20130409-221508.jpg

The photo below shows how the top is bookmatched to the front of the lamp. The top and front are cut out of the same piece of lumber. They are then opened up like a book. The two pieces are essentially a mirror image of each other. The line on the two boards is to provide me with a reference mark, so that I can keep the boards aligned when assembling the lamp.

20130409-221633.jpg

The final photo is the output off a long weekend in the shop. The two boxes are awaiting 5 holes each for light bulbs. The lamp on the front right really highlights matching the top and front grain patterns. The scattered 44 coasters are from excess lumber from the past 5 or 6 lamps.

20130409-221820.jpg


2 Comments

Four New Edison Lamps

Finally finished up a couple orders of Edison lamps. Except for one of the single bulb lamps, all of these are in the care of the USPS. The 5 bulb lamp is a pretty traditional rendition but the length has been shortened ever so slightly. The maple version is a significantly larger version of the single bulb lamp I’ve been making. I wasn’t too sure about it’s size at first. But with the right bulb it looks great. One of the small Edisons just left DC. The other will become my second lamp on etsy that is ready to ship when ordered.

Only one lamp on the books for the weekend, so hopefully I can get back to some of the other neglected projects in the shop.

20130405-135016.jpg

20130405-135043.jpg

20130405-135118.jpg

20130405-135142.jpg

20130405-135207.jpg

20130405-135226.jpg


Leave a comment

Wrapping the Grain Around the Corner

I’ve mentioned in a few posts that I like to cut the Edison lamp boxes out of a continuous piece of lumber. I just took this picture for a reason other than this blog, but I thought it did a great job at explains why I try to get the box from one piece of lumber. If you look closely, you can see that the grain wraps from the left to the right around the corner of the box. The left side of the photo is the front of the box and the right side is the side of the box. This is definitely not Ikea style furniture where you get an instruction manual telling you to put together part A and part B from the nondescript white cardboard box…

20130404-193328.jpg


Leave a comment

Edison Lamps in the Raw

Just a quick update post tonight. In the photos below are 4 lamps ready for a first coat of finish. The long walnut piece is a few inches shorter than my standard build, whereas the maple box is a few inches larger than the standard. I love the way that walnut looks before any finish is applied. One day I might build one of these pieces and never apply a finish… These lamps should be ready to ship soon.

20130402-214226.jpg

20130402-214247.jpg

20130402-214305.jpg