Claremont Designs


Leave a comment

Single Bulb Edison Lamps

Just a quick post here that is mostly photos oriented… While working on a 5 bulb Edison lamp for a customer, I also built some new single bulb versions. These don’t have homes currently, so they’ll sit in inventory unless someone wants to buy them. If you are interested, either contact me directly or just check out my shop on etsy.

20130210-172000.jpg

20130210-172015.jpg

20130210-172028.jpg

20130210-172041.jpg

20130210-172053.jpg


Leave a comment

Continuing the Build of a New 5 Bulb Edison Lamp

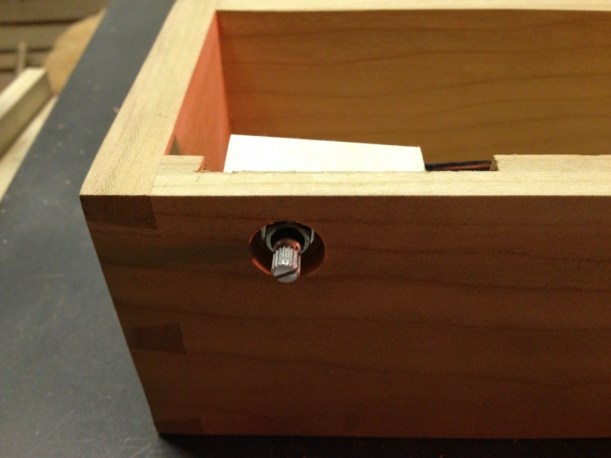
Continuing along with one of my earlier posts, I figured that I would focus in on the building of an Edison lamp. In this case I wanted to show two of the aspects of the build that I don’t usually give a lot of attention. For the lamps, I’ve started using a full range dimmer switch. The switches are a little larger than the ones I used to use, but the ability to dim the Edison bulbs is worth it. The lights are capable of being used as a room light source, but for the most part they are a decorative piece of furniture. And when the light is dimmed down low, it’s really easy to see the patterns of the filaments in the bulbs. The challenge is to make room for the switch. First I locate the position of the switch and then move over to the dedicated mortising machine. The goal here is to make the back of the lamp thinner where the switch is located. Next I need to take a forstner bit to make room for the knob. It’s important that the knob is recessed into the lamp to improve the overall appearance of the piece. The photo below shows a quick test fitting of the switch.

20130203-082048.jpg

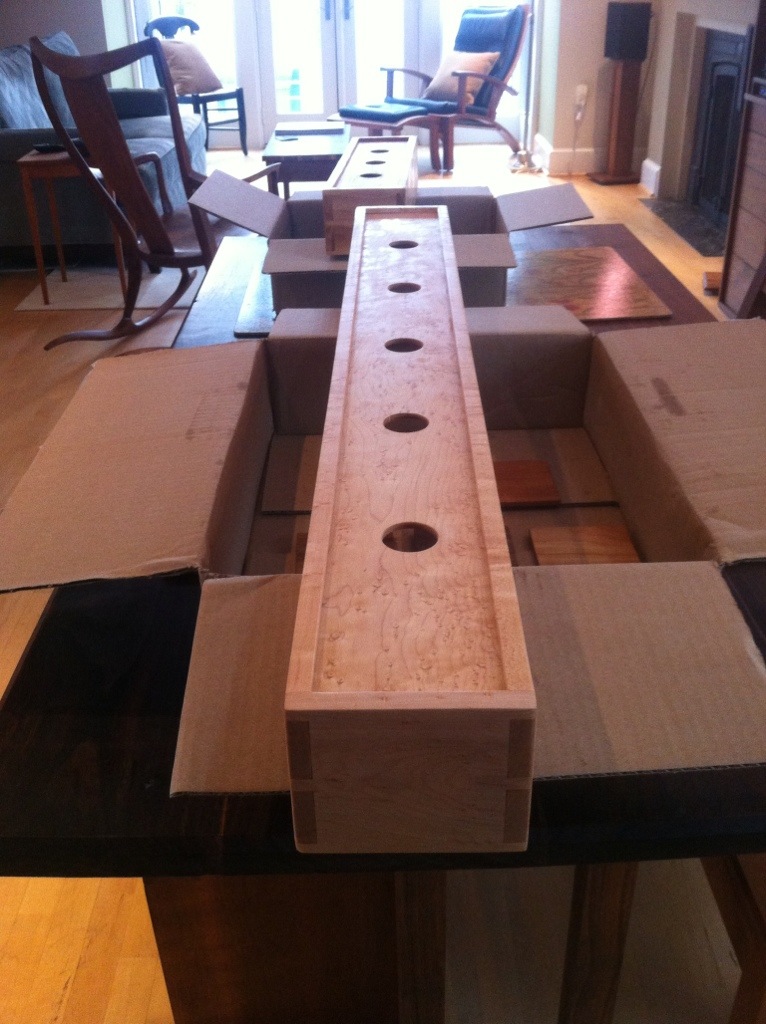
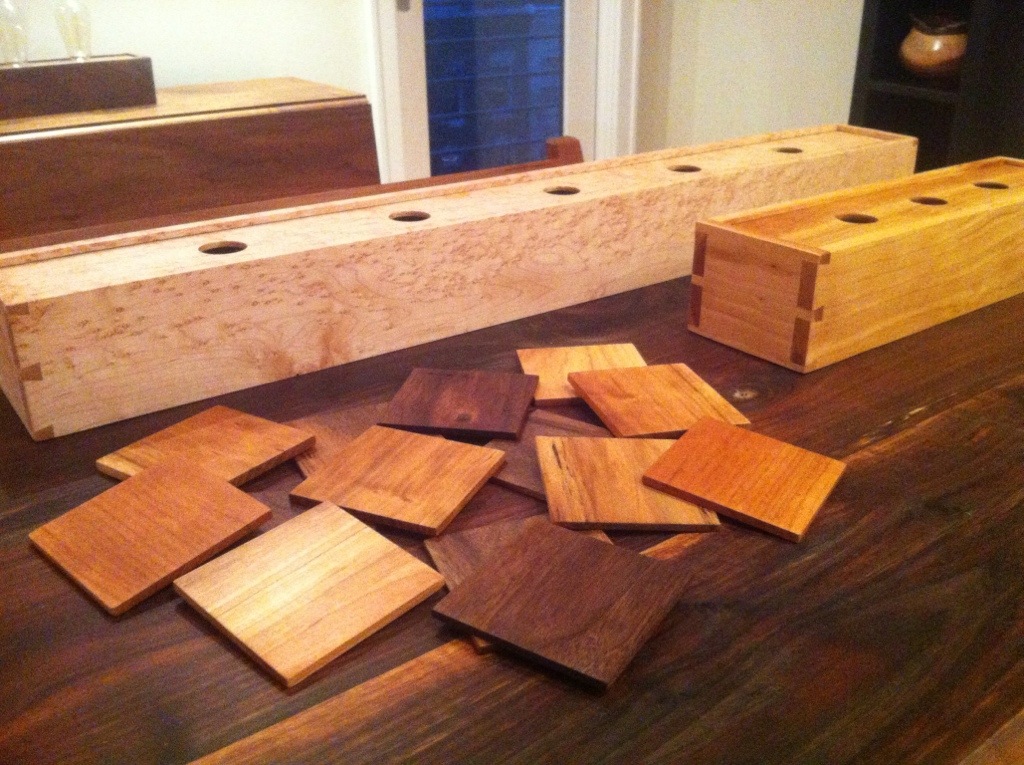
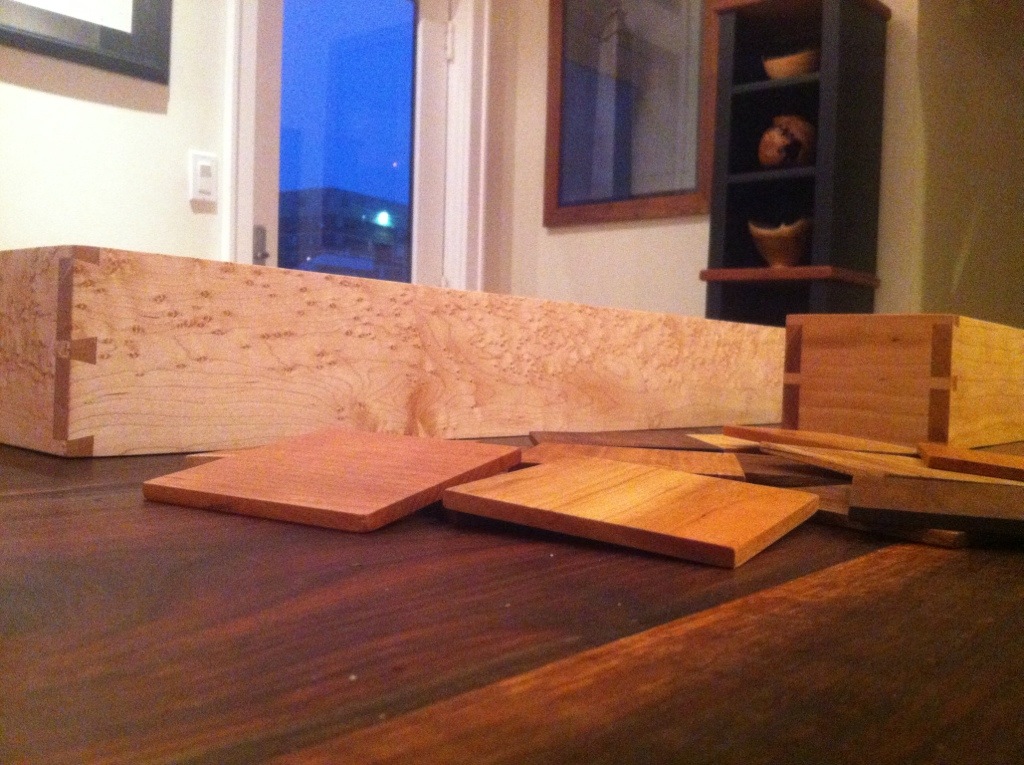
The next aspect I wanted to highlight was the location of the holes for the sockets. In all of my lamps, I use a wooden board to attach the sockets to… The challenge is to get the hole for the light socket nipples dead center in the larger diameter hole that exposes the sockets. I start by sizing the support board so that it fits perfectly inside the top lip of the lamp. Then with simple layout lines, I locate the center point of each bulb (shown in the first photo below with pencil lines). From here I’m able to use a drill press to drill a series of holes at each location to generate the final cutouts shown in the second photo. The process starts by drilling one hole through the support board and the top at the same time. This is followed by making the hole in the support board just a little wider to fit the nipple. Finally after removing the support board, I cut out the larger diameter hole to fit the socket.

20130203-082824.jpg

20130203-082835.jpg

In the next post, I’ll highlight more of the interior working of the Edison lamp. Then it’s off to finishing.


Leave a comment

Sanded Koa and Birdseye Maple Dovetailed Boxes

With all of the prior patch work completed on the boxes, I was able to finish sanding up the two small dovetail boxes that I was working on. Assuming that there is enough room on the interior for a dimmer switch these will both become single bulb Edison lamps. The only thing left that I could screw up would be cutting the hole for the light socket. Hopefully this will be finished up after one more shop trip.

20130120-100243.jpg


Leave a comment

Koa and Birdseye Boxes

For the first full trip to the shop in 2013, I worked on some new dovetailed boxes (also made a new pen / iPad stylus but no photos of that one). One of the boxes is built from a small piece of koa that I picked up earlier in the week. The other is built from some leftover birdseye maple from the 5 bulb Edison lamp I built at the end of 2012. I haven’t decided the ultimate purpose of each individual box, but one will be a coasters holder and the other will be a single bulb Edison lamp. Each box had some chip out issues with the dovetails. We’ll see how well I can patch up or sand out any of the issues. If they come out nicely, I’ll probably put them up in my etsy shop. Otherwise I’ll just selectively photograph them and list them as built to order.

The photo below shows the individual pieces being organized before rapid gluing and clamping.

20130105-202134.jpg


3 Comments

Completed Birdseye Maple Edison Lamp

After a combination of boiled linseed oil followed up by an oil / urethane blend, I finally finished up the birdseye maple lamp. This is the first version of the lamp that I built with a dimmer switch. I’m sure it’s not evident from the photos, but the switch makes a tremendous difference. The bulbs can put off a lot of heat, and the dimmer allows you to dial in the brightness to just the right level. I’m pretty sure this will be a standard part off all future builds.

20121213-162551.jpg

20121213-162617.jpg

20121213-162642.jpg


Leave a comment

Edison Lamp Finish Coats and Fancy Coasters

A real mixed bag of project work today. Thanks to a tardy FedEx delivery, started the day by running down to the shop to fit a dimmer switch into a new Edison lamp. With that out of the way, it was on to finishing work. Although I prefer to use an oil urethane blend for my finishing work, I switched things up a bit this time. This weekend’s finish work was using exclusively boiled linseed oil. It’s a finish I like, but you just need to be very careful with your rags because of the spontaneous combustion issue. The photo below shows my impromptu finishing area (aka my living / dining room with pieces resting on the edges of cardboard boxes.

20121209-203013.jpg

The following shots just show some extra perspectives on the current pieces that I’m working on. In the photos are the Birdseye maple piece that has been featured in the past few posts on this site. Also featured is a smaller 3 bulb version built out of cherry. The cherry was particularly light, but it has been warming up with more coats of finish. In the photos below, the small cherry piece has two coats of boiled linseed oil. The maple piece has just received its first coat (keeping in mind, that my iPhone doesn’t take the best photos). You’ll also notice scattered 3.5″ square pieces of wood. Given the amount of wood furniture I have in my house, coasters are an absolute must. Building items like the Edison lamps has generated a lot of thin stock that has no other use for me, so I’ve decided to start making drink coasters. If I make enough and get motivated, they might be the next item to make an appearance on etsy. Next post should have nicer photos of the finished pieces.

20121209-203053.jpg

20121209-203104.jpg

20121209-203118.jpg


1 Comment

6 Clamps to Put Together a Dovetailed Birdseye Maple Edison Lamp Base

There were a lot of moving parts in the shop today. I started by sanding the interior surfaces and the top for the lamp base. The first photo shows all of the pieces before sanding and before the top is cut to the right size. You can tell this is the interior of the box showing by the groove at the top edge of all of the pieces. That groove is what secures the top into place.

The second photo shows my quick test of the fit of the dovetails. It looked like a pretty good fit. But after years of doing this, I’ve decided to reserve judgement on the quality of fit until after it comes out of the clamps. Speaking of (or more accurately… writing of) clamps, the final photo shows the box after being glued and clamped. It may not look like much, but trust me that you have to move quickly to get everything glued and clamped in time. You don’t want the glue to setup too much before it is fully clamped. Hopefully, I’ll be able to get to the shop for a quick trip this week to clean up the glue and check the fit.

20121202-181207.jpg

20121202-181219.jpg

20121202-181232.jpg


Leave a comment

Laying Out for a Birdseye Maple Edison Lamp

I’m in the early stages of creating another long Edison lamp, but this time get to try some birdseye (or bird’s eye – you choose) maple for the work. It costs a bit more, but it is considerably more interesting than stock maple.

In the series of photos below I’ve shown the front of the box after dimensioning the lumber. For the front of the box and the sides I always try (doesn’t always happen) to get those 3 pieces out of one piece of lumber. In most cases that allows the grain of the wood to flow around the piece. In this case it is less about the grain and more about the location of the eyes.

The “easy” part of the project is over. Next up are the dovetails and the groove for the light top. The dovetails aren’t too hard, but I can’t tell you how many times routing that groove on the router table has forced me to mill up an extra side piece. Hopefully a little patience and planning will pay dividends here.

20121201-154314.jpg

20121201-154326.jpg


Leave a comment

Hand Tools

As much as I love my power tools, sometimes the hand tools are just a little easier to use. In this case I was trimming a walnut strip that I put on the front of a drawer runner. Granted once I got it dialed in it was over to the wide belt sander to get all of the runners cleaned up and the same thickness. The walnut might be overkill, but I don’t want the maple to show when the drawers are shut.

20120512-172606.jpg


Leave a comment

Half Blind Sanding

Well it’s taken a lot of sanding but the drawers are taking shape. Sorry if the picture is a little blurry. Combination of still shaking from sanding and using an iPhone doesn’t always make for the best picture quality. Up next is the carcass of the cabinet and then fitting the drawers to the opening…

20120331-142542.jpg