Claremont Designs


Leave a comment

From Rough Sawn to Edison Boxes and Coasters

I thought that last weekend might be the first in a few months not dedicated to building lamps, but that plan quickly changed. I tried to get a little ahead of the game and decided to build 2 lamps instead of the one on order. I wish that was a true statement, but I wasn’t happy with an extremely small detail of the first lamp. Consequently a second lamp happened.

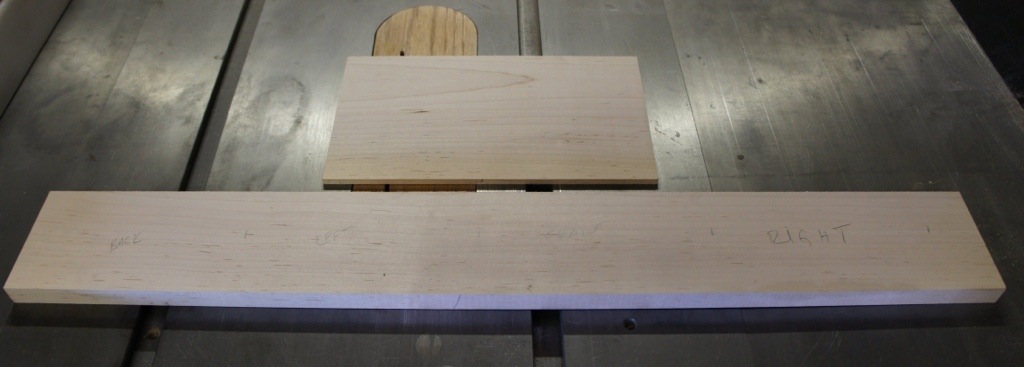
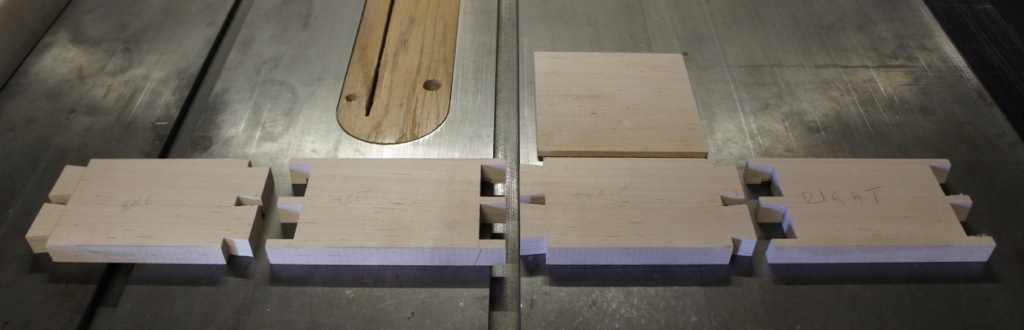
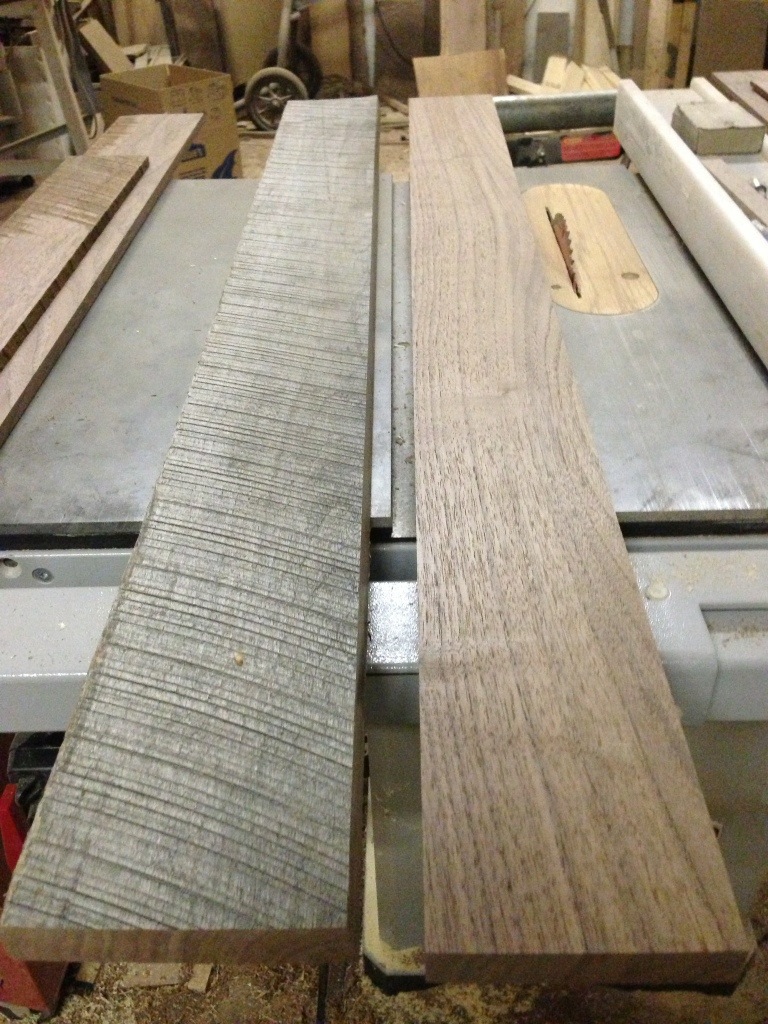
Although not intended this did give me a chance to show in one photo the changes that the lumber goes through. The piece on the far left is what my favorite walnut boards look like before any work is done to them. The middle board shows the lumber after one face has been completely flattened. Finally the board on the right shows the inside of the front of the lamp right before it is ready for assembly.

20130409-221508.jpg

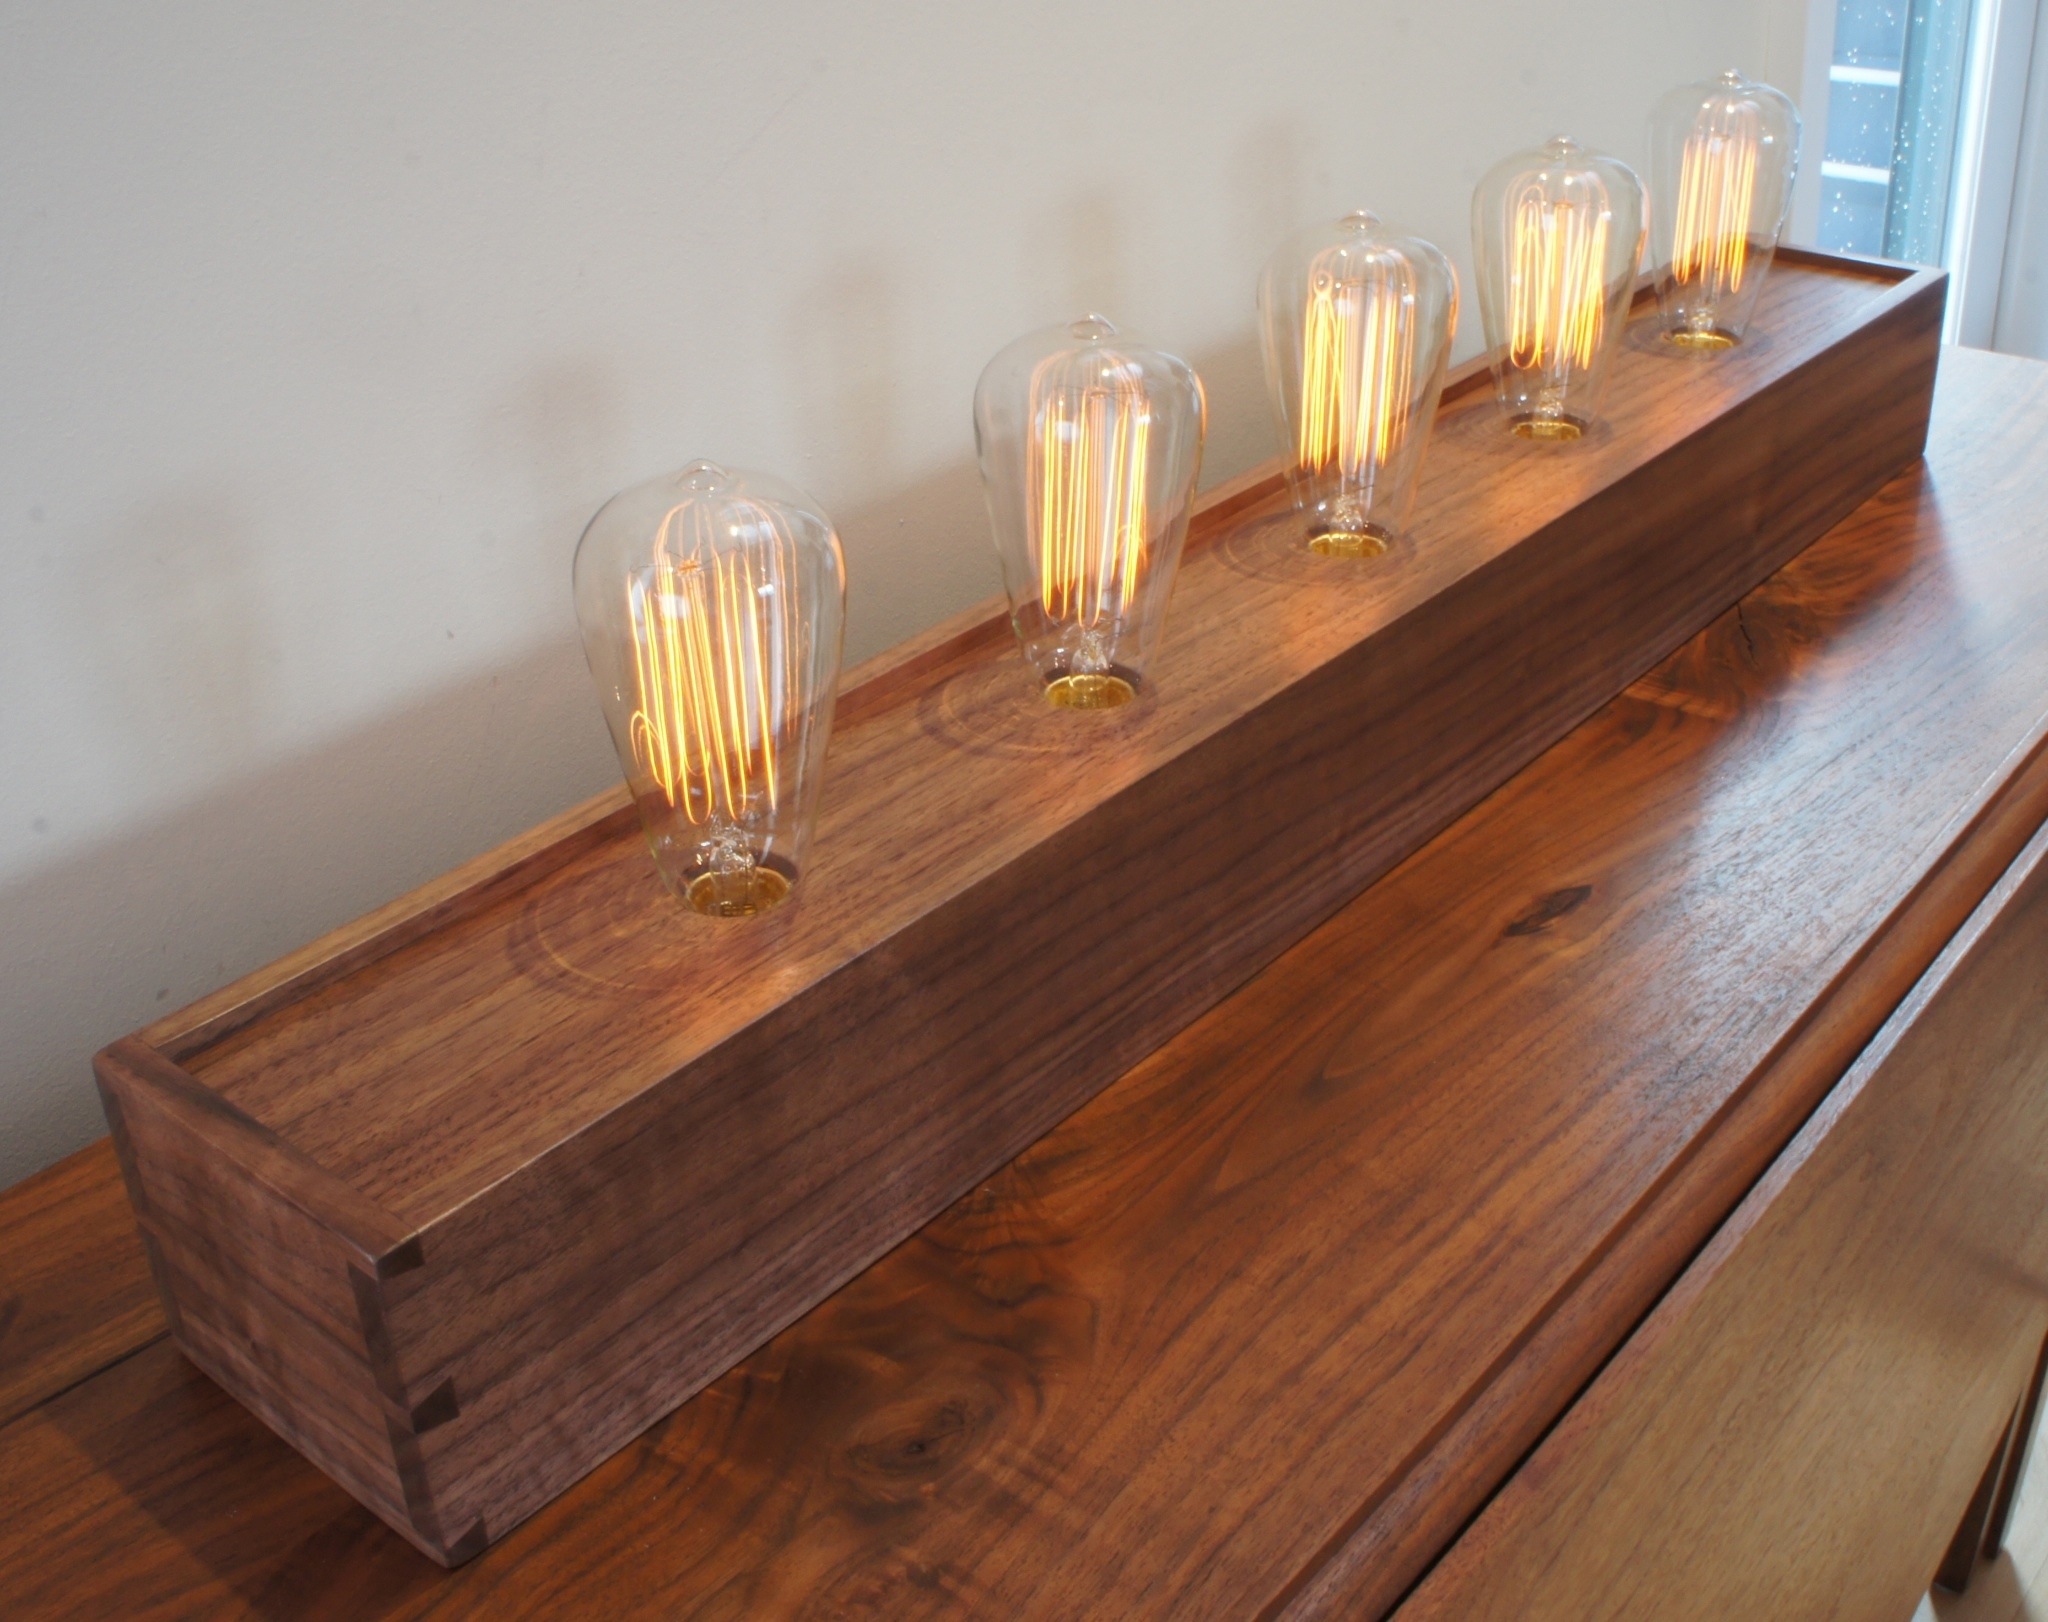
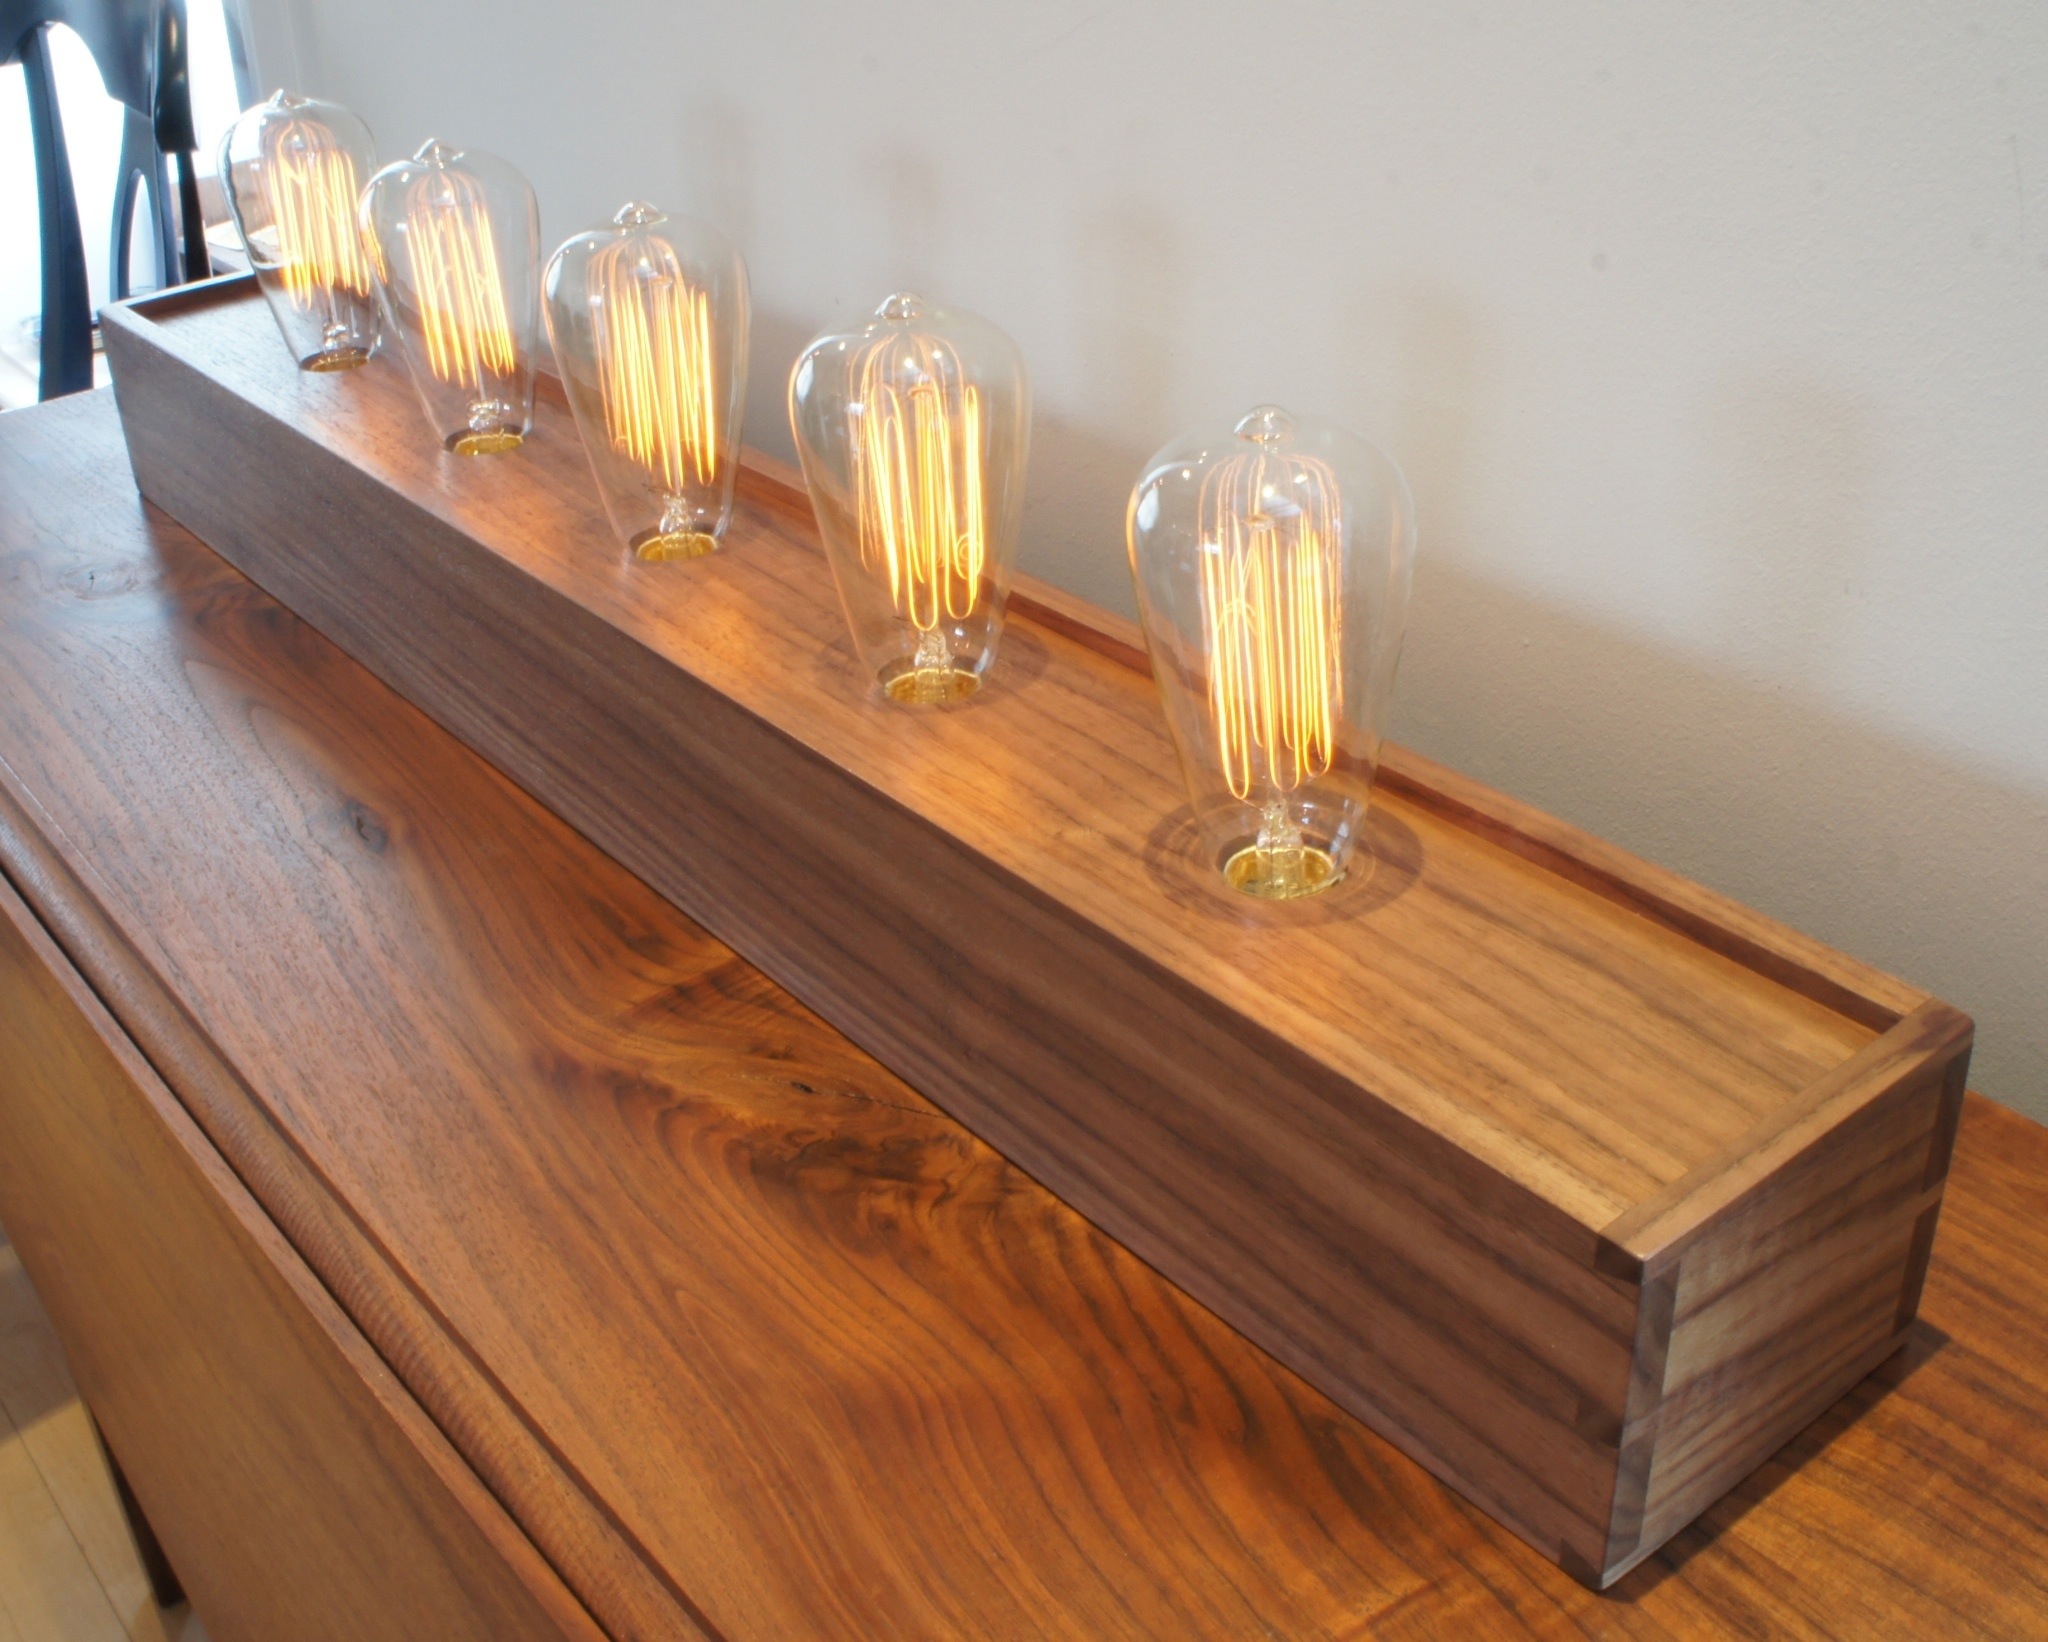
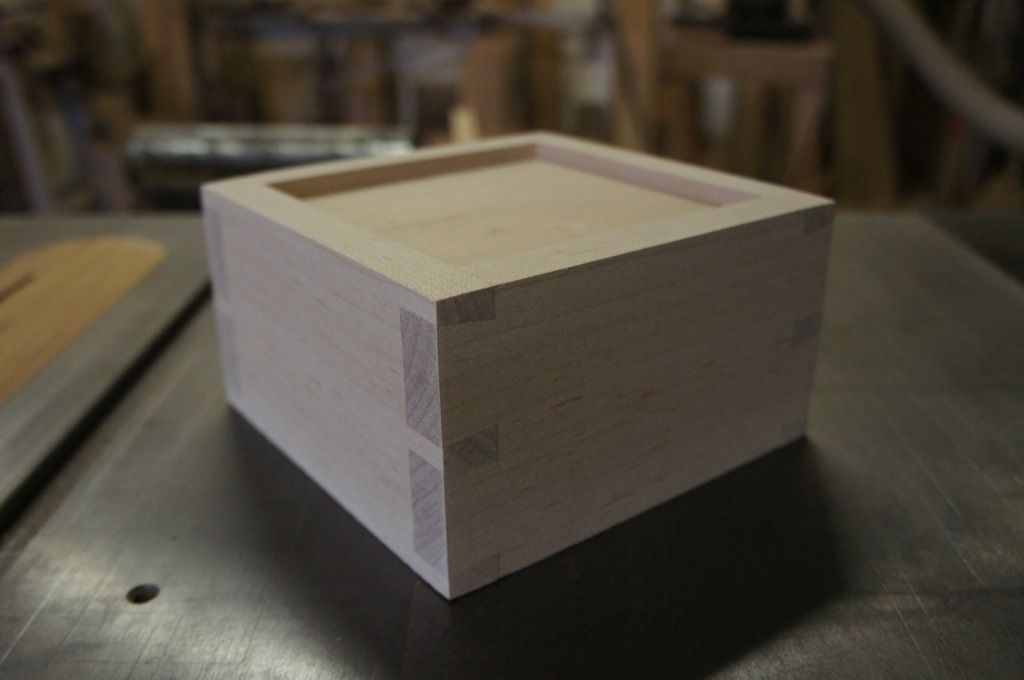
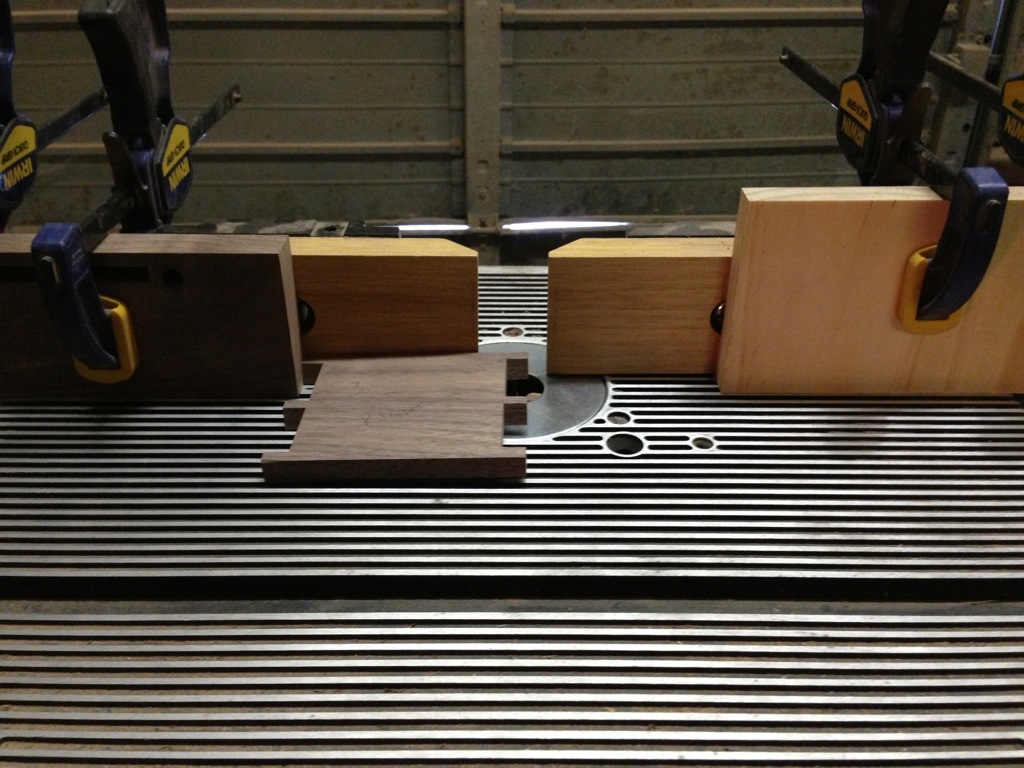
The photo below shows how the top is bookmatched to the front of the lamp. The top and front are cut out of the same piece of lumber. They are then opened up like a book. The two pieces are essentially a mirror image of each other. The line on the two boards is to provide me with a reference mark, so that I can keep the boards aligned when assembling the lamp.

20130409-221633.jpg

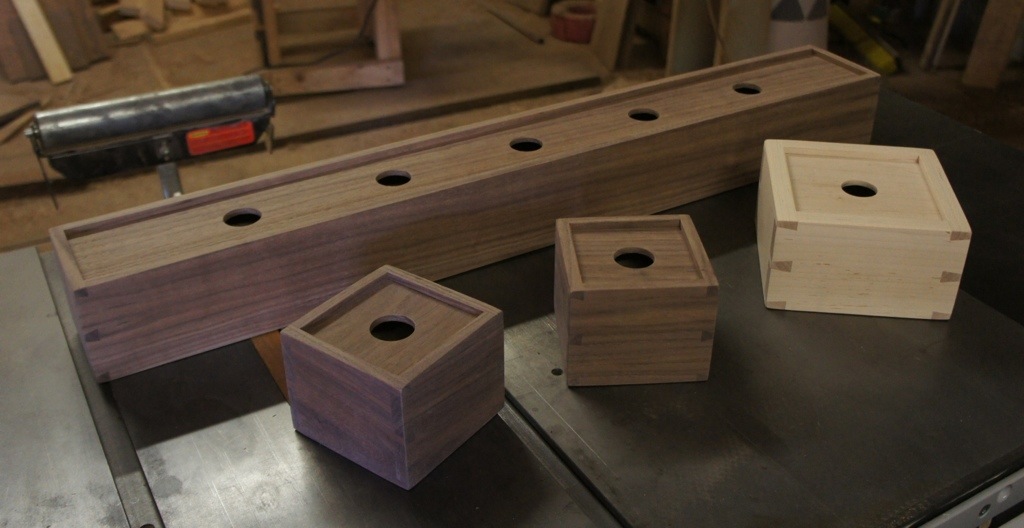
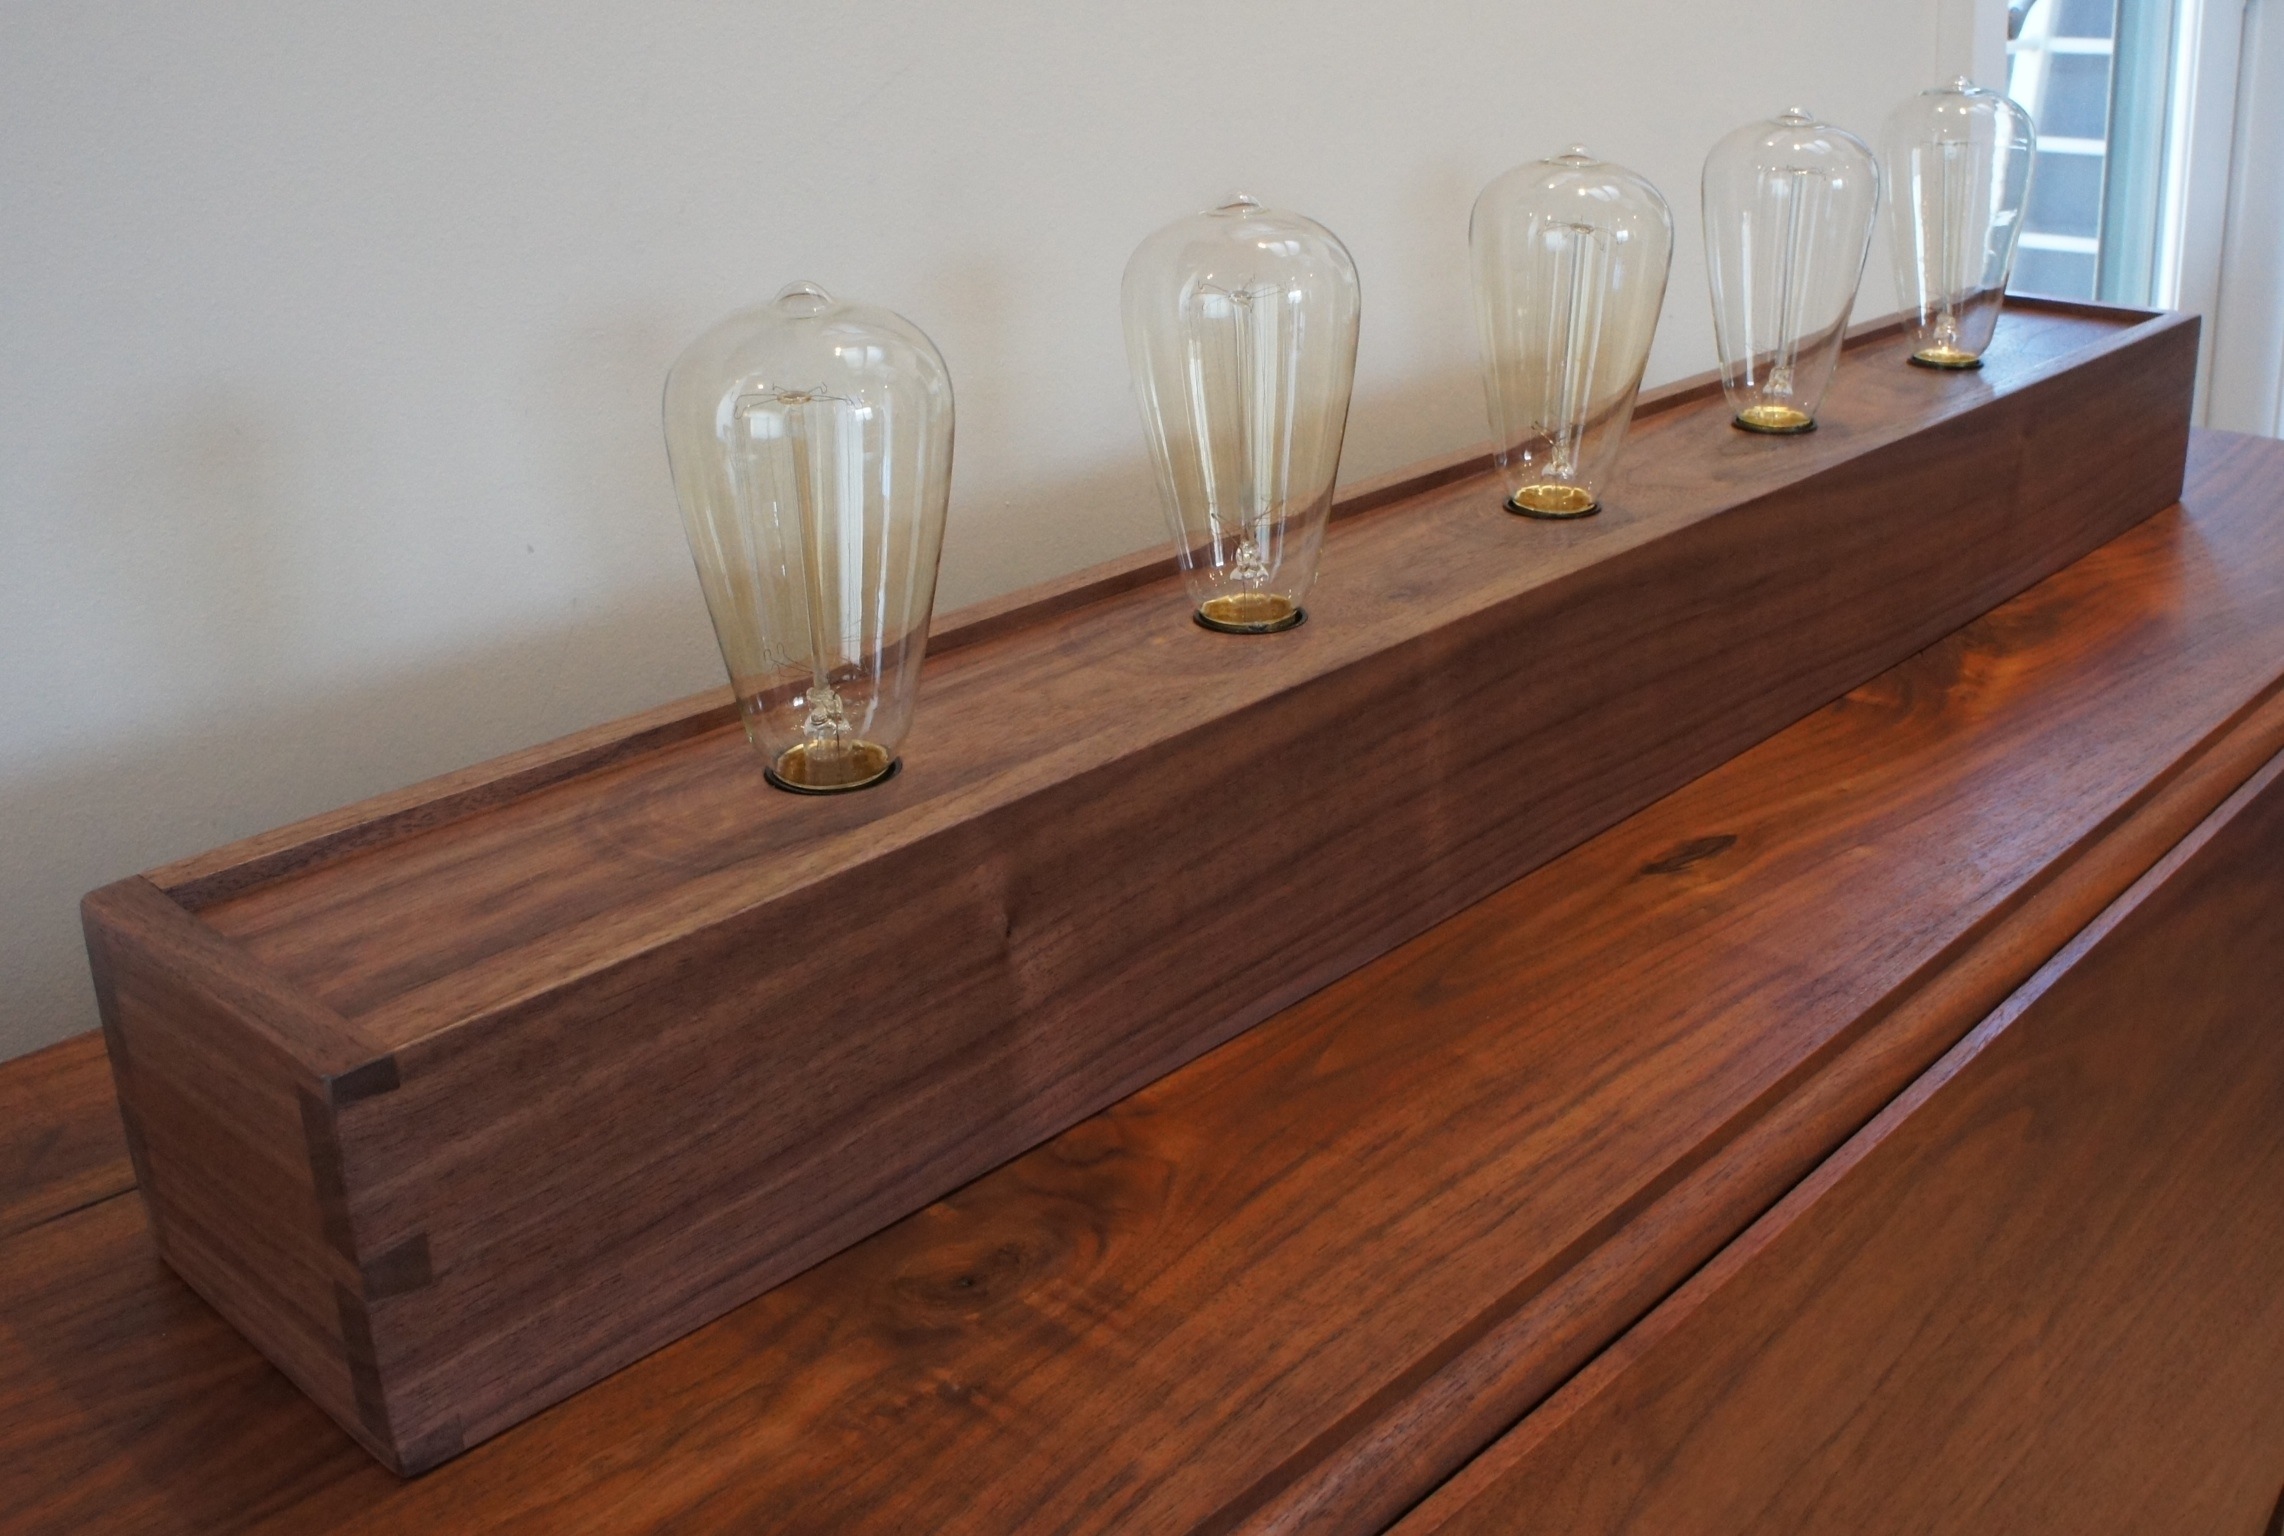
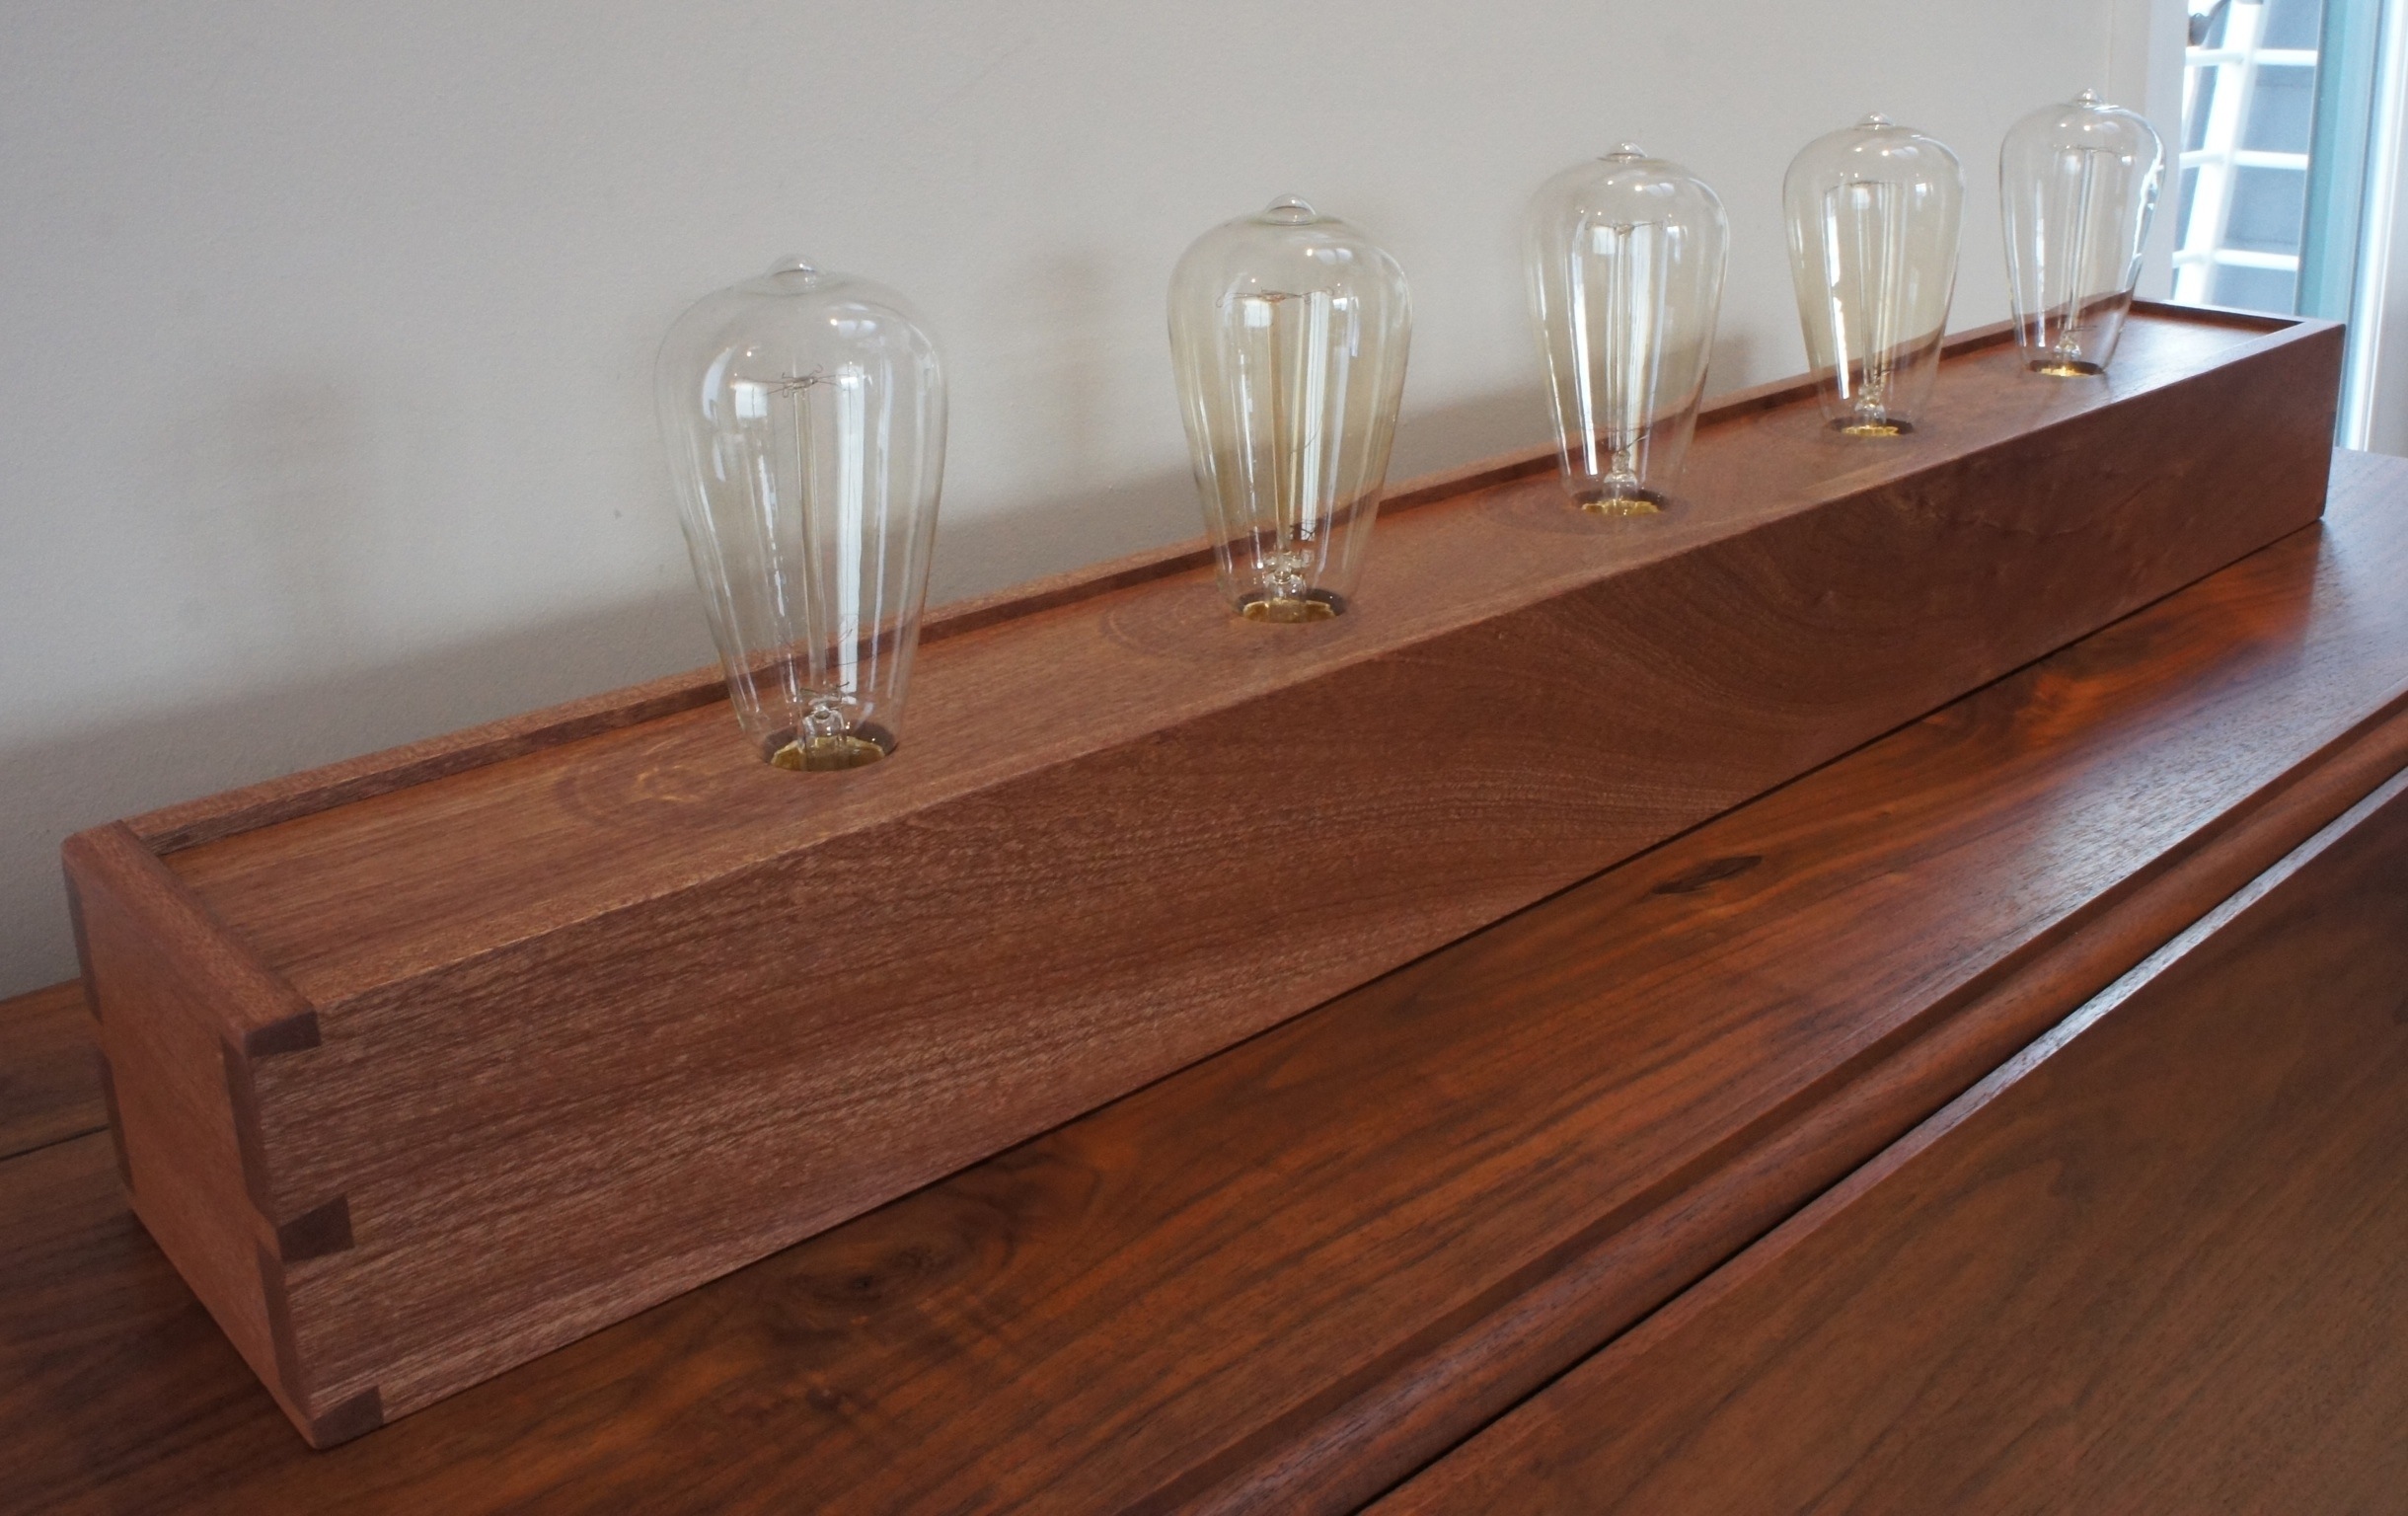
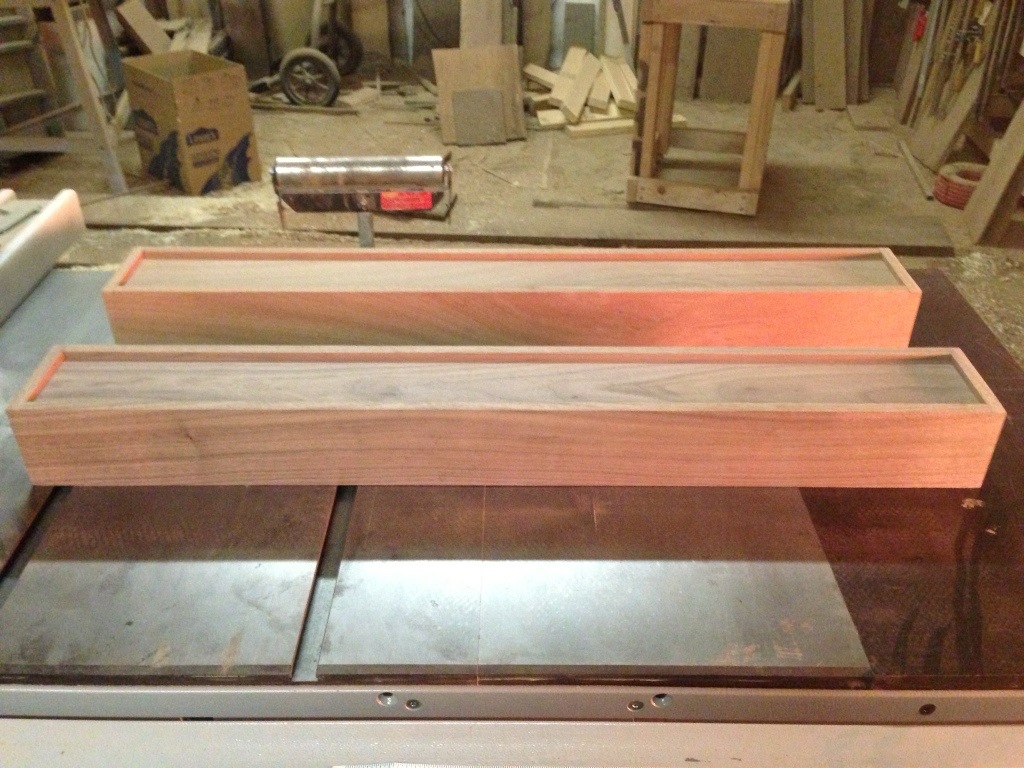
The final photo is the output off a long weekend in the shop. The two boxes are awaiting 5 holes each for light bulbs. The lamp on the front right really highlights matching the top and front grain patterns. The scattered 44 coasters are from excess lumber from the past 5 or 6 lamps.

20130409-221820.jpg


2 Comments

Four New Edison Lamps

Finally finished up a couple orders of Edison lamps. Except for one of the single bulb lamps, all of these are in the care of the USPS. The 5 bulb lamp is a pretty traditional rendition but the length has been shortened ever so slightly. The maple version is a significantly larger version of the single bulb lamp I’ve been making. I wasn’t too sure about it’s size at first. But with the right bulb it looks great. One of the small Edisons just left DC. The other will become my second lamp on etsy that is ready to ship when ordered.

Only one lamp on the books for the weekend, so hopefully I can get back to some of the other neglected projects in the shop.

20130405-135016.jpg

20130405-135043.jpg

20130405-135118.jpg

20130405-135142.jpg

20130405-135207.jpg

20130405-135226.jpg


Leave a comment

Wrapping the Grain Around the Corner

I’ve mentioned in a few posts that I like to cut the Edison lamp boxes out of a continuous piece of lumber. I just took this picture for a reason other than this blog, but I thought it did a great job at explains why I try to get the box from one piece of lumber. If you look closely, you can see that the grain wraps from the left to the right around the corner of the box. The left side of the photo is the front of the box and the right side is the side of the box. This is definitely not Ikea style furniture where you get an instruction manual telling you to put together part A and part B from the nondescript white cardboard box…

20130404-193328.jpg


Leave a comment

Edison Lamps in the Raw

Just a quick update post tonight. In the photos below are 4 lamps ready for a first coat of finish. The long walnut piece is a few inches shorter than my standard build, whereas the maple box is a few inches larger than the standard. I love the way that walnut looks before any finish is applied. One day I might build one of these pieces and never apply a finish… These lamps should be ready to ship soon.

20130402-214226.jpg

20130402-214247.jpg

20130402-214305.jpg


Leave a comment

Expanding the Size of a Single Bulb Edison Lamp

Started today to build a new single bulb Edison lamp. This one will be a little unique. It’s still going to be square still, but this one will approach 6.5″ square. In theory this isn’t a big deal, but the challenge is related to my bandsaw. I have a pretty nice bandsaw, but it’s resaw capacity is just shy of 6″. In order to make the top of the lamp, I need to resaw a board to get the 1/4″ thick top board. Technically I could just plane a board all of the way down the the right thickness, but that just seems like a complete waste of lumber. Fortunately, I was able to make this work by keeping the sides of the lamp a little thicker than normal. The thinking is that the outside dimension of the lamp is 6.5″ square. If you use lumber that is 3/4″ thick, then the interior dimension of the lamp is only 5″ (6.5″ – .75″ -.75″). From there you need to add back about 5/16″, so that it will be able to rest inside the groove for the top.

After a lot of math and woodworking, I was able to get the lamp into the clamps. The first photo shows the sides of the lamp before it’s pieces are cut to length. My goal is to always get the lamp out of a single board. By using a single board, you can have the grain wrap around the piece. Unfortunately, I had to use a different section of the board for the thin top piece. The lumber just wasn’t thick enough to get it out of the same section of lumber. When I get it out of the same board, I at least attempt to match the top to the front of the lamp. When it works properly, you get a top that is bookmatched to the front. The second photo shows the lamp after the dovetails have been cut. It’s been a long time since I’ve used the 7 degree dovetail bit, but with my jig it’s necessary for stock this thick. Hopefully, soon I’ll have a post on this site that isn’t just WIP…

20130330-235748.jpg

20130330-235801.jpg


Leave a comment

The Very Beginnings of a Walnut Single Bulb Edison Lamp

Just a week ago, I finally got an order for a single bulb Edison Lamp made from walnut. I’ve previously built single bulb versions out of koa and birdseye maple, but never walnut. And just a post or two ago I was bemoaning the end of my supply of walnut… But I do have enough left to build a single bulb version. In fact I’ve got enough stock to build at least 2 lamps. I’ll designate the nicest of the 2 finished lamps for the new customer and probably list the second one for sale as-is on my etsy store. The board I’m building the lamps from is probably 20″ long by 8″ or 9″ wide and maybe an inch thick. The photo below shows the lumber before any work is done to clean up the surfaces. Fortunately, I’ve worked from this tree long enough to know that it will look pretty nice.

20130327-211759.jpg

In several of my prior posts I’ve talked about resawing the lumber to get the 1/4″ thick piece of lumber for the top of the lamp. To do that I need to first joint a face and edge of the lumber. I then run the board through my bandsaw with the jointed edge down and the flat face against the fence. If any real woodworkers ever read this I know that the fence on the bandsaw is not the best approach, but I’ve pulled the fence back to where the blade is. Essentially the board can float free beyond this point. It’s not the best setup, but I’ve been getting good results for some time. The picture below shows the face being resawn.

20130327-211930.jpg

After that I did all of the other dimensioning so that I could finally move to cutting the dovetails. From that point the only difficult moment left is to cut the groove for the top board. I’ve learned the hard way (on several occasions) that if you aren’t careful you might cut the groove all the way through the end of a pin or a tail. In fact I’ve had to scrap a few lamps for that very reason. The first picture below shows how I approach this issue… Basically I clamp stop blocks on the front and backside of the cuts. They prevent me from cutting through the end of the boards. Once the stops are in place I drop the board on top of the router bit and make an initial cut. Once that is complete I can proceed as normal with the confidence that the stop blocks will prevent me from cutting too far.

20130327-212129.jpg

I did have a new issue arise this time. I was almost done with the groove for the lamp top when I could hear that no cutting was taking place. It turns out that for one reason or another my router bit had sheared off. It’s not that it was an extremely costly piece to replace, but it was frustrating to have to run out one more time to the hardware store. The photo below shows the outcome of that incident.

20130327-212314.jpg

Ultimately everything worked out and the piece made it to the clamps.. The clamps where it will sit until I can return to clean everything up before fit and finish.

20130327-212411.jpg


Leave a comment

Lots of Coasters on the Way

During one of the last Edison lamp builds I ended up with walnut that was just a little thinner than I wanted. Actually it looked fine, but I didn’t know if it would be acceptable for a customer I’ve never met. Rather than risk upsetting a customer, I restarted the build of that lamp. But I ended up with this extra stock and nothing to do with it.

At the same time I have been making lots of drink coasters. I’ve mentioned in previous posts that each time I build a lamp I end up with extra 1/4″ thick stock. I’ve started turning that thin stock into drink coasters. In fact the current lamp I’m working on will produce over a dozen coasters. I probably have 60 coasters in inventory.

So ultimately I decided to turn the unused stock for an Edison lamp into an extra large coaster case. I’m guessing that it can hold over 120 coasters before it’s full. The coasters haven’t been flying out of the etsy store, so I might end up filling this case pretty quickly. The photo below shows the case after a first coat of finish; the odd red hue is courtesy of my space heater in the shop

20130322-215655.jpg


Leave a comment

Chalking Up Another Walnut Edison Lamp

As soon as I finished the last walnut lamp it was time to turn around and build another one. The challenge is that I was out of any suitable walnut to build it out of. So a quick trip to the closest woodworking store was required. Unfortunately the only walnut they had in stock they referred to as “wide stock” or something to that effect. More importantly that meant that they were going to charge $9 a board foot for that lumber. For those that don’t know, a board foot is basically a cubic foot of lumber (1″ thick by 12″ wide by 12″ long). Similarly for those that don’t know, $9 is a lot for walnut. My last stack cost me around $3 a board foot. So after $54 for a 4/4 board 9″ wide and about 8 feet long it was off to the shop.

Once in the shop the first day of build followed a typical routine. I first selected the section of the board to use for the lamp and cut it to rough length. From there I needed to rip the board to an appropriate width. My jointer is only 8″ wide, so the 9″ wide board wasn’t going to work. More importantly if dealing with any cupping issues, you can get to a flat surface quicker if you start with a narrower board. Unlike my rough sawn lumber this piece was already surfaced on both sides (although not straight and flat). So before heading to the jointer, I’ve marked the boards with chalk to help check my progress (see photo below). The basic idea is that once all of the chalk is removed, I can be pretty confident that the lumber face is smooth and flat. After that its the same old process… Joint the edge; resaw a 1/4″ piece for the top at the band saw; rejoint the face and edge; run the boards through the planer; cut pieces to final dimension; then breakout the dovetail jig; cut the groove for the top board; sand the interior to 220; then glue the base up.

20130319-214754.jpg

In this build the walnut was a hair narrower than I usually used so I switched over to the 14 instead of the 11 degree bits. The 14 degree bit is just a tiny bit too short (in my opinion). Consequently there was the smallest lip at the end of the cut. If you look really closely in the photo below, you might be able to see it. Not that big of a deal though – an extra couple of minutes of sanding before being able to glue the piece up. The base is sitting in the clamps now and will be ready for a lot of extra fit and finish next weekend.

20130319-214811.jpg


Leave a comment

Finished Sapele and Walnut EdisonLamps

Just a quick post tonight to show the 2 most recently completed lamps… The walnut lamp was built for a customer and features my traditional Edison lamp design. On the sapele version I’ve switched over to a porcelain socket that doesn’t rise above the top of the lamp base. I really like the look of the bulbs being embedded in the base as a result. One of the sockets must be a tiny fraction of an inch below the surface of the top. As a result I had to really screw in one of the bulbs to get it to work… In the future I’ll have to ease the edges of the opening a bit more or make the top a bit thinner. I built this one to go on etsy and I think it will still go there, but I’ll definitely have to be very clear about how hard you have to screw down the one bulb…

20130309-222800.jpg

20130309-222834.jpg

20130309-222859.jpg

20130309-222941.jpg


Leave a comment

Not Always Sure What You’re Going To Get When Starting a Walnut Edison Lamp

I’m finally building a 5 bulb Edison lamp out of walnut. I’ve been wanting to do a walnut version for a while now, and thankfully I just got an order for one through my shop on etsy. I’ve been working off of the same stack of walnut for years now, so I have a fairly good idea of how it will look when dressed. If I hadn’t been working from this same tree, I would be flying blind. In the photo below, you can see the board I used to construct the case. The board on the left is rough sawn; I haven’t done anything to it yet. The board on the right has been passed over the jointer (both to expose the beauty of the walnut and to flatten one face / square one edge). Sometimes you don’t know what you’re going to get until the lumber hits the jointer.

20130224-225032.jpg

From there it was on to my normal sequence of planing, dimensioning, routing and assembling the case. I’m not going to detail those steps here, but there are plenty of other posts on this site that show those steps. Ultimately, I got to the point where the 2 boxes pictured below were ready for sanding. I decided I would add another lamp to the weekend build. Once you go through the steps to setup tools to build one, you feel like you might as well build a second one too. The box in the back is made from sapele. I’ve never worked with sapele before, but it seemed like I was getting a good deal on the lumber (and you can build an entire lamp from one board). Unfortunately, the photo isn’t the best… The ceiling light in my shop is not great, so the photo is overly lit by my space heater. As a result it’s hard to see any details or the colors of the lamps. Once I get to the finishing stages, all of the details will become clearer.

20130224-230348.jpg